
 Shop
Shop My
My Custom





FREE 5-Ingredient Recipe EBook
GET IT NOWThis Honey Cake Is Just Like My Grandma’s Medovik Recipe, But With No Refined Sugar
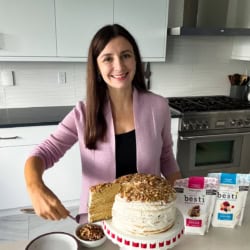
This honey cake, called medovik in Russian, is the one my grandma made for my birthday almost every year growing up, and every slice brings me right back to childhood. She’s the same grandma behind my chicken fritters, and I’m so grateful she wrote down her recipe for me before she passed away.
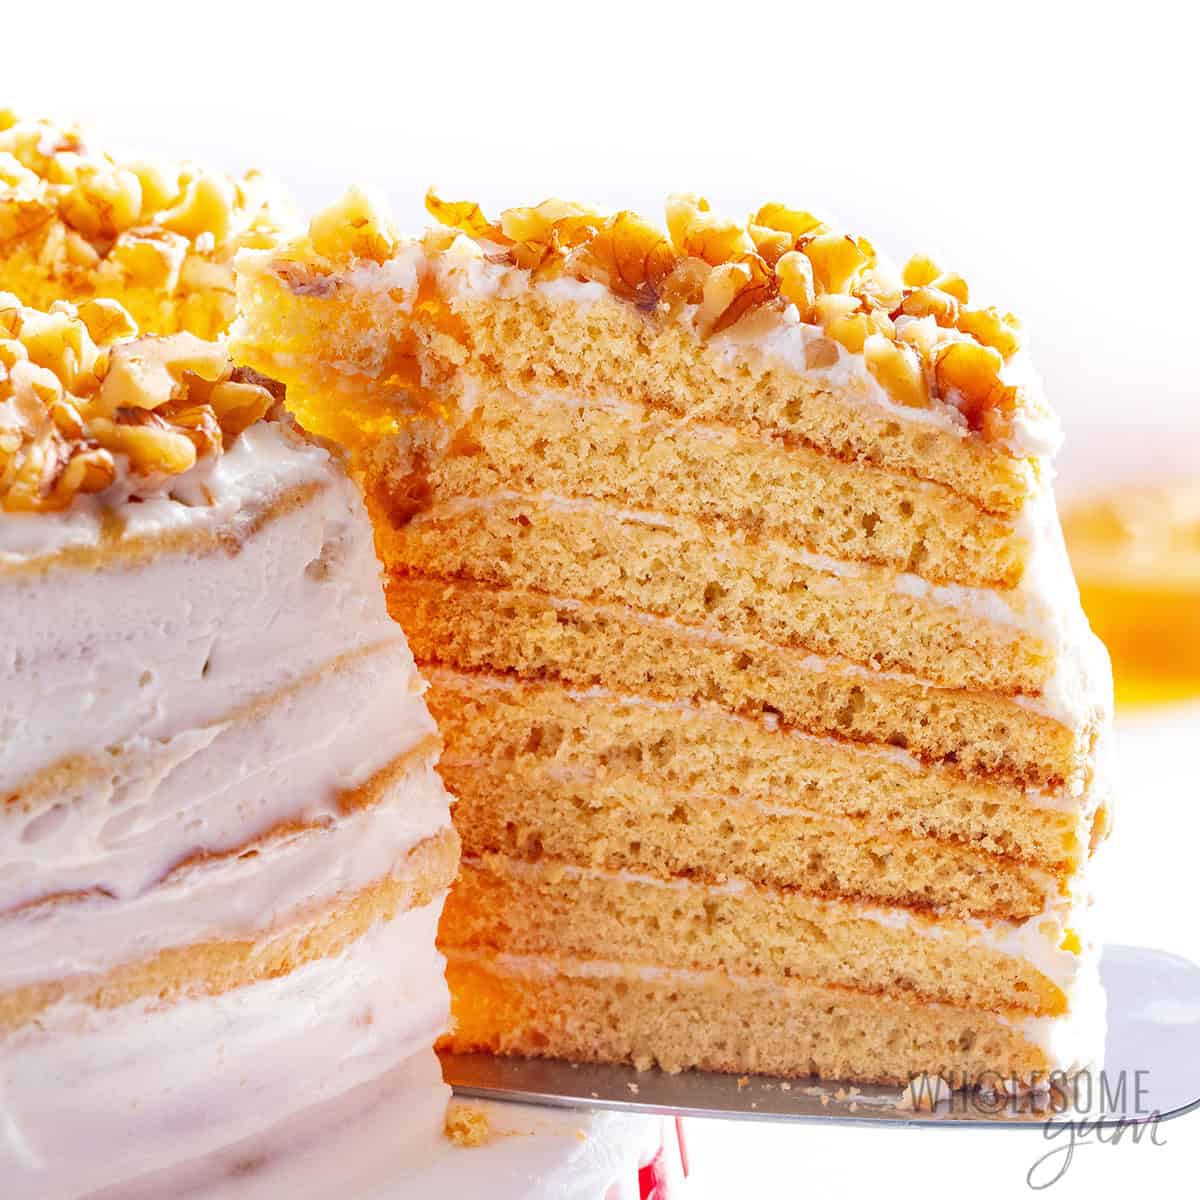
Medovik is a Russian honey cake made with thin, separately baked layers and a cream filling that makes them very moist and tender. I made just a few tweaks to lighten up my grandma’s recipe, and when I made it for dozens of visiting friends and family earlier this year, they thought it was hers! Beyond the meaning for me personally, here’s why I think you should make it too:
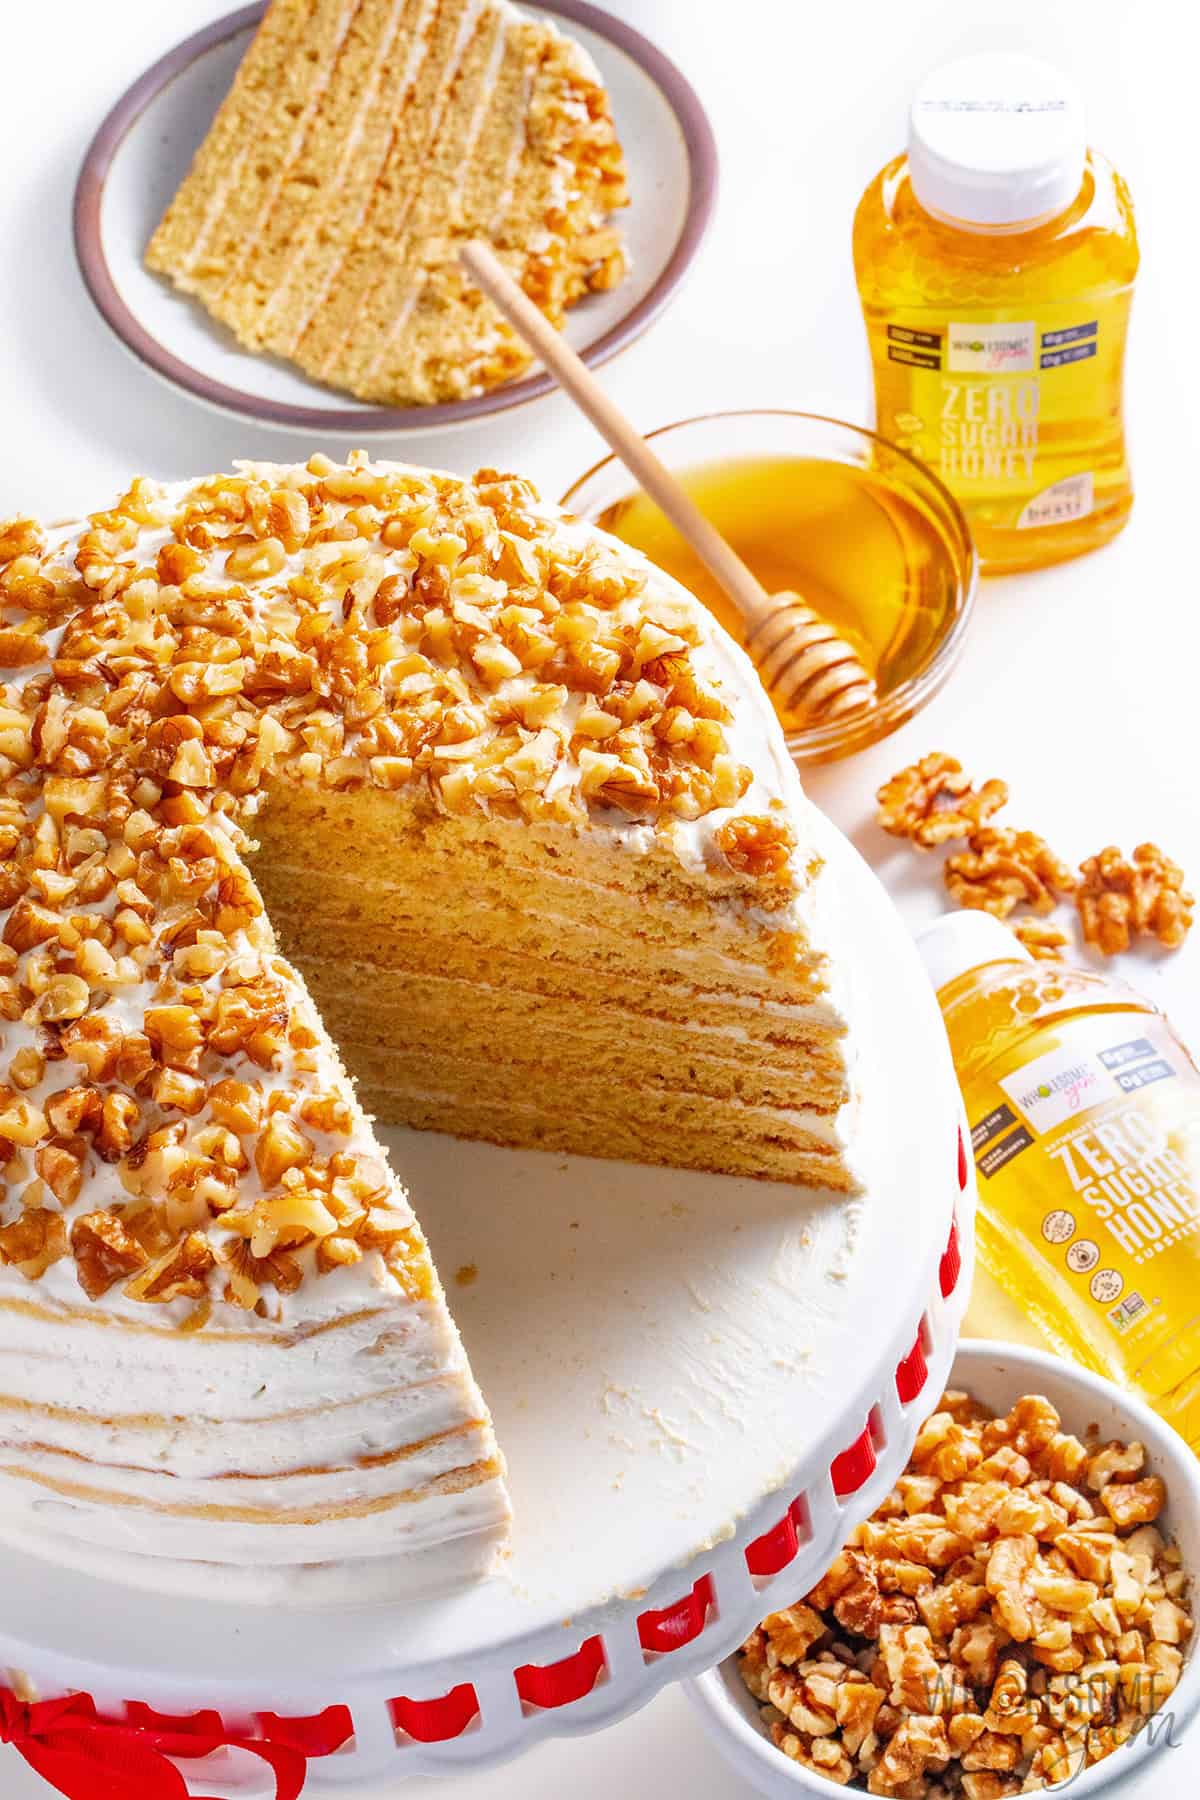
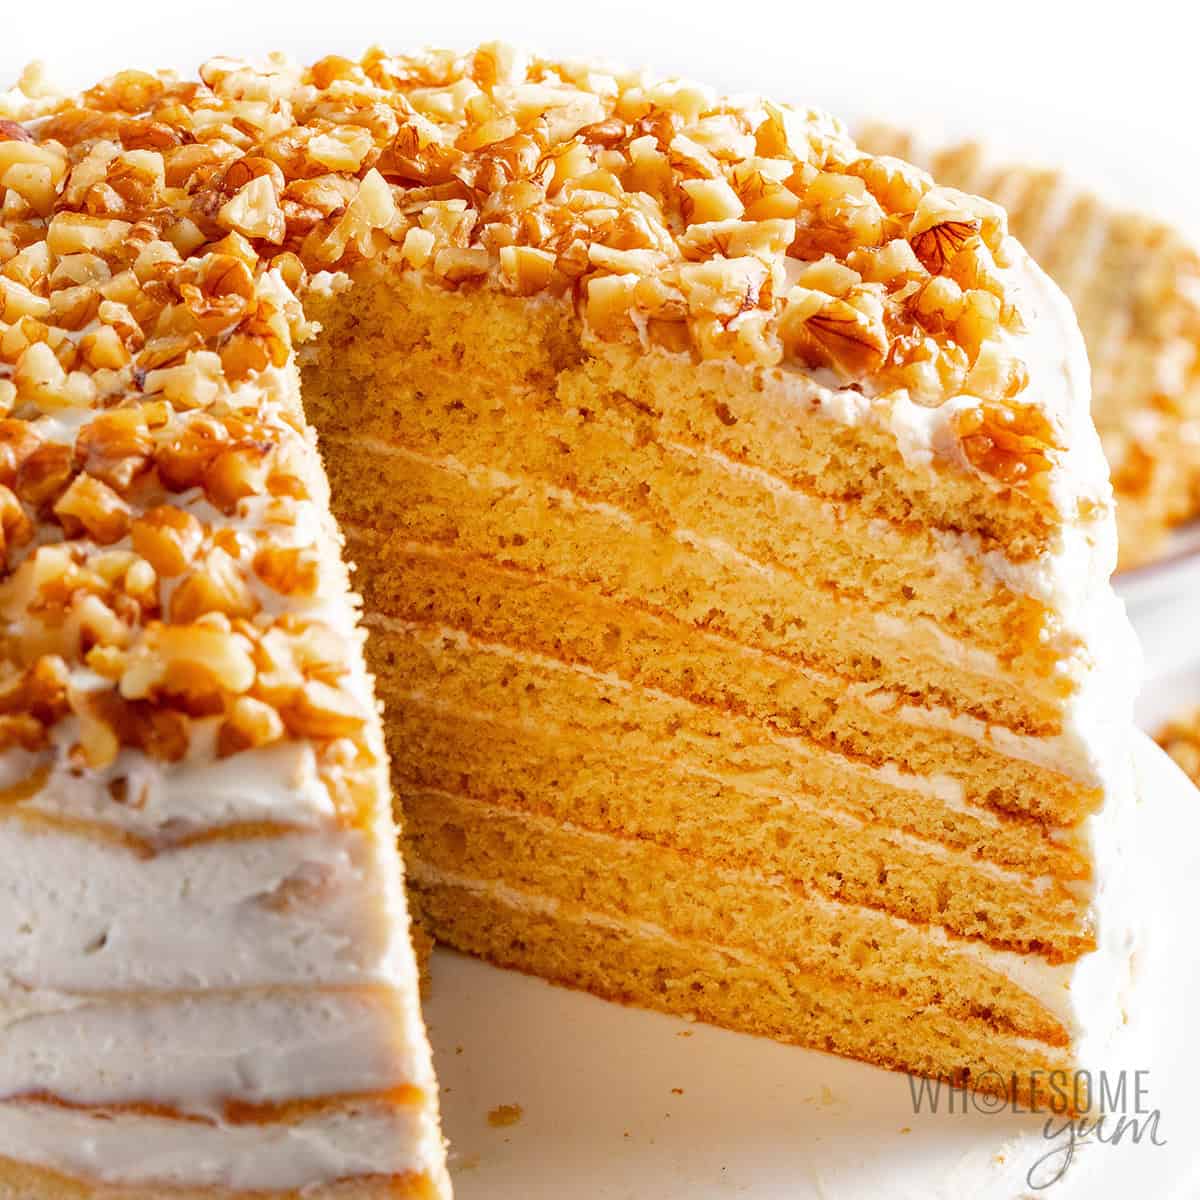
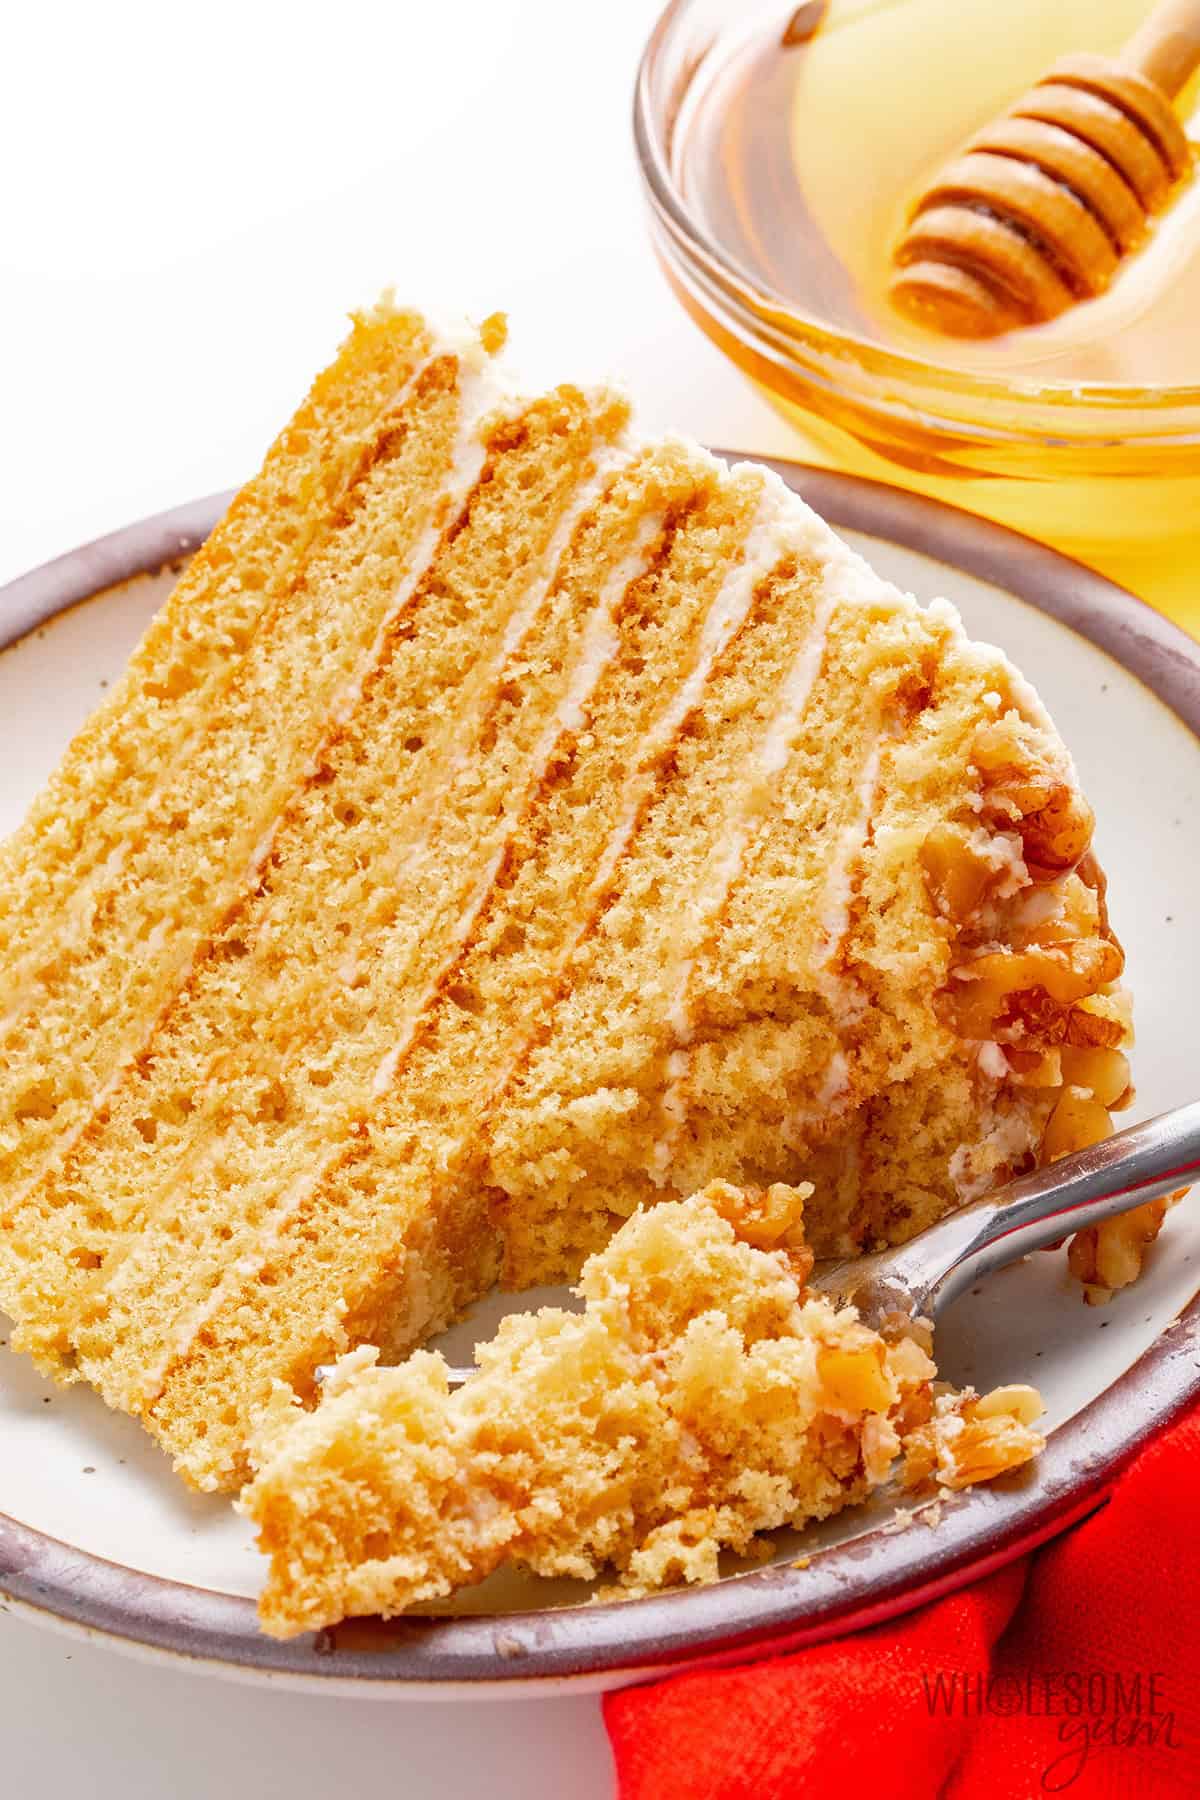
- Super moist, creamy layers – The thin, delicate medovik cake layers are super moist and taste like honey. They partly soak up the tangy cream frosting between them, which makes them even more tender. Your fork slips right through. I also add chopped walnuts on top for a little crunch.
- Grandma’s cake, with my healthier ingredient swaps – I replaced the white all-purpose flour with einkorn flour, almond flour, and a little protein powder, plus Besti instead of sugar. Each thin slice actually has 9 grams of protein! And no one can tell.
- Worth the birthday cake effort – This honey cake recipe takes more work than most of my healthy desserts, because you have to chill the dough and then roll out 8 layers, but they bake fast. And that tall stack is so worth it!
- Even better made ahead – I love that this cake actually improves after a day or 2 in the fridge. Finishing it in advance makes your celebration stress-free.
This medovik is my kids’ favorite cake now, and I have some in my freezer as we speak. Make it with me for your next special occasion!

Ingredients & Substitutions
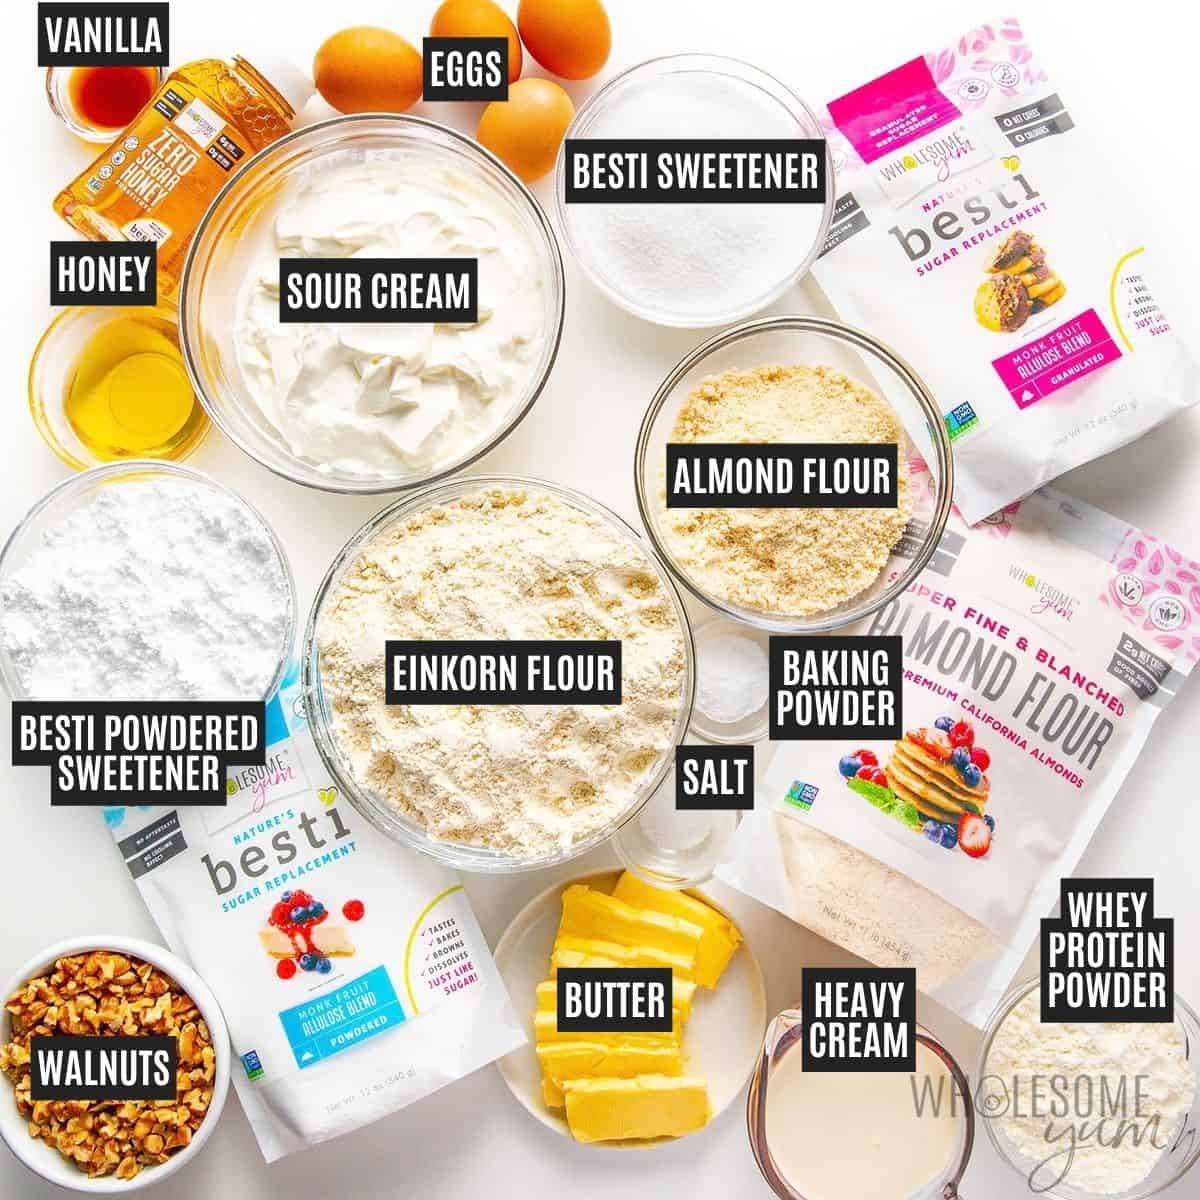
Here I explain the best ingredients for my honey cake recipe, what each one does, and substitution options. For measurements, see the recipe card.
Honey Cake Layers:
I kept my cake ingredients the same as grandma’s, except I swapped the flours and sweeteners:
- Honey – I use Wholesome Yum Zero Sugar Honey for that classic honey flavor without the added sugar, but you can definitely use regular honey. I also tested a 50/50 combination of regular and sugar-free, which was actually my favorite for flavor and sweetness.
- Einkorn & Almond Flours – My grandma used white flour, but I swapped it for a blend of einkorn flour and almond flour, which made it even more moist with a hint of nutty flavor.
- Einkorn Flour – This is an ancient type of wheat. Even though I’m usually gluten-free and einkorn contains gluten, I tolerate this one better. I use this einkorn flour for this honey cake recipe. You can replace it with white flour 1:1 if that works for your needs, or for a gluten-free option, a gluten-free flour blend is fine. Almond flour alone won’t work the same way by itself, you won’t be able to roll it out.
- Almond Flour – This adds fat and a little protein, so the cake tastes richer and a little nutty compared to my testing with einkorn flour by itself. I highly recommend Wholesome Yum Blanched Almond Flour here because it’s milled finer than other brands. Many others are too coarse and can make your medovik gritty. I don’t recommend replacing this with something else, because swapping this flour will affect the moisture and fat content of the dough.
- Besti Monk Fruit Allulose Blend – I used this instead of sugar in my grandma’s recipe, and the best part is it helps the layers stay moist. Regular sugar works, as that was grandma’s original. I don’t recommend other brands of monk fruit or stevia, as they are usually erythritol-based and will make your cake turn out dry.
- Whey Protein Powder – I like this unflavored whey protein powder because it actually improves the texture of baked goods while adding protein, without changing the flavor or adding fillers. I tested this medovik with and without it, and actually liked the structure it provided. If you want to skip it, replace it with the same amount of extra einkorn flour. Other protein powders behave differently in baking, so I can’t guarantee they’ll work.
- Eggs – They help bind the dough, which is important when you’re rolling the layers so thin.
- Unsalted Butter – Adds richness to the cake layers. I use unsalted so I can control the salt separately.
- Baking Soda – My grandma’s method adds this to the hot honey to help the medovik develop lighter layers (in other words, not so dense!) and a richer, caramelized flavor. I do it just like she did. Make sure you’re using baking soda, not baking powder.
- Sea Salt – Just a little to balance the sweetness.
Cream Filling & Topping:
The cream filling is key for this honey cake recipe, because it partly soaks into the layers and makes it super moist. It’s different from most American cake recipes because sour cream is the base:
- Sour Cream – I recommend thick, full-fat sour cream rather than a light version, and stir any separated liquid back in before measuring. The ounces in the recipe card are by weight, so a 16-ounce container plus half of another is the amount you need.
- Heavy Cream – Makes the filling lighter and fluffier. Keep it cold so it whips well.
- Powdered Sweetener – I use Besti Powdered Monk Fruit Allulose Blend for all my frosting recipes, including this one. (You might have seen it in my sugar-free buttercream, cream cheese frosting, and chocolate frosting too!) That’s because it tastes just like sugar and most importantly, dissolves easily. Unless you want to use actual powdered sugar, most other sweeteners resist dissolving or crystallize over time, leaving a grainy texture. The only alternative I’ve tried that works just as well is plain confectioners’ allulose, but you’ll need to increase the amount to 2 cups.
- Vanilla Extract – For a little warm flavor in the cream. I recommend a high quality pure vanilla extract like this.
- Walnuts – Optional, but grandma added these for crunch against all those soft layers. Some traditional versions use dough scraps to make a crumble instead, and I tested this option in my variations below.
How To Make Honey Cake
I have step-by-step photos here to help you visualize the recipe. For full instructions with amounts and temperatures, see the recipe card.
Cake Layers:
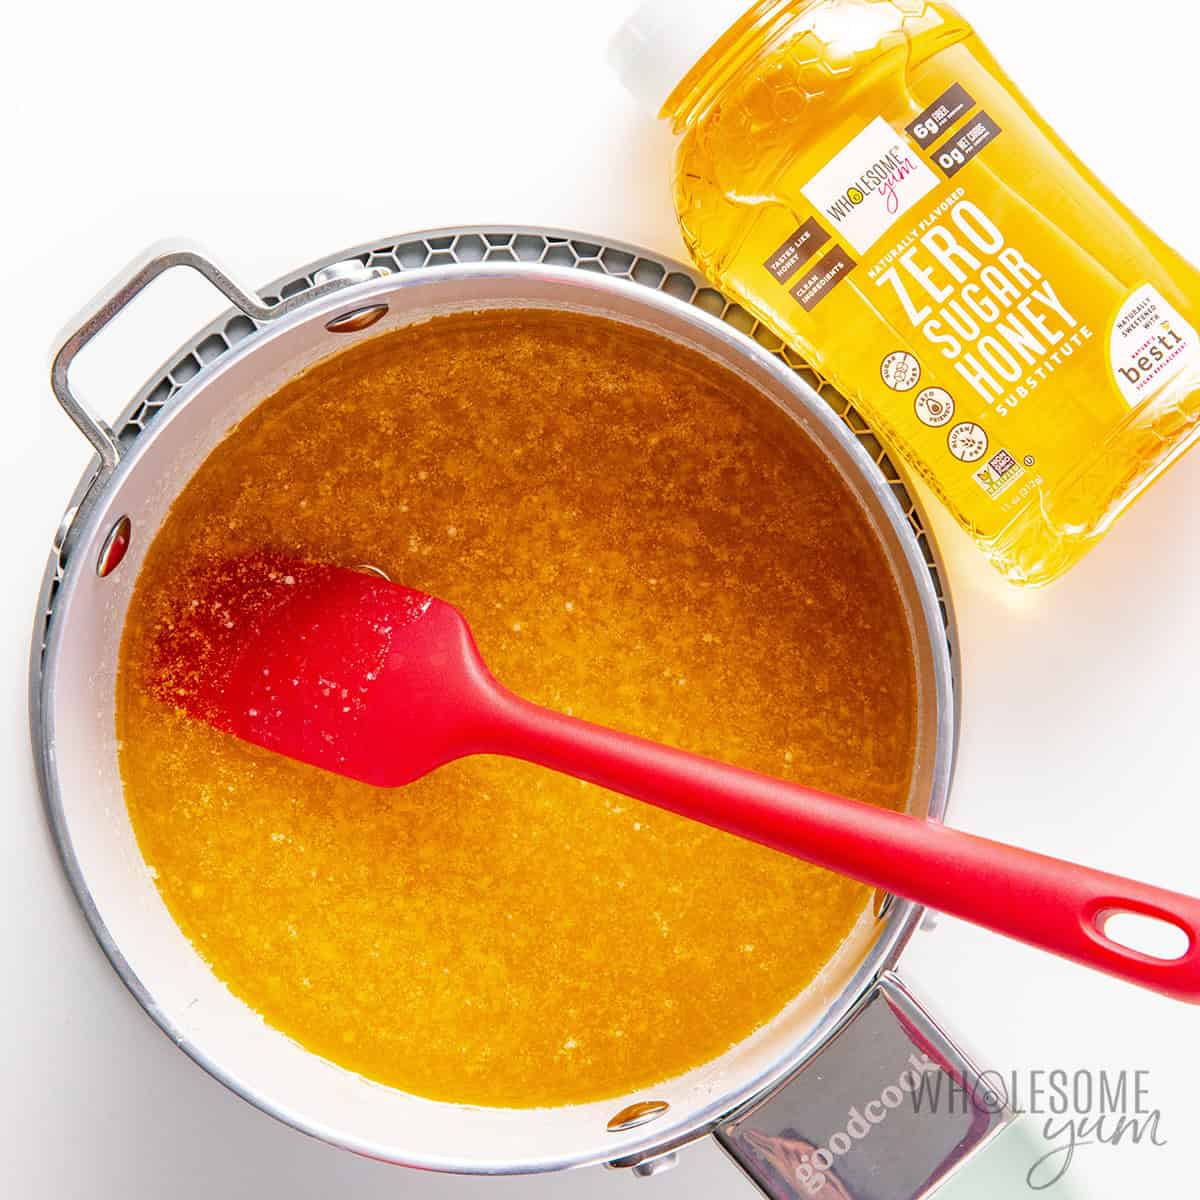
- Melt the butter and honey. Heat them in a small saucepan over low heat until melted and bubbling.
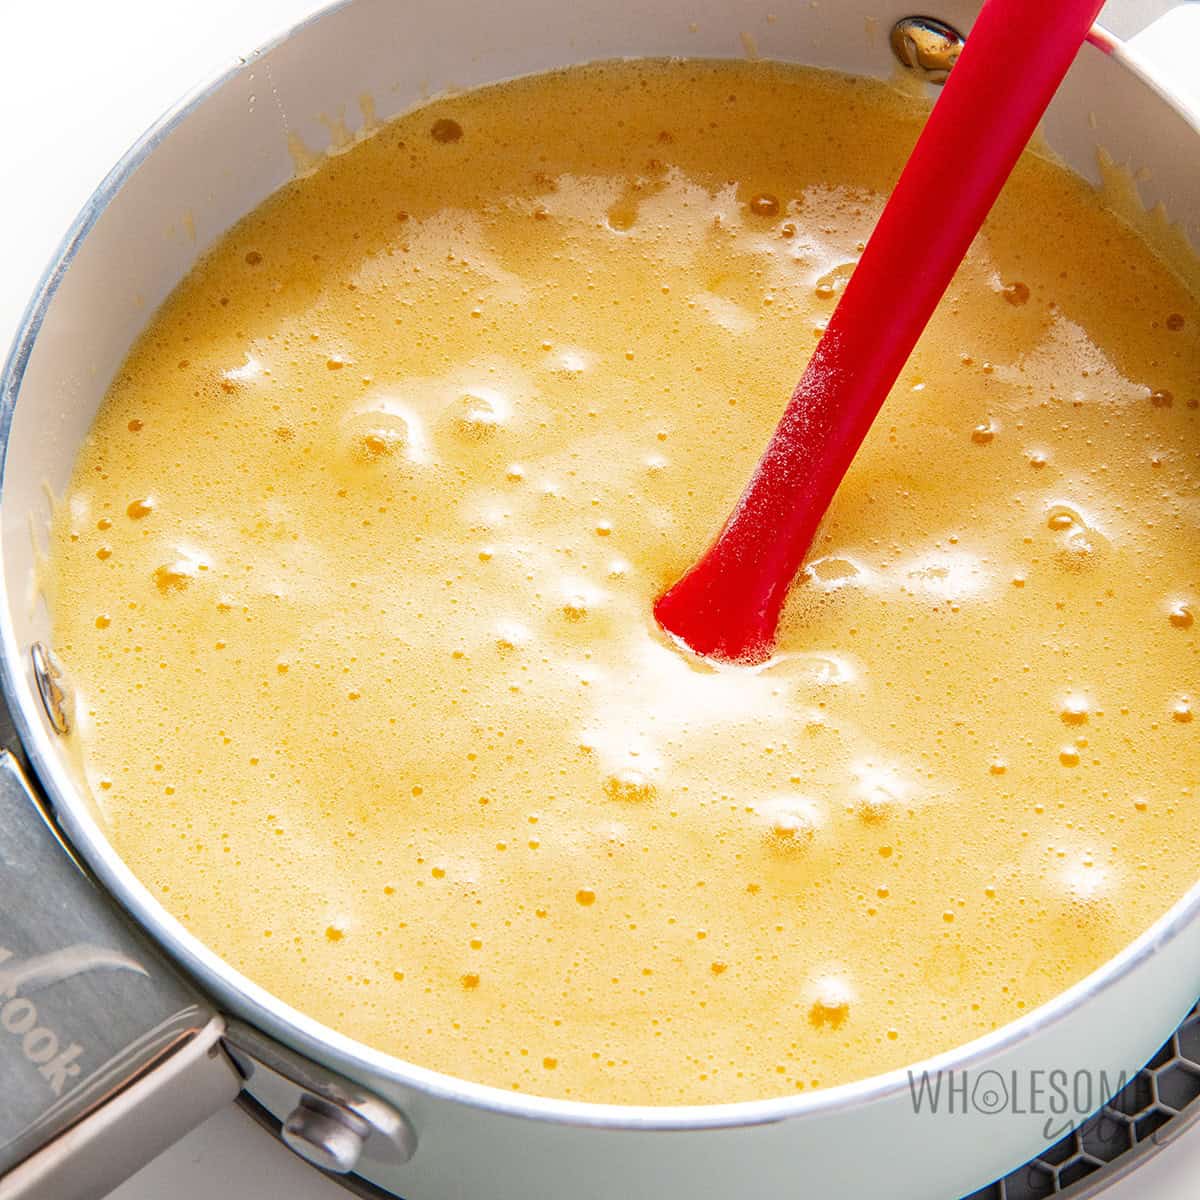
- Add the baking soda. Remove from heat before adding it. The mixture will foam and rise, which actually looks pretty cool, but make sure you have enough space in the pan!
- Whisk the egg mixture. In a large bowl, whisk together the eggs, Besti, and salt.
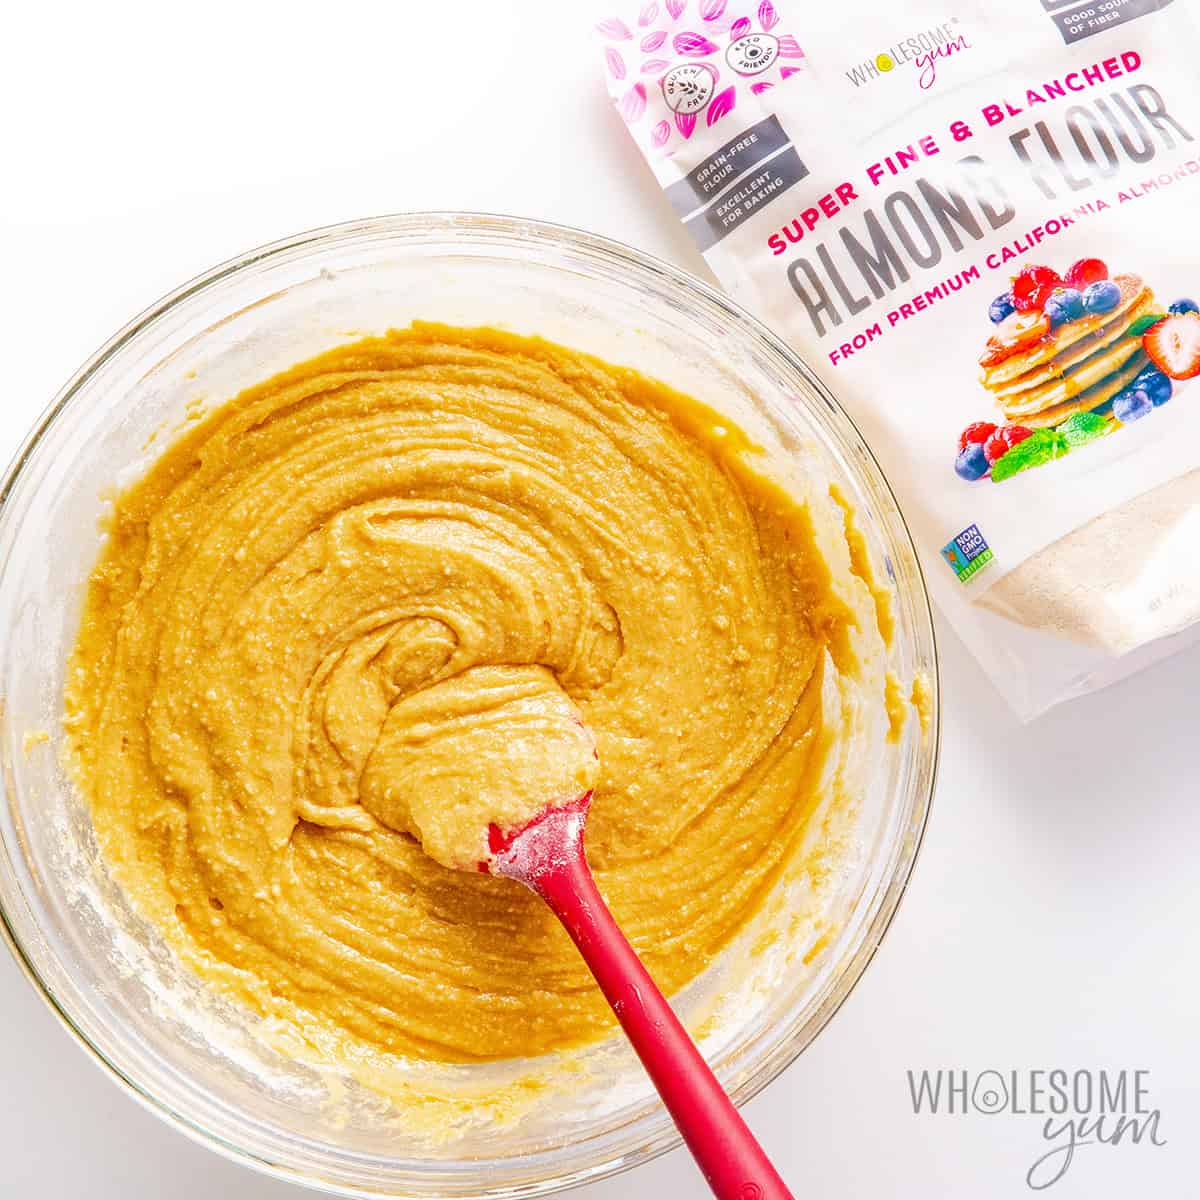
- Mix the dough. Add the flours, protein powder, and butter-honey mixture to the egg mixture. The mixture will form a thick and sticky dough, so at this point I switch to a spatula and find folding works best to bring it together.
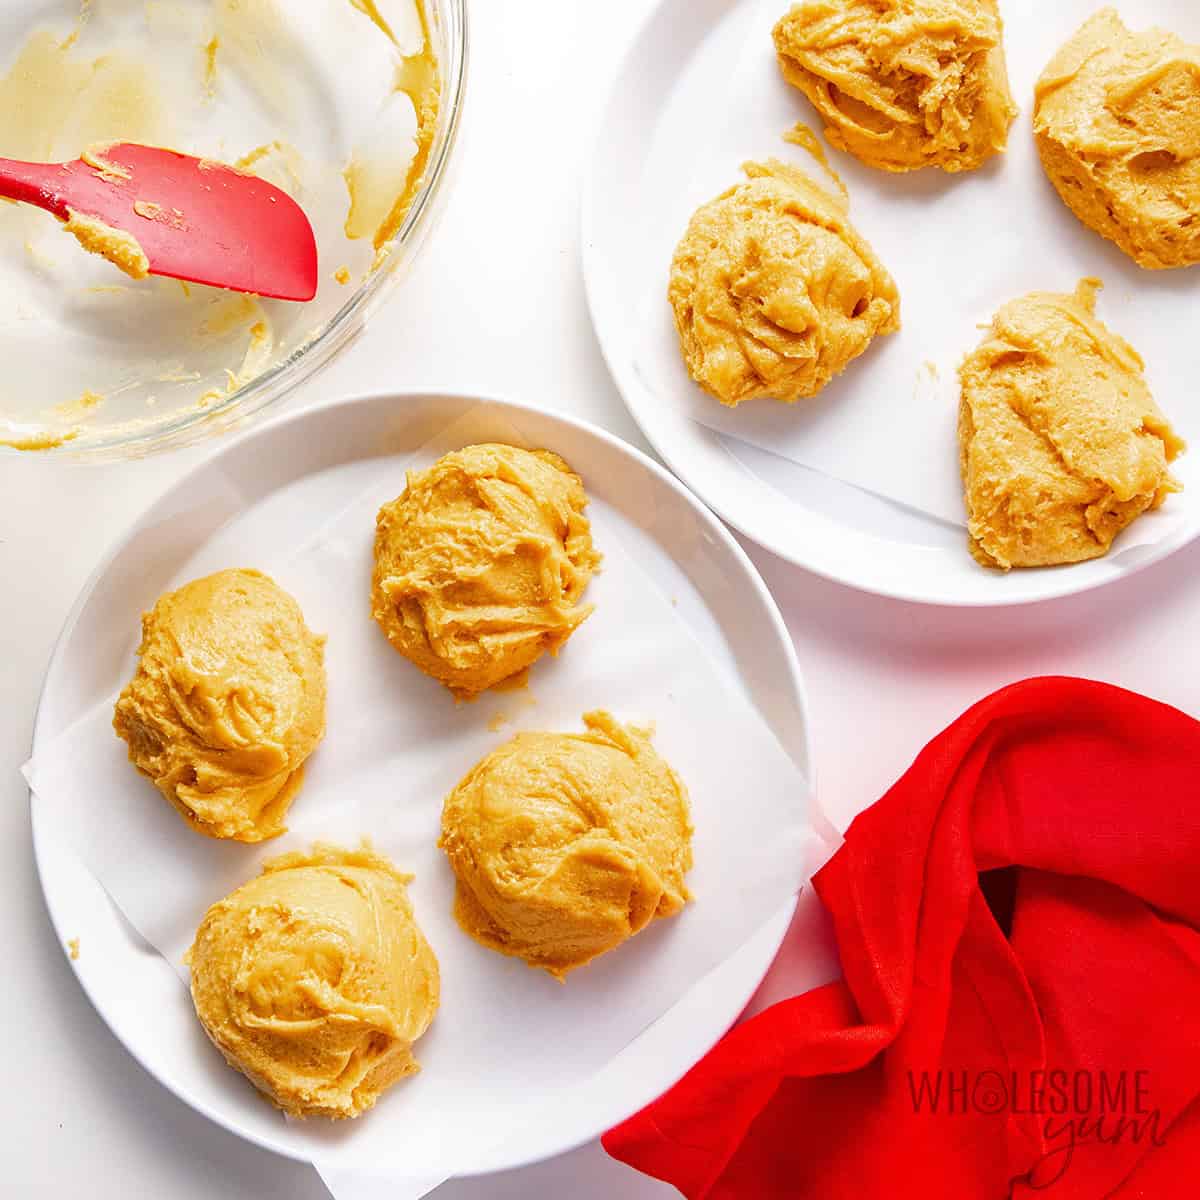
- Divide and chill. Drop the dough into 8 equal portions on parchment-lined plates (or a baking sheet works too, as long as it’ll fit in your freezer). Freeze until firm and less sticky to the touch. You can refrigerate it instead if you have more time, I just use the freezer to make it quick.
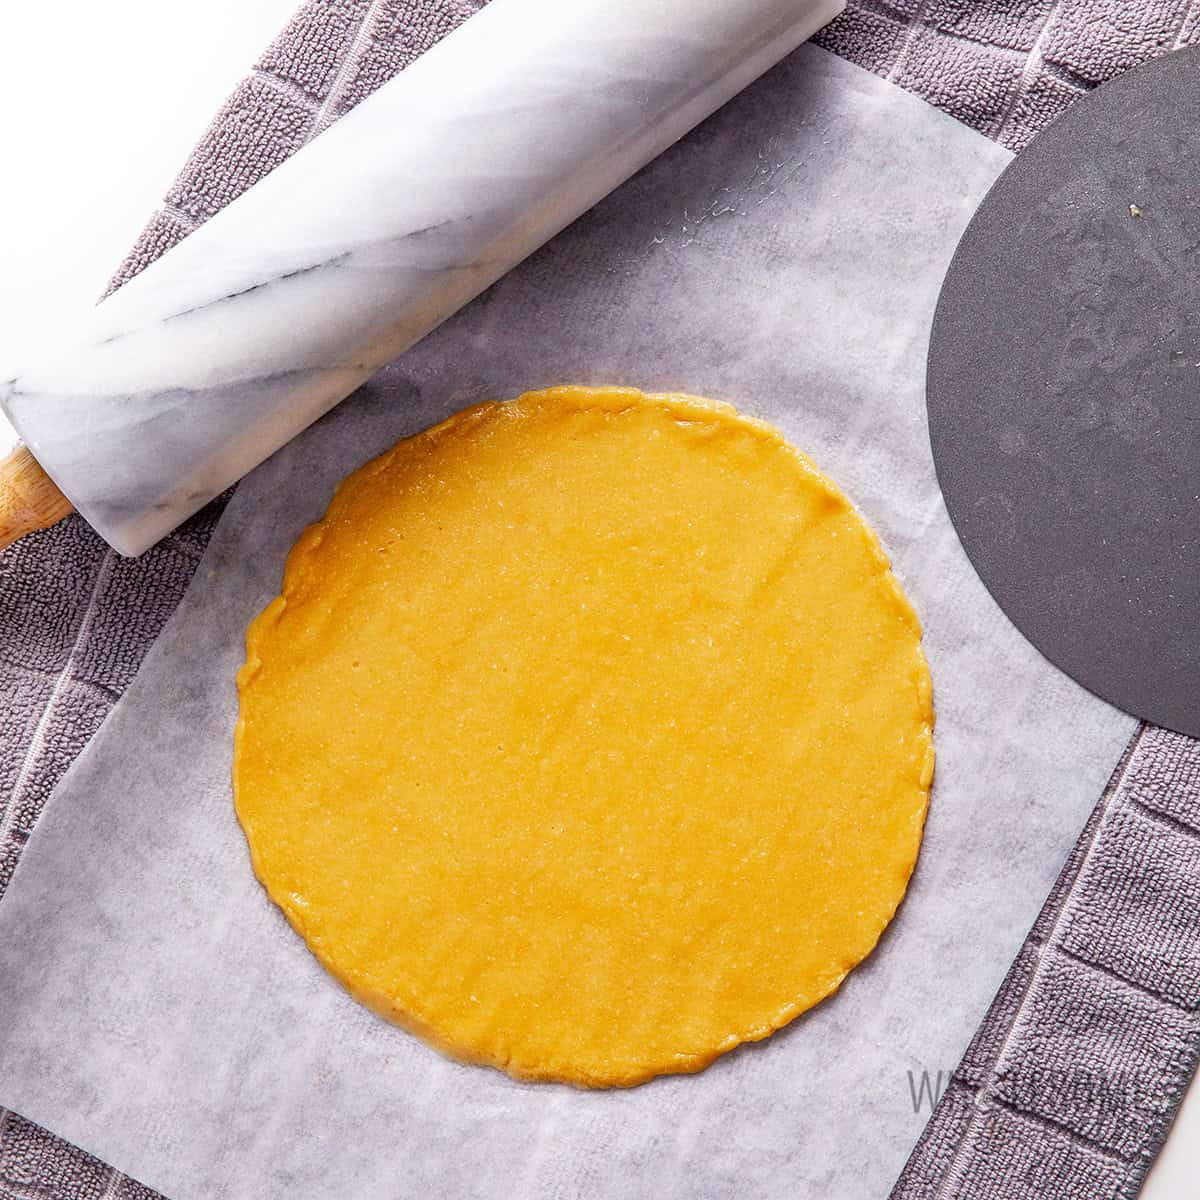
- Roll the layers. Working with 2 portions at a time, roll each between 2 pieces of parchment paper lightly coated with avocado oil spray (I love this glass sprayer), with the oiled sides facing the dough. Aim for a circle about 1/8 inch thick and 8-9 inches wide (see my tips below on size). Peel off the top sheet and gently nudge the edges into a neat circle.
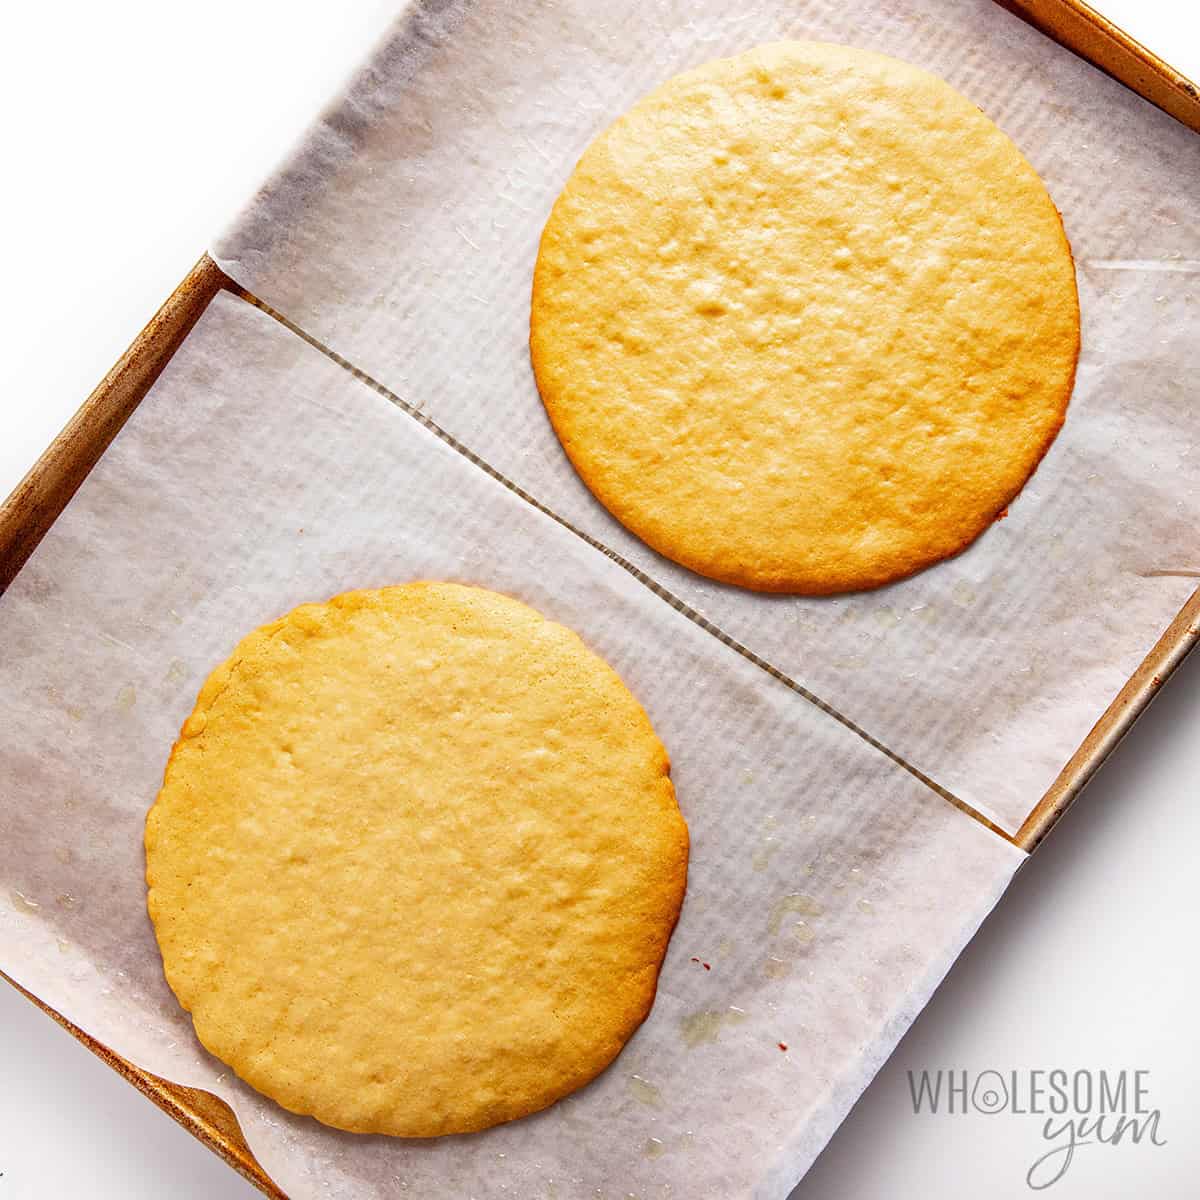
- Bake, cool, and trim. Slide 2 layers, still on their parchment, onto an extra large baking sheet and bake in the oven until golden. Roll the next pair while those bake. Repeat with all 8 layers. (Don’t worry, each pair only takes a few minutes!) Let them cool completely. Once cooled, place an 8- or 9-inch plate or pan bottom on each layer as a guide and run a knife around the edge to trim them into matching circles.
Frosting & Assembly:
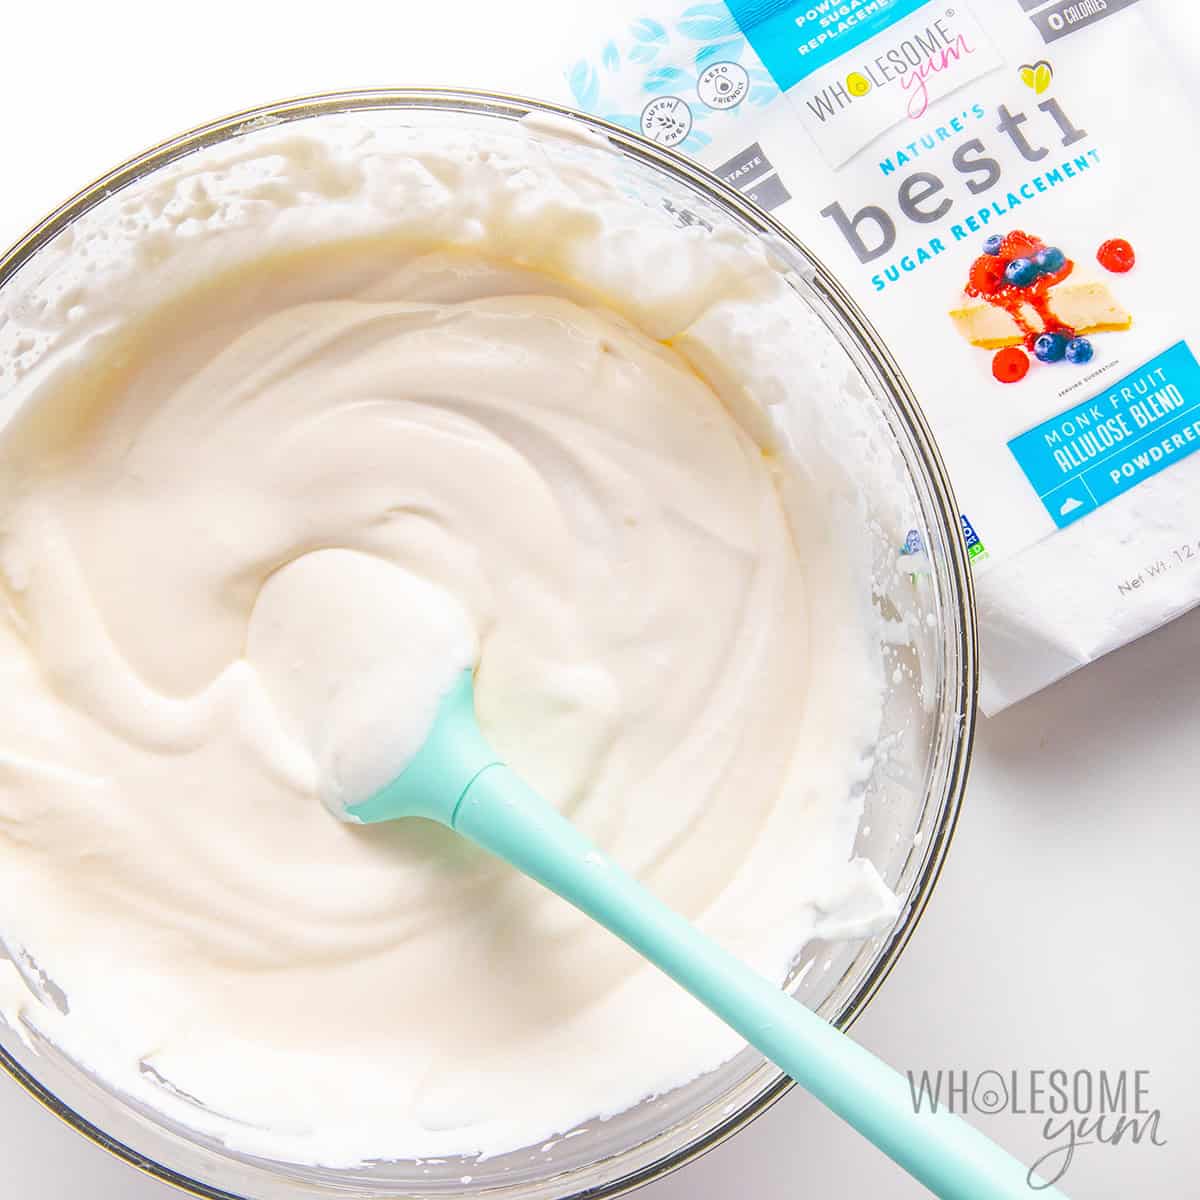
- Make the sour cream base. Whisk together the sour cream, powdered Besti, and vanilla in a medium bowl.
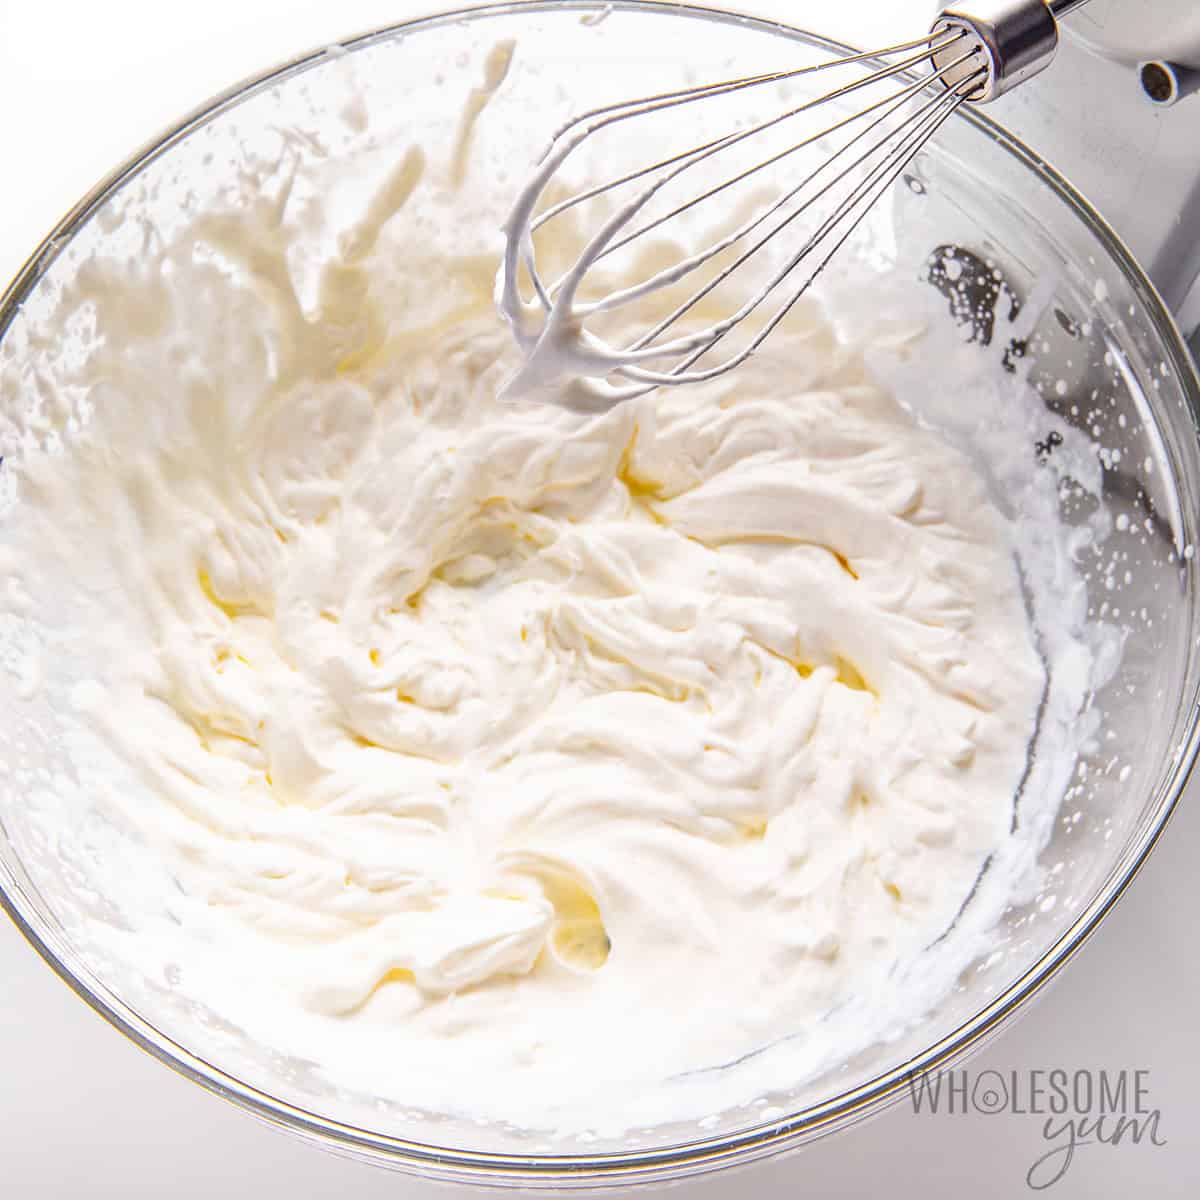
- Whip and fold. In a separate large bowl, use a hand mixer to beat the heavy cream until stiff peaks form. Gently fold the sour cream mixture into the whipped cream. Keep the frosting in the fridge until you’re ready to assemble.
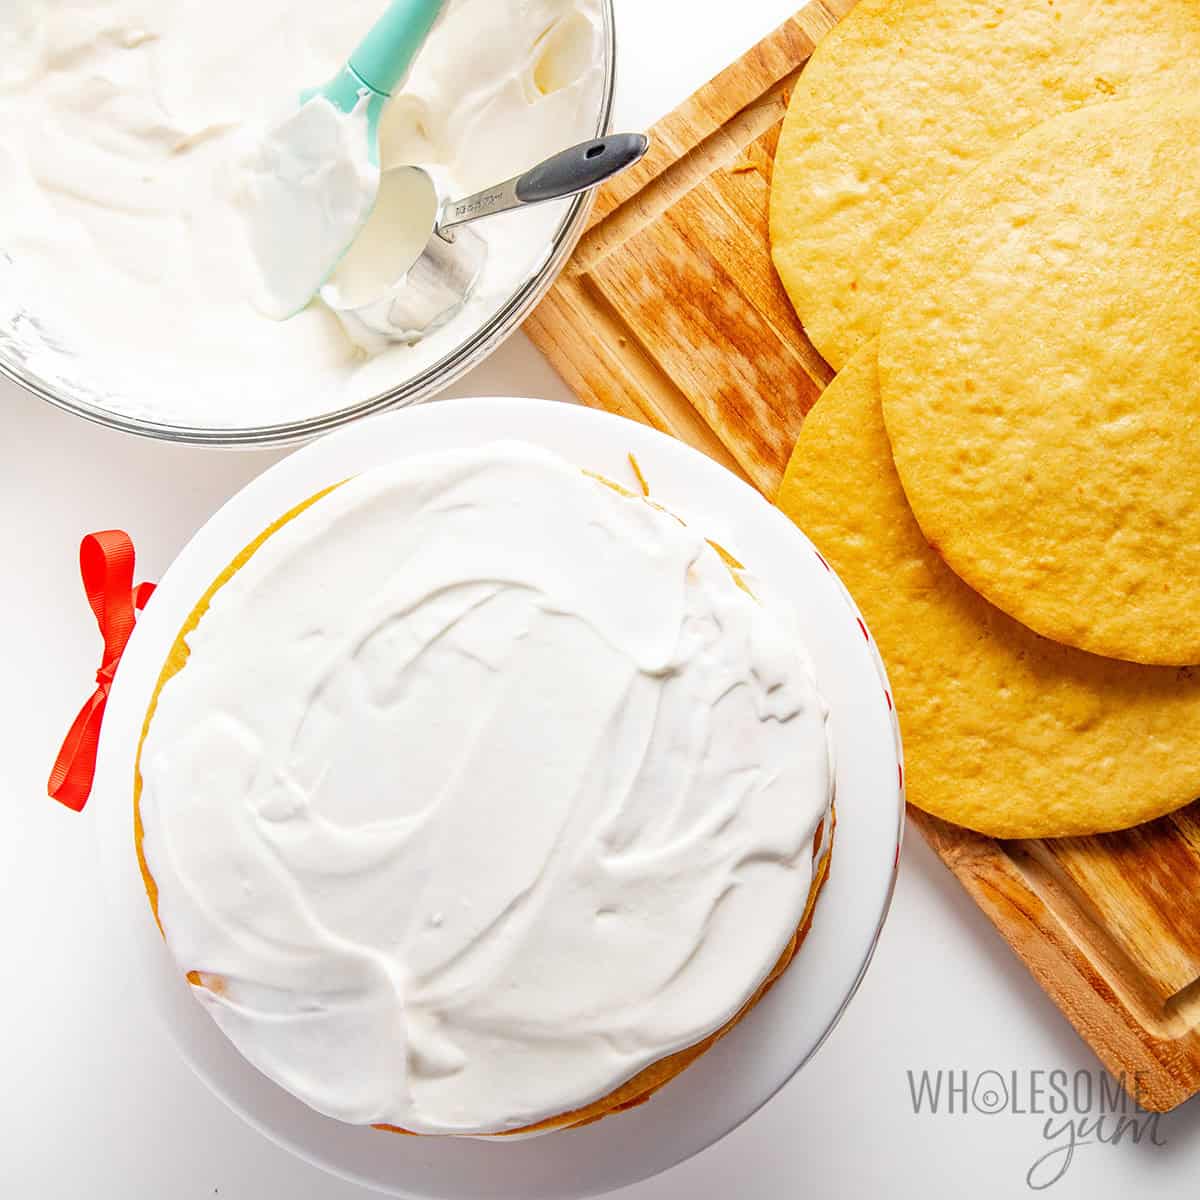
- Stack the cake. Place a honey cake layer on a platter or cake stand and spread the cream filling evenly over it. Repeat with the remaining layers, lining up the edges as you go.
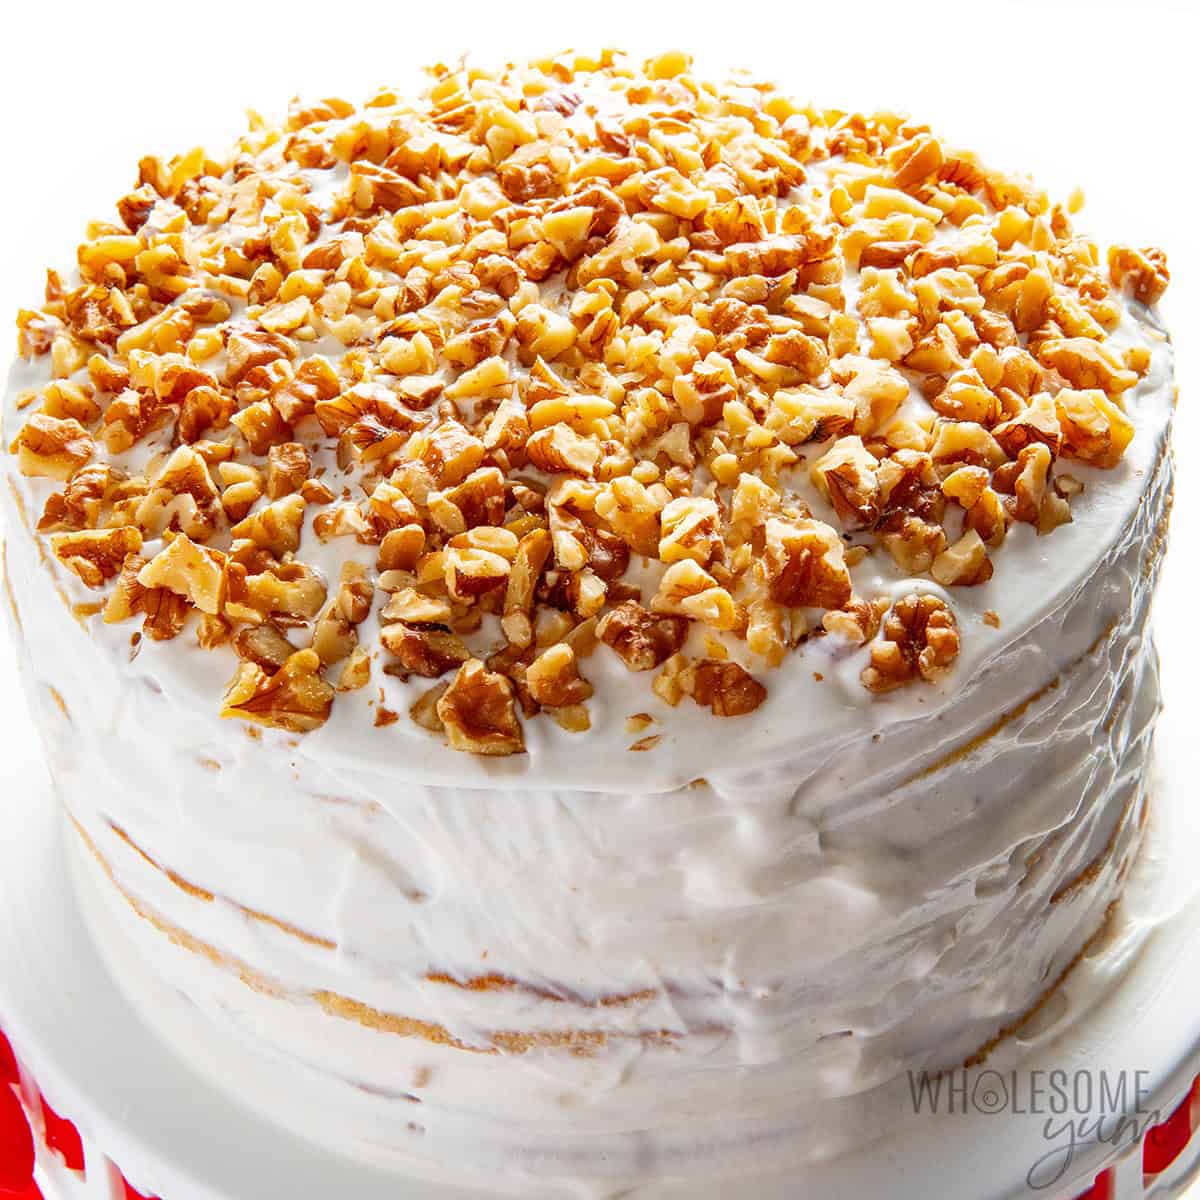
- Frost and refrigerate. Cover the top and sides with the remaining filling, then press on the chopped walnuts. I use them on top as shown, but you can cover the sides, too. Refrigerate the finished medovik cake overnight to let the layers absorb some of the frosting and soften before slicing.

Maya’s Recipe Tips
- Sticky dough is normal. Don’t add more flour. I know it’s tempting, but more flour does not make it less sticky. Instead, to make it easy to work with, the key is to keep the dough cold from the fridge and use the lightly oiled parchment layers. If the dough gets stretchy as you peel it back, return that layer to the fridge until it’s firmer.
- I only take out 1-2 pieces of dough at a time, what I’m about to roll. If the rest sit on the counter, they warm up and get sticky again. Many medovik recipes say to roll the dough at room temperature, but this dough is actually very sticky when warm, so I recommend keeping it cold until the last minute. A marble rolling pin like this also stays cool while you work.
- A kitchen towel helps keep the parchment from sliding. I just place it under the bottom sheet of parchment paper, which creates friction so it doesn’t slide all over my counter.
- Two big baking sheets make the baking process faster. I use two of these extra large baking sheets, and get the next pair of cake layers ready while the first bakes. I find they cool pretty quickly, so I can reuse the first one almost right away.
- You can reuse some of the parchment paper. I keep the oiled top sheet for rolling the next layer if it still releases cleanly. You don’t need a fresh sheet for every single portion.
- You can make this an 8-inch or 9-inch cake. I’ve done both with exactly the same honey cake recipe, just depending on how thin I roll the pieces and how much dough I cut away.
- Watch the layers closely. These are thin enough to go from golden to too dark quickly. I set a timer for each batch and use the golden color as my cue.
- Soft frosting is expected, but keep it airy. This filling will not be as firm as most frostings, such as buttercream, but be careful not to break down the whipped cream when mixing with the sour cream mixture. Using a folding motion helps. If it’s difficult to spread on the honey cake without running off, chill it again before continuing.
- Don’t skimp on the filling between layers. I use 1/3 to 1/2 cup per layer, spreading it all the way to the edges. A thin smear won’t give the cake enough moisture to soften, but keep some filling back for the top and sides.
- Start with a level base. I recommend assembling right on the platter you’ll serve from, because this cake is too fragile to move. Check that each layer is centered before adding the next, and don’t press down or you’ll squeeze out the filling.
Honey Cake (Grandma’s Medovik, No Sugar)
This honey cake recipe tastes just like my grandma's Russian medovik, with 8 moist, golden layers and sweet cream frosting. No refined sugar!


Ingredients
[ See substitutions ]Tap underlined ingredients to see the ones I use.
Cake:
Cream Filling:
Instructions
[ See step photos See my tips ]Tap on the times in the instructions to start a kitchen timer.
Cake Layers:
-
In a small saucepan over low heat, or in the microwave, heat the butter and honey until melted and bubbling. Remove from heat and whisk in baking soda (mixture will fizz, bubble, and rise – this is normal).
-
Meanwhile, whisk together the eggs, Besti, and salt in a large bowl.
-
Add the flours, protein powder, and butter/honey mixture. Stir well (folding works best), until a sticky, uniform dough forms.
-
Divide the dough into 8 sections and drop as 8 blobs on 2 large plates lined with parchment paper. Freeze the dough blobs for 30-60 minutes, until firm and less sticky to the touch. (You can also refrigerate if you have more time and want to finish later.)
-
Preheat the oven to 350 degrees F (176 degrees C).
-
Roll out the cake layers: Spray 2 large pieces of parchment paper very lightly with avocado oil spray. Take the pieces of dough out of the fridge or freezer 2 at a time; keep the rest cold until ready. Form one blob of dough into a rough ball and place it between the layers of paper, with the oil sides facing the dough. Press down into a disc, then roll out into a thin circle, about 1/8" thick and 8" wide. Peel off the top paper and gently press the edges inward to make a neat circle. Repeat with a second blob of dough.
-
Slide the 2 rolled cake layers onto an extra large baking sheet, right on the parchment paper. Bake for 4-5 minutes, until golden.
-
While the 2 layers are baking, roll out 2 more layers the same way, so they are ready to bake when the first ones are done. Bake the next 2 layers. Repeat until you’ve rolled out and baked all 8 layers.
-
Let all 8 layers cool completely. Place an 8-inch plate or the bottom of a round 8-inch pan over each layer and trace around the edge with a knife to cut away the excess, making perfect circles.
Frosting:
-
Meanwhile, in a medium bowl, whisk together the sour cream, powdered Besti, and vanilla.
-
In a large bowl, use a hand mixer with whisk attachment to beat the heavy cream, until stiff peaks form.
-
Scrape the sour cream mixture into the large bowl with the whipped cream, and gently fold together, until uniform. Be careful not to break down the whipped cream.
-
Refrigerate the frosting until ready to use. (This will help it get a little firmer, but it’s normal for it to be more runny than regular frosting.)
Assembly:
-
To assemble, place a pastry layer onto a platter or cake stand. Spread 1/3 to 1/2 cup of cream filling evenly over the pastry.
-
Repeat the layers, alternating the cakes and frosting.
-
After the last pastry layer is placed on top, spread the cream filling over the entire cake (both the top and sides). Press the nuts over the top and sides.
-
Refrigerate the honey cake overnight, or preferably 24 hours. (This is key for a soft, tender texture.)
LAST STEP: Leave a rating to help other readers, or tag me @wholesomeyum on Instagram. I’d love to hear from you!
Maya’s Recipe Notes
Serving size: 1 slice, or 1/16 the entire recipe
- Tips: Check out my recipe tips to help you roll the sticky dough, keep the frosting airy, and stack even layers.
- Variations: I’ve included options below for a crumb topping or walnuts between layers.
- Storage & make ahead: Keep the honey cake covered in the refrigerator for up to 4-5 days. A cake keeper like this protects the frosting better than wrapping it tightly. I’ve also included several make-ahead options below, including freezing, partial prep, and full prep.
- Note on serving size: It’s common for medovik to be served in very thin slices, partly because this type of cake is traditionally very rich and partly because it improves the texture of each forkful. I cut mine in 16 slices and it feels just right, so that’s what the nutrition info is based on.
I provide nutrition facts as a courtesy. Have questions about calculations or why you got a different result? Please see my nutrition policy.
Add Your Notes Your Notes
Try More Of My Recipes


© Copyright Maya Krampf for Wholesome Yum. Please DO NOT SCREENSHOT OR COPY/PASTE recipes to social media or websites. We’d LOVE for you to share a link with photo instead.
Honey Cake (Medovik Recipe)
Recipe Variations
I’ve done the layering and topping for this honey cake recipe a couple different ways. I prefer the version above, but you can also try it like this:
- Cake crumb topping – Skip the walnuts and finely crumble or chop the baked edges you trimmed from the cake layers. Sprinkle them over the top and press them onto the sides. This is actually the more common medovik finish and my youngest daughter preferred it.
- Walnuts between the layers – I’ve also made this with chopped nuts between each layer, in addition to the topping, but I liked it less because the actual honey cake absorbs less of the frosting that way and isn’t as moist. If you still want this option, you’ll need 4 cups of walnuts total, and the cake is about 6 inches tall instead of about 4 inches with nuts only on top.
Make Ahead Options
Medovik is the perfect make ahead cake, because it needs a day in the fridge anyway. Since it’s quite a bit of work to put together, I’ve actually done this a few different ways:
- Make the dough ahead – This dough stores very well in the fridge, so you can cover it with plastic and chill it for up to 2-3 days. I’ve done it all in one blob as well as individual portions for each layer. If you’ll do this for more than 1-2 days, I recommend wrapping it tightly in plastic wrap once it’s cold.
- Bake the layers ahead – Let the baked layers cool completely, trim them, then stack with parchment between them. Wrap well and refrigerate for up to 3-4 days. After frosting, the cake still needs at least 8 hours in the fridge to soften, preferably 24 hours.
- Make the whole cake ahead – The option I use most often! Assemble and frost the honey cake 1-2 days before serving, then keep it covered in the fridge until ready to serve.
- Freeze the cake – I was surprised that this medovik cake freezes so well, since the frosting is sour-cream-based, but it didn’t separate at all after thawing it. In fact, it seemed even more moist and tender! To freeze, refrigerate the assembled cake overnight to let the layers soak up some of the cream first. Place the cake in the freezer uncovered first to firm up the cream, then wrap in plastic wrap and foil. It keeps well for up to 3 months. Thaw for 12-24 hours in the fridge.











Popular Recipes Right Now
Baked Chicken Legs
Taco Salad
Halibut Recipe
Sirloin Steak
Fresh Salsa
Sauteed Eggplant