 Shop
Shop My
My Custom


FREE 5-Ingredient Recipe EBook
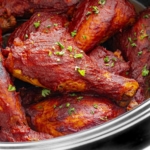
GET IT NOWMy Crispiest, Juiciest Baked Chicken Legs Recipe

Everyone needs a reliable baked chicken legs recipe to turn to, and this one is mine. It’s basically the opposite of fancy — just simple, flavorful, savory, and crispy chicken I want to make over and over again. Here’s why:
- Juicy with super crispy skin – Chicken leg recipes are harder to dry out than white meat, but these come out extra juicy with my tips. And if you’ve seen me rave about crispy skin in my chicken leg quarters, chicken wings, and chicken thighs, you know I wouldn’t have drumsticks any other way, either.
- Quick and easy – I love spices, but pared down to just the important ones here — 4 ingredients (plus salt and pepper), if you’re counting! And these oven baked chicken legs need just a few minutes of your time.
- Family friendly – They’re protein packed, simple, and a hit with kids and adults alike. It’s just all around a winner of a chicken dinner.
Clearly I’m not the only one that has those days I love this kind of easy, healthy dinner. It’s become one of my most popular chicken recipes here on Wholesome Yum. And after all these years, this method for how to bake chicken legs in the oven is still the one I use most often. Make them with me!

Ingredients & Substitutions
Here I explain the best ingredients for my baked chicken legs recipe, what each one does, and substitution options. For measurements, see the recipe card.
- Chicken Drumsticks – Choose ones that are uniform in size, so they cook at the same rate. Some of you have asked if you can use chicken breast. You can, but you’re better off following my baked chicken breast recipe — some of my tips are different for that cut.
- Butter Or Oil – For flavor, locking in moisture, and crispy skin. Butter has a low smoke point, so I don’t usually use it for roasting, but I love the flavor that it gives this recipe and haven’t had issues. Feel free to use ghee, olive oil, or avocado oil instead. Cooking spray also works — I recommend an oil mister like this to avoid chemicals.
- Seasonings – My go-to blend is smoked paprika, garlic powder, salt, and pepper. I’ve also made these baked chicken legs with other spice blends, including Italian seasoning, lemon pepper seasoning, and Cajun seasoning. If your blend contains salt, reduce or omit the salt added separately. You can make complimentary additions to the above spices, too, such as oregano, onion powder, or cayenne pepper.

How To Bake Chicken Legs
I have step-by-step photos here to help you visualize the recipe. For full instructions, including amounts and temperatures, see the recipe card.
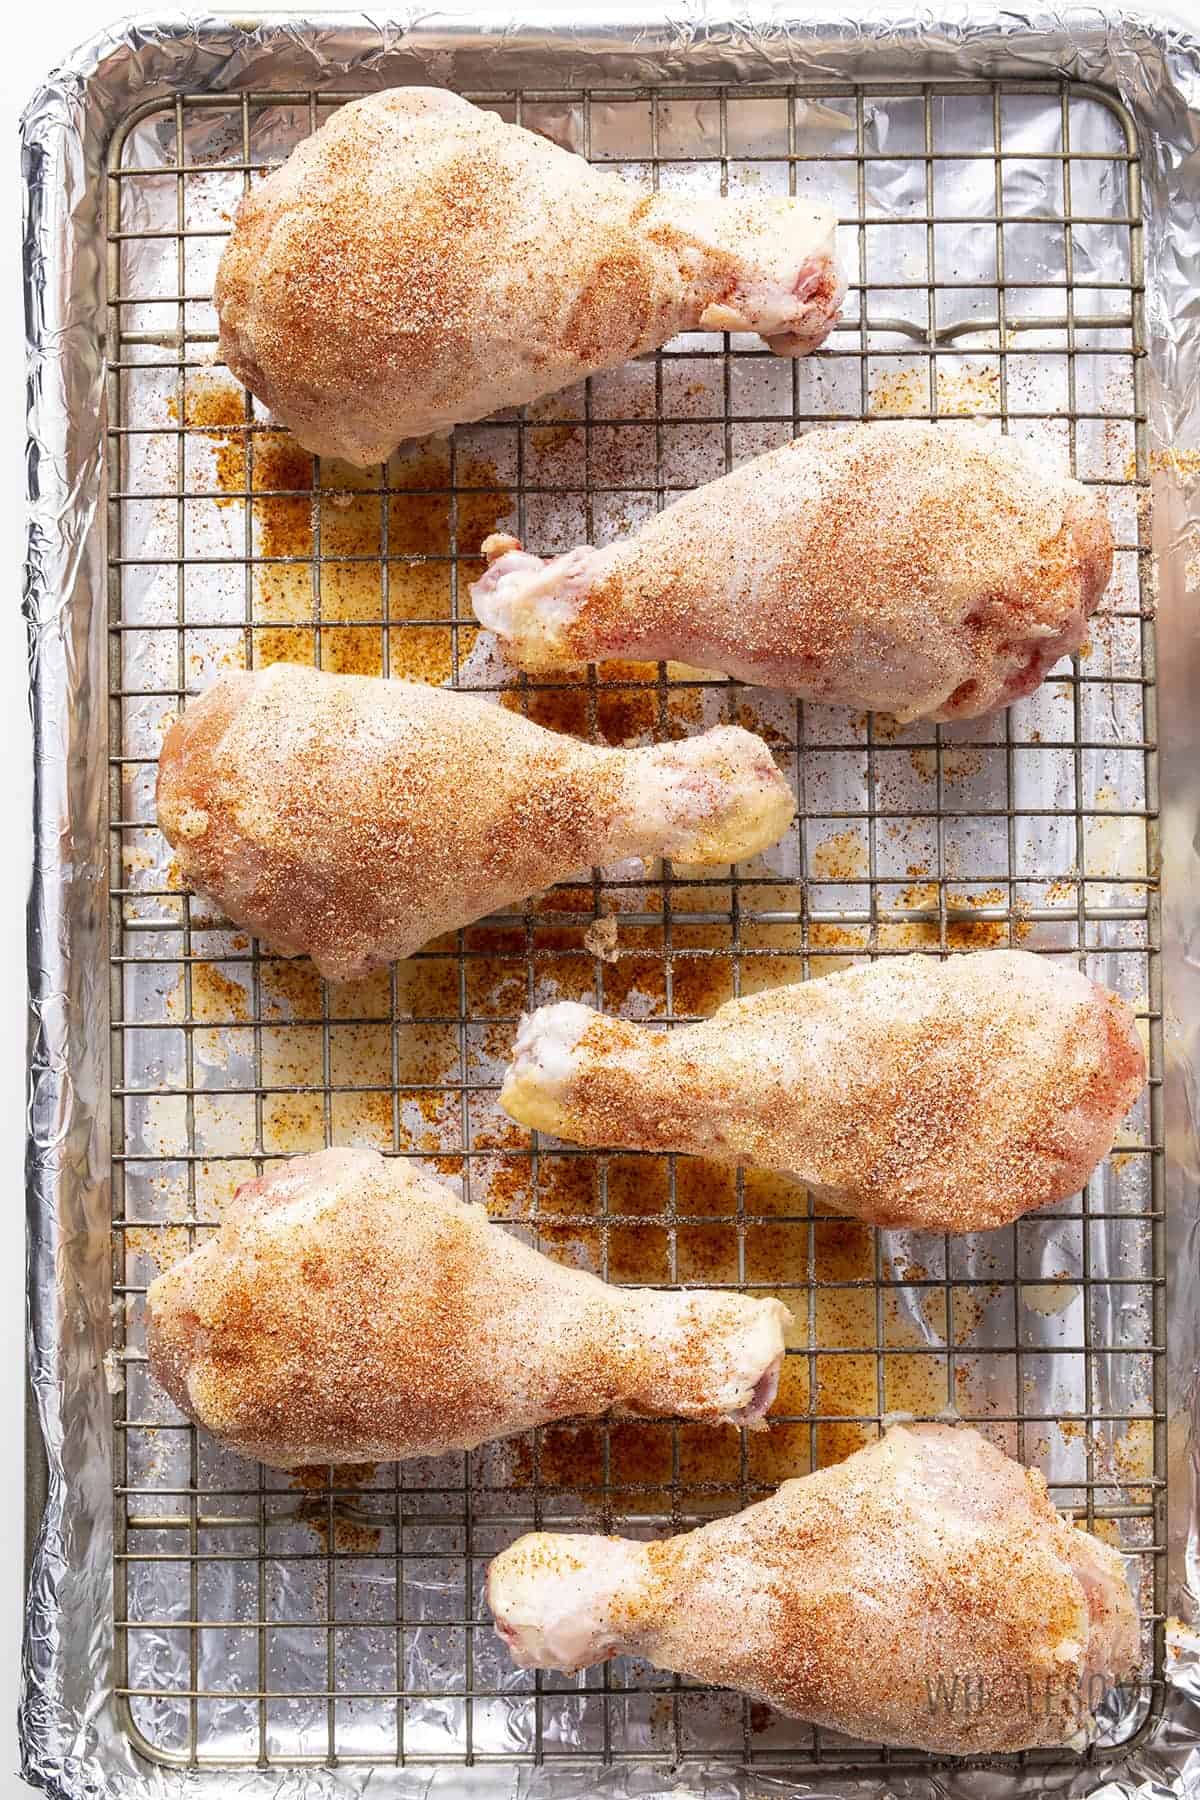
- Prep the oven and pan. Preheat the oven. Line a baking sheet with aluminum foil for easy cleanup, then place an oven-safe rack over the sheet pan. (I like this set — it’s non-stick, so easy to clean.) I prefer foil rather than parchment paper for lining underneath the rack, because it catches the juices more easily.
- Dry, oil, and season. Pat the drumsticks dry with a paper towel to remove excess moisture, then brush with melted butter or oil. (I like this brush that cleans up easily.) Sprinkle spices all over.
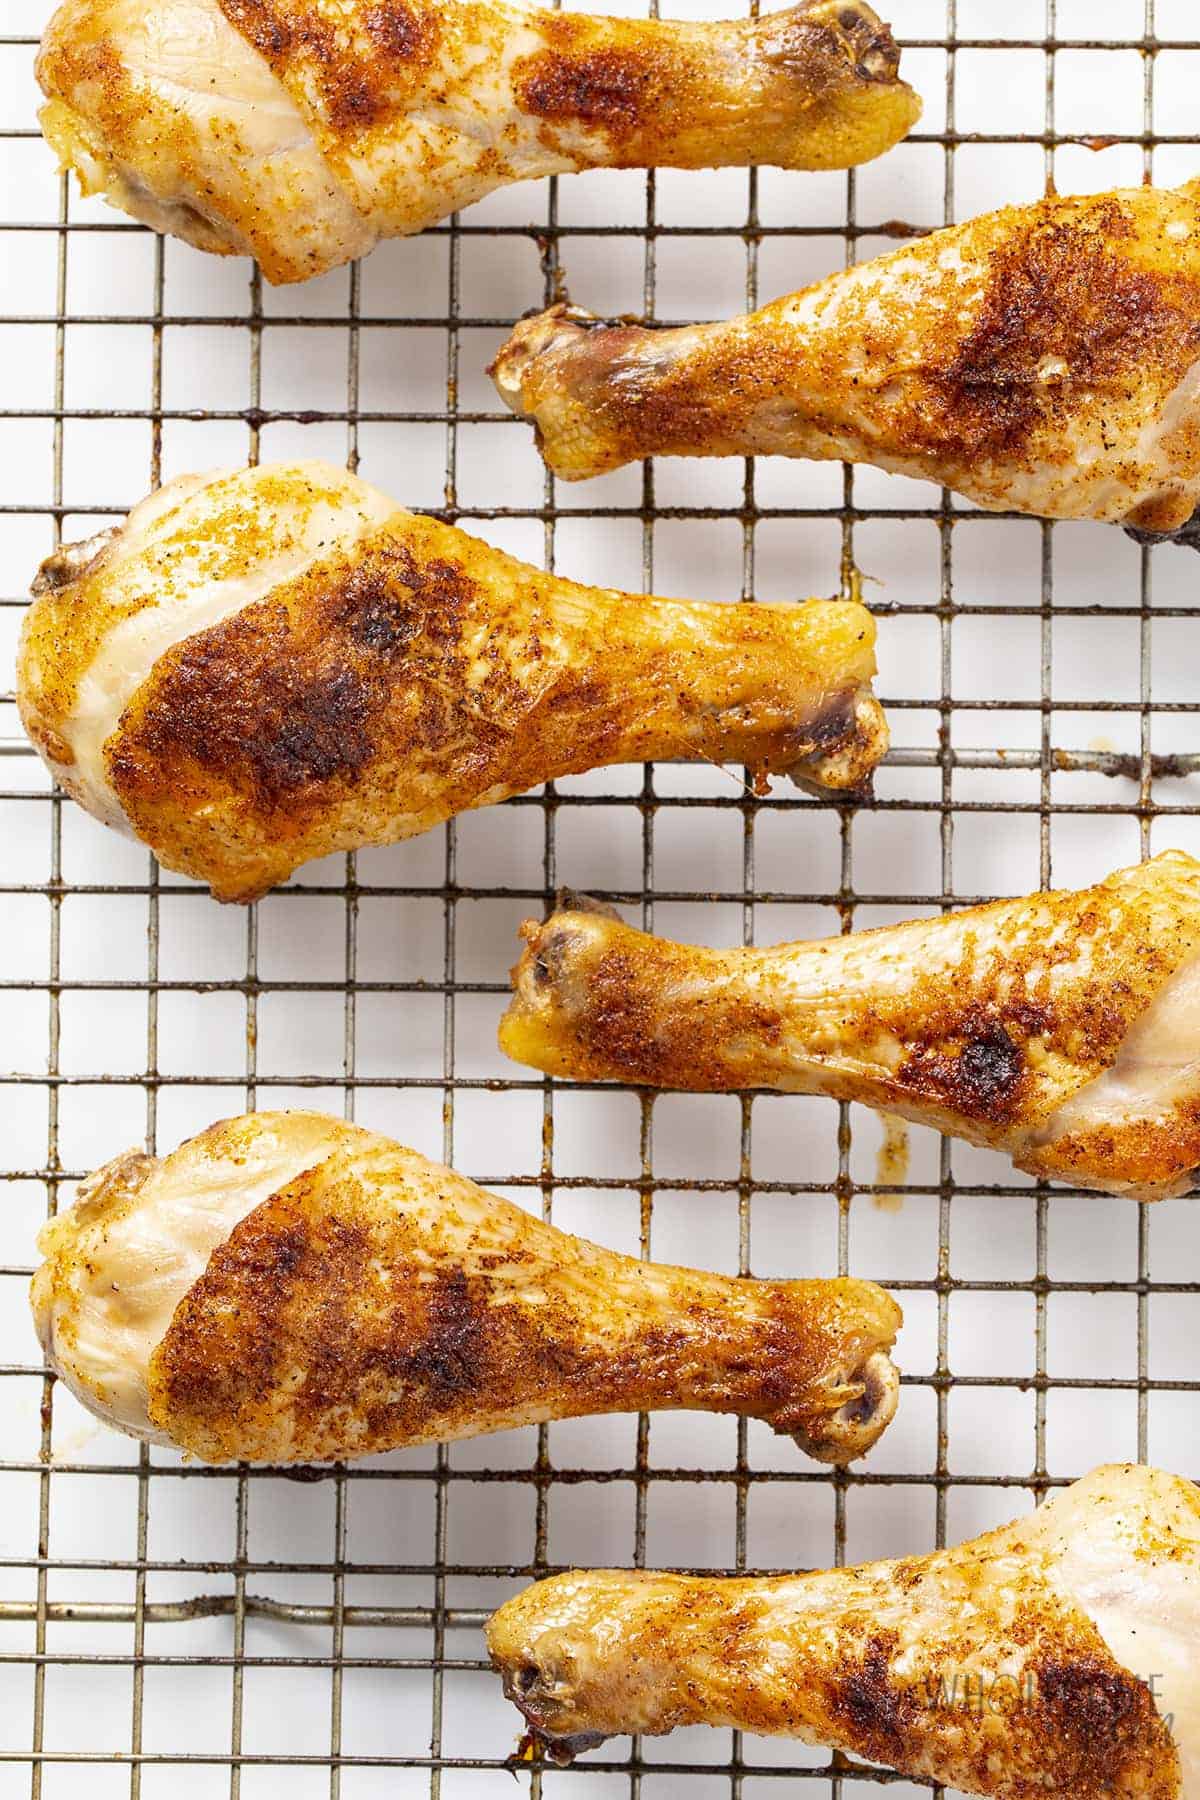
- Bake chicken legs in the oven. Roasting at high heat, flipping halfway through. See my tips below to get them extra crispy!
- Let them rest. Remove from the oven and wait a few minutes before serving — this lets the juices settle, so your baked chicken legs stay juicy inside.

My Recipe Tips
- Why pat dry? I always pat steaks, poultry, and fish dry before cooking, as it helps them all stay more juicy. But for skin-on chicken in particular, this also helps the skin crisp up better.
- Do you have to use a rack? No, and I’ve tried this baked chicken legs recipe on a regular baking sheet, but this baking sheet with rack set makes it so much better. It allos hot air to circulate and extra grease drips down, so it cooks more evenly and crisps up better. And you won’t run out of ways to use it — I also use mine for bacon in the oven, lemon pepper wings, coconut shrimp, and spatchcock chicken!
- Season right on the pan to save on dishes. You can just toss the chicken drumsticks with everything in a bowl or on a cutting board too, but using the baking sheet means less dishes to wash.
- Want to use fresh garlic? I use garlic powder because garlic over the skin will burn. If you want to use fresh garlic, it’s best to put it in a compound butter underneath the skin instead, like I do with my air fryer chicken legs.
- For even crispier skin, sprinkle lightly with baking powder before baking. I do that for this crispy baked chicken and it’s pretty amazing.
- Start baking chicken legs skin side down first. Obviously all sides have skin, but one side has more. The side facing up last ends up a teeny-tiny bit more crispy than the bottom side, so I like to start with the best side down and end with it face up. And flipping is a must, even with the rack.
- Cook to 170 degrees F, not 165. Chicken needs to reach 165 degrees F to be safe (source), but I highly recommend cooking chicken legs in the oven to an internal temperature of 170 degrees F. That’s when the collagen breaks down (in other words, they become juicy and tender). Here’s the instant-read thermometer I use and recommend.
- Broil at the end if needed. If your baked chicken legs are not as crispy as you like, place them under the broiler for a couple minutes to crisp up more. Watch closely so that they don’t burn!
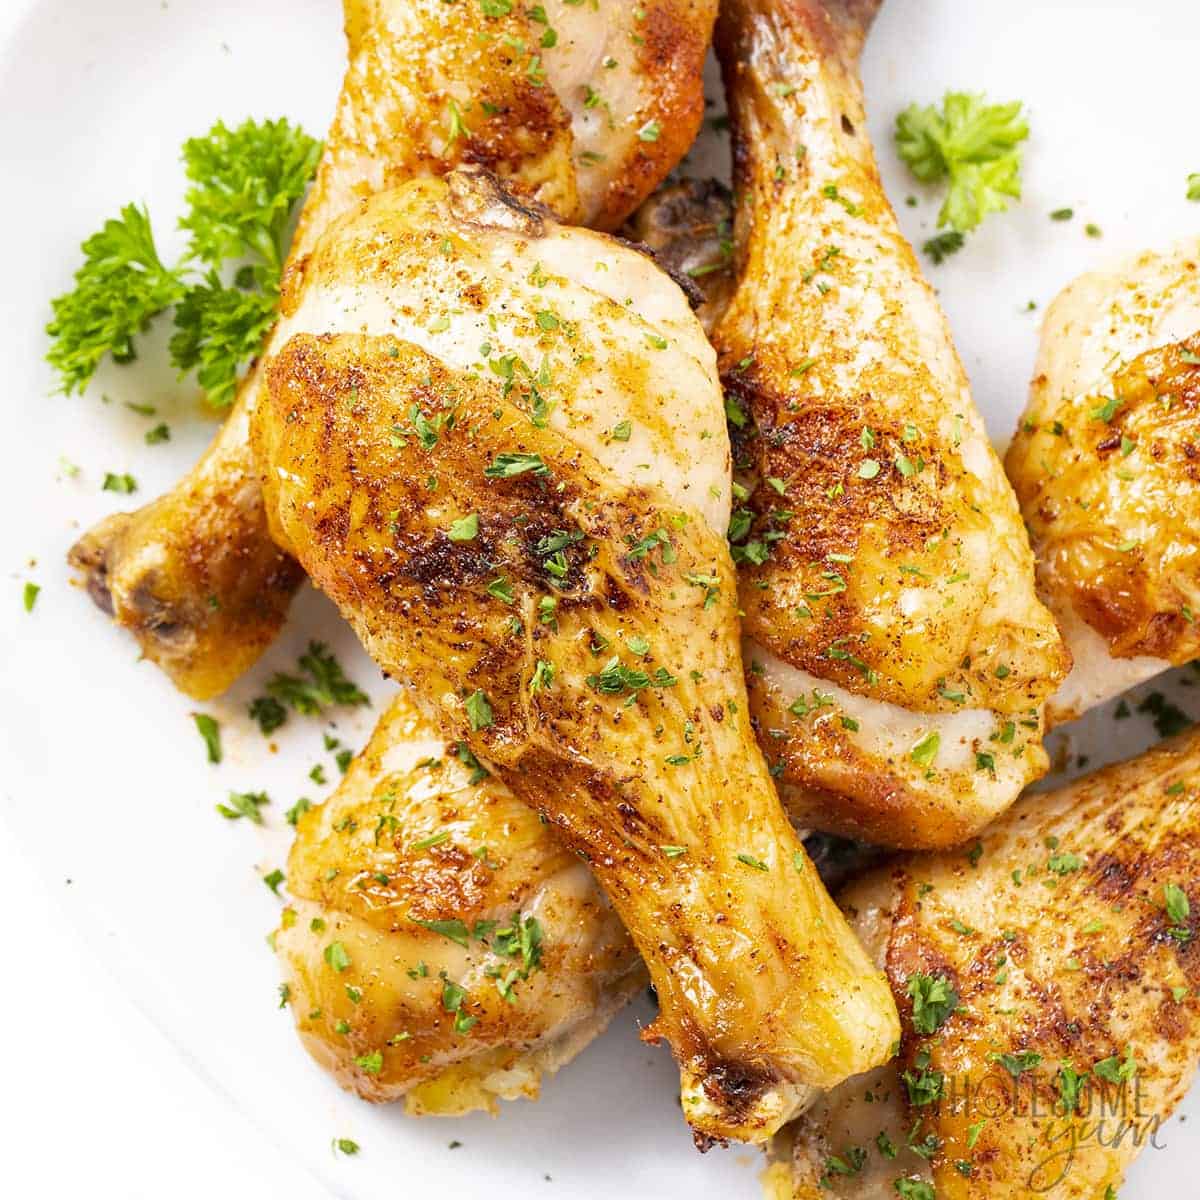
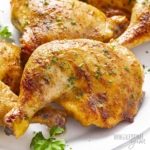
Baked Chicken Legs (Crispy, Easy Recipe)
This baked chicken legs recipe makes them so juicy with perfect crispy skin! You need just a few simple ingredients and easy 10-minute prep.

Instructions
Tap on the times in the instructions to start a kitchen timer.
-
Preheat the oven to 425 degrees F (218 degrees C). Line a rimmed baking sheet with foil and place an oven safe rack on top. (I use this set, which includes the baking sheet and rack that fits perfectly.)
-
Pat the chicken legs dry with paper towels, which will help them get crispy. Arrange the chicken legs on the rack.
-
Brush the chicken drumsticks with melted butter. Season with smoked paprika, garlic powder, salt and pepper.
-
Bake the chicken legs in the oven for 25 minutes. Flip and bake for another 10-20 minutes, until the internal temperature reaches 170 degrees F (77 degrees C).
-
Optional step: If the chicken drumsticks are not as crispy as you like, place under the broiler for a couple of minutes to crisp up the skin more.
-
Let the chicken rest for 5 minutes before serving.
LAST STEP: Leave a rating to help other readers, or tag me @wholesomeyum on Instagram. I’d love to hear from you!
Maya’s Recipe Notes
Serving size: 1 drumstick
- Tips: Check out my recipe tips to help you get the juiciest baked chicken legs with the crispiest skin.
- Store: Keep leftovers in an airtight container in the fridge for up to 3-4 days. The skin does get soft, but you can crisp it up again.
- Reheat: For crispy skin and a juicy inside, I recommend reheating chicken legs in the oven again, this time at 350 degrees F. If the skin is still not crisp, you can place under the broiler for a minute or two. The microwave works in a pinch, but the skin will be soft.
- Freezer meal prep: My favorite meal prep hack with this recipe is to brush with butter and season the chicken, then freeze it raw. That way there is virtually no prep before baking later, and this actually makes them even more juicy!
- More freezing options: You can freeze raw chicken for up to 9-12 months, but already baked chicken legs taste best in the first 3-4 months. I lay them on a parchment lined sheet pan in a single layer and freeze until solid, then transfer to a zip lock bag for compact storage. This method prevents them from sticking together. For best results, thaw before you reheat.
I provide nutrition facts as a courtesy. Have questions about calculations or why you got a different result? Please see my nutrition policy.
Add Your Notes Your Notes
Try More Of My Recipes

© Copyright Maya Krampf for Wholesome Yum. Please DO NOT SCREENSHOT OR COPY/PASTE recipes to social media or websites. We’d LOVE for you to share a link with photo instead.
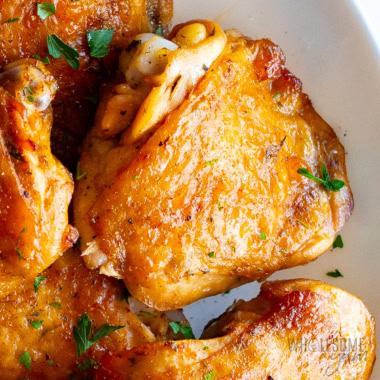
Baked Chicken Legs Recipe
Serving Ideas
There isn’t much that doesn’t go with baked chicken legs. Here are some of my fave side dishes to go with them:
- Vegetables – If you have double ovens like I do, you can make my roasted green beans, loaded cauliflower casserole, or roasted eggplant at the same time as the chicken. Otherwise, I would cook fried cabbage, creamed spinach, sauteed broccoli with garlic, or sauteed zucchini on the stovetop while you bake chicken legs in the oven.
- Starches – Most often, I roasted potatoes, air fry sweet potatoes, or make lighter pasta swaps, like baked spaghetti squash or zucchini noodles.
- Salads – Make it a light meal with my Caprese salad or cucumber tomato avocado salad in the warm months, and my kale salad or winter salad in the cool months.
- Sauces – I think these juicy baked chicken legs are plenty flavorful on their own! If you want a little something extra, serve them with my BBQ sauce, ranch dressing, or sugar-free honey mustard.
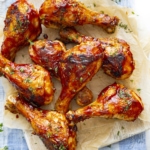
More Easy Chicken Leg Recipes
Looking for more chicken leg recipes? Here are some of my other favorite ways to cook them:


385 Comments
Marilyn
4I am 92 years old and like simple recipes.
Lana Drew
1I love adding the baking powder for crisper skin, without the carb laden coating usually associated with crispy chicken. This is great, too, for a pan of chicken wings. My family loves it!
Wholesome Yum D
0So glad to hear that, Lana! The baking powder trick is such a game changer for crispy skin without the carbs.
Dela
2I love this recipe—thank you for this easy one! I’ve made it about 3-4 times now so far. It’s now one of my favorite to make and new ‘go-to’!
Cee Tee
2Made these exactly as the recipe described (no tweaks aside from cooking a little longer in oven due to how our oven is calibrated) and they turned out great! My husband who normally isn’t fond of drumsticks enjoyed this recipe so much we have now prepare this recipe for dinner often. PS: We like to make it and serve it along with your crunchy kale recipe!
Helen Sohne
2This was perfect! Your recipe found its way into my email inbox just as I was defrosting chicken legs. The cooking method was easy and the seasonings delicious. I followed the advice for extra crispy skin by putting under the broiler, checking after a minute so as not to burn. I have to tell you that my husband and I gobbled up 5 between us. No leftovers!
Laurie is good
1Oh my gosh this recipe was good, my mom and kids loved it and I was requested to remake it again, so awesome.
Sara
1Perfectly seasoned and sooo crispy. LOVED these!
Pat
1Wow, what a tasy great recipe for chicken legs. I followed instructions to the “T” and my chicken turned out crispy & juicy! I’ll definitely be making it again!!! Yum!!
Ava G
0I made this receipe on May 2, 2026. Yum…. great flavour.
Wholesome Yum D
0Ava, love that you made it recently! So glad you enjoyed the flavor. 😊
Madeline Felix
0I made this recipe last night for dinner with your suggestion of air fryer potatoes and a salad wow it was delicious chicken was crispy but juicy and very tasty 😋 my entire family loved it!!
Wholesome Yum D
0Madeline, thank you so much for sharing this! I love that you made it with the air fryer potatoes and a salad, that sounds like the perfect dinner. It’s the best when your whole family loves what you make!
Margo
0Hi! I’m planning to make a large batch of these for an upcoming holiday. To ensure the kids like it, I thought about adding a little honey. Would you recommend that?
Maya | Wholesome Yum
0Hi Margo, You can do that, but I would brush it on toward the end because it can burn easily with the long baking time.
Jerimie
0Nvm im blind
Jerimie
0Talked about cooking the drum to 175° internally but never said where to preheat the oven to
Maya | Wholesome Yum
0Hi Jerimie, I’m glad you found it based on your other comment, but replying in case this helps someone else. I do have the oven temperature on the recipe card above, so make sure you (and anyone else reading) look there for full amounts and temperature. Hope you love these baked chicken legs!
jersuerhodes
0I made these the other night and they received great raving reviews! They were so crispy and delicious. Thank you Maya!
Wholesome Yum D
0So glad they were such a hit! Crispy is always the goal with these, and it makes me happy to hear everyone loved them. Thanks for giving them a try!
Ronny Mason
0Happy Holidays! Used your recipe for 52 chicken pieces (Drumsticks/Thighs) for my mother in laws church function…Amazing! The feedback was super positive and they raved! The bad part…They want me to do the next party as well! LOL
Maya | Wholesome Yum
0Wow, that’s incredible, Ronny! That’s quite a feat making so many and I’m so happy to hear these baked chicken legs were well received. Happy holidays!
Wendy Kasprowicz
0Lacks flavor but very easy to make
Maya | Wholesome Yum
0Sorry to hear you didn’t find these flavorful, Wendy! I thought they were very flavorful. Just to confirm, your chicken was a total of 1.5 pounds and not more? If your drumsticks are large, I would increase the amounts of the seasonings.
Genie
0Plan on trying this..mainly because of your simple but very informative directions. I appreciate the ‘hints’ and reasoning behind them.
Maya | Wholesome Yum
0I’m so happy to hear that, Genie! Please let me know how your chicken turns out.
Marie Alm
0I’ve made this many times and it never fails to be fantastic. Also, I got the baking sheet and rack you said you use in this recipe and it is my favorite!! I use it often and it still looks great. Thanks, Maya, for the umpteenth time. I love your recipes!
Wholesome Yum D
0Aw, thank you so much, Marie! That makes me so happy to hear, especially that the pan and rack are working out so well too!
Lisa
0Chicken was yummy! Splattered all over my oven while baking…any tips to prevent that? I didn’t want to cover the chicken because I wanted the skin to be crispy. Thanks!
Maya | Wholesome Yum
0I’m glad it tasted good, Lisa! You’re right, covering ruins the crispness. A baking dish with taller sides reduces splattering a bit, but it also turns out less crispy than using the rack. The only other way I can think of is to cover the chicken for most of the baking time and then uncover at the end to crisp up the skin, but in my experience it’s still less crispy this way.
Danna
0I made these chicken legs for dinner tonight. I followed the recipe exactly. My husband is not a fan of chicken and he ate 3 legs! He also commented, “This is some juicy chicken”. Believe me, that is high praise. I may be able to serve these every couple of weeks.
Highly recommend!😊
Maya | Wholesome Yum
0Wow, that’s amazing, Danna! I’m so glad my recipe turned chicken around for your husband. Thank you.
Holly
0Disabled and a mature, very mature, home cook. Fell in love with how easy this recipe is. Have made it a few times now. Only 2 changes I made was omitting paprika because of allergy. And I mixed some plain bread crumbs in with your seasoning amounts in a zipper bag and coated drumsticks for extra crunch. Thank you so much for this amazing treat! (Just to let you know…sometimes the link to visit the site to go to recipe is not there.)
Maya | Wholesome Yum
0I’m glad you liked them, Holly! Thank you for sharing your variation. Can you please explain a bit more what you mean by the link to the recipe is not there? Where is “there”? I don’t see any issue but would like to fix it if there is one.
Bee
0Best chicken legs recipe. It got raves from the husband. Woohoo!
Maya | Wholesome Yum
0Awww, thank you, Bee!
Rebekah
0Very delicious! I used this recipe for 2 legs and 2 thighs. So simple and tasty!
Maya | Wholesome Yum
0Thank you, Rebekah! I’m glad you enjoyed this recipe.
David G.
0I’ve made this for my family a few times. It’s such a simple recipe but so tastey! My wife loves it!😋
Carmela Crespo
0I was going to skip the paprika; I’m glad I did not. Such a quick and easy recipe, and very flavorful too!
Don
0Great recipe. Tastes great. Used organic chicken.
Maya | Wholesome Yum
0I’m glad you liked it, Don! I love it with organic chicken, too.
Beverly
0Can you do this recipe using a cast iron skillet in the oven instead of a baking sheet and rack?
Maya | Wholesome Yum
0Hi Beverly, Possibly, but they will turn out less crispy than using a rack.
Beverly
0I have experimented with this recipe using chicken legs and thighs in my oven in a very large cast iron skillet, and they came out just as crispy, moist, and delicious than using the original cookie sheet method….
Maggie
0This recipe was so easy to follow and it was delicious even my picky eater liked it!! Thank you.
Jackie Turner
0This recipe was very good. Because of the size of the chicken legs, I had to use a longer cooking time of 25 on one side and 25 on the other side. I was surprised at how well it came out considering, it was oven baked, but everyone loved it. Will definitely add to the rotation!
Maya | Wholesome Yum
0I’m so glad you and your guests (or family?) liked them, Jackie! Yes, the baking time can vary depending on the size of the chicken legs, so just use a meat thermometer to confirm they reach 170 degrees F.
jersuerhodes
0Super easy and delicious!
apennant
0Loved this chicken leg recipe.
I did a combo of the chicken thigh and leg recipe. Using the elements I thought would work best for our family. It was a hit, legs were so juicy and flavourful. My toddler who dislikes most meats, gave it her stamp of approval :). We are dairy free and used Vegan Becel instead of butter and it worked perfectly. I had to broil to get some Crispíness on the legs, but absolutely no complaints :).
Maya | Wholesome Yum
0So glad to hear that! Yes, always a win when the picky toddler approves, haha!
Debee
0Thanks for such an easy to follow wholesome recipe. Job well done, a well done job.
Blessings,
Amy
0Delish! Crunchy juicy!
Vicky Flesch
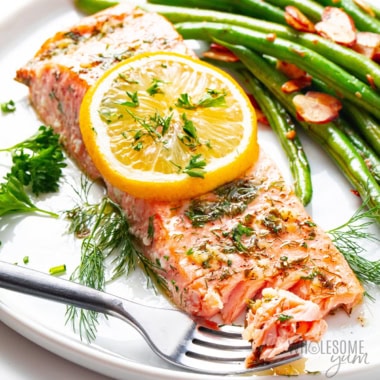
0Please send me the recipe for Aiir Fryer Salmon. Thanks!
Maya | Wholesome Yum
0Hi Vicky, Here is my air fryer salmon recipe. I also have one for air fryer salmon bites.
Dawn
0These were good, definitely needed broiler. Also a bit more seasoning but quick and very juicy. Will be adding this to our regular recipe rotation.
Joy
0I loved these chicken legs and so did my family. I will be making them again.
Seán
0Maya’s recipe is really easy and versatile. I use it whenever we get a craving for drumsticks.
Amanda
0I absolutely loved it!!! Made it a few times now and perfection every time! Thank you for sharing. Question… my son wants these but with buffalo sauce on them. When would be the best time to put it on?
Maya | Wholesome Yum
0So glad you liked these, Amanda! If you wan tto add buffalo sauce, I would just mix the buffalo sauce with butter and brush it on at the end, like I do with buffalo wings.
JOHN LINDQUIST
0SIMPLE AND QUICK
Sonja Lillie
0Can I use chicken breasts or thighs for this recipes and long do I bake them?
Wholesome Yum D
0Hi Sonja, I have a recipe for both baked chicken thighs and baked chicken breast that you can use.
Sandy
0Can you use olive oil instead of butter for the chicken? I already tried with butter and it fine just want know how it be with oil instead.
Wholesome Yum D
1Hi Sandy, Yes, you can use olive oil.
Lynn
0How would I cook in convection oven?
Wholesome Yum D
0Hi Lynn, I haven’t tested this recipe with the convection setting. It should work, but I’d probably reduce the temperature to 400 degrees F and watch the cook time.
Pamela Morin
0loved these drumsticks, extra crispy skins and still juicy inside. I will be making these alot
Jennifer
0Love this! Reminds me of my moms chicken growing up.
jersuerhodes
0Delicious and easy!
Kristyn
0One of my favorite go-to meals!! Everyone loves these drumsticks! They are tasty & go with just about anything!!
Melissa
0This is such a fun switch up from what I normally do with chicken! My kids thought this was so delicious and fun!
Allyson Zea
0Perfect for an easy healthy dinner! Love these!
Jessica
0I tried this recipe last night and absolutely loved it! The skin was super crispy and the inside so juicy!! Plus it was quick and easy to put together. This will definitely be one of my weekly dinners now.
Michele
0Thank you for sharing this recipe. It’s an easy prep and seasoning method. I did one thing different. I did not coat with butter before seasoning and cooking. I seasoned, cooked the one side, THEN when I flipped the drumsticks coated with melted butter. The skin was crispy, chicken was moist and delicious! It was enjoyed with a side of au gratin potatoes. I look forward to trying several of your recipes. Thanks for sharing and Happy New Year!
BeBe
0Thank You for sharing!!!!!
Lara M
0Absolutely fantastic! The flavors were perfect. The cooking time was perfect. I’ll definitely be making this again & again.