 Shop
Shop My
My Custom


FREE 5-Ingredient Recipe EBook
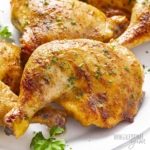
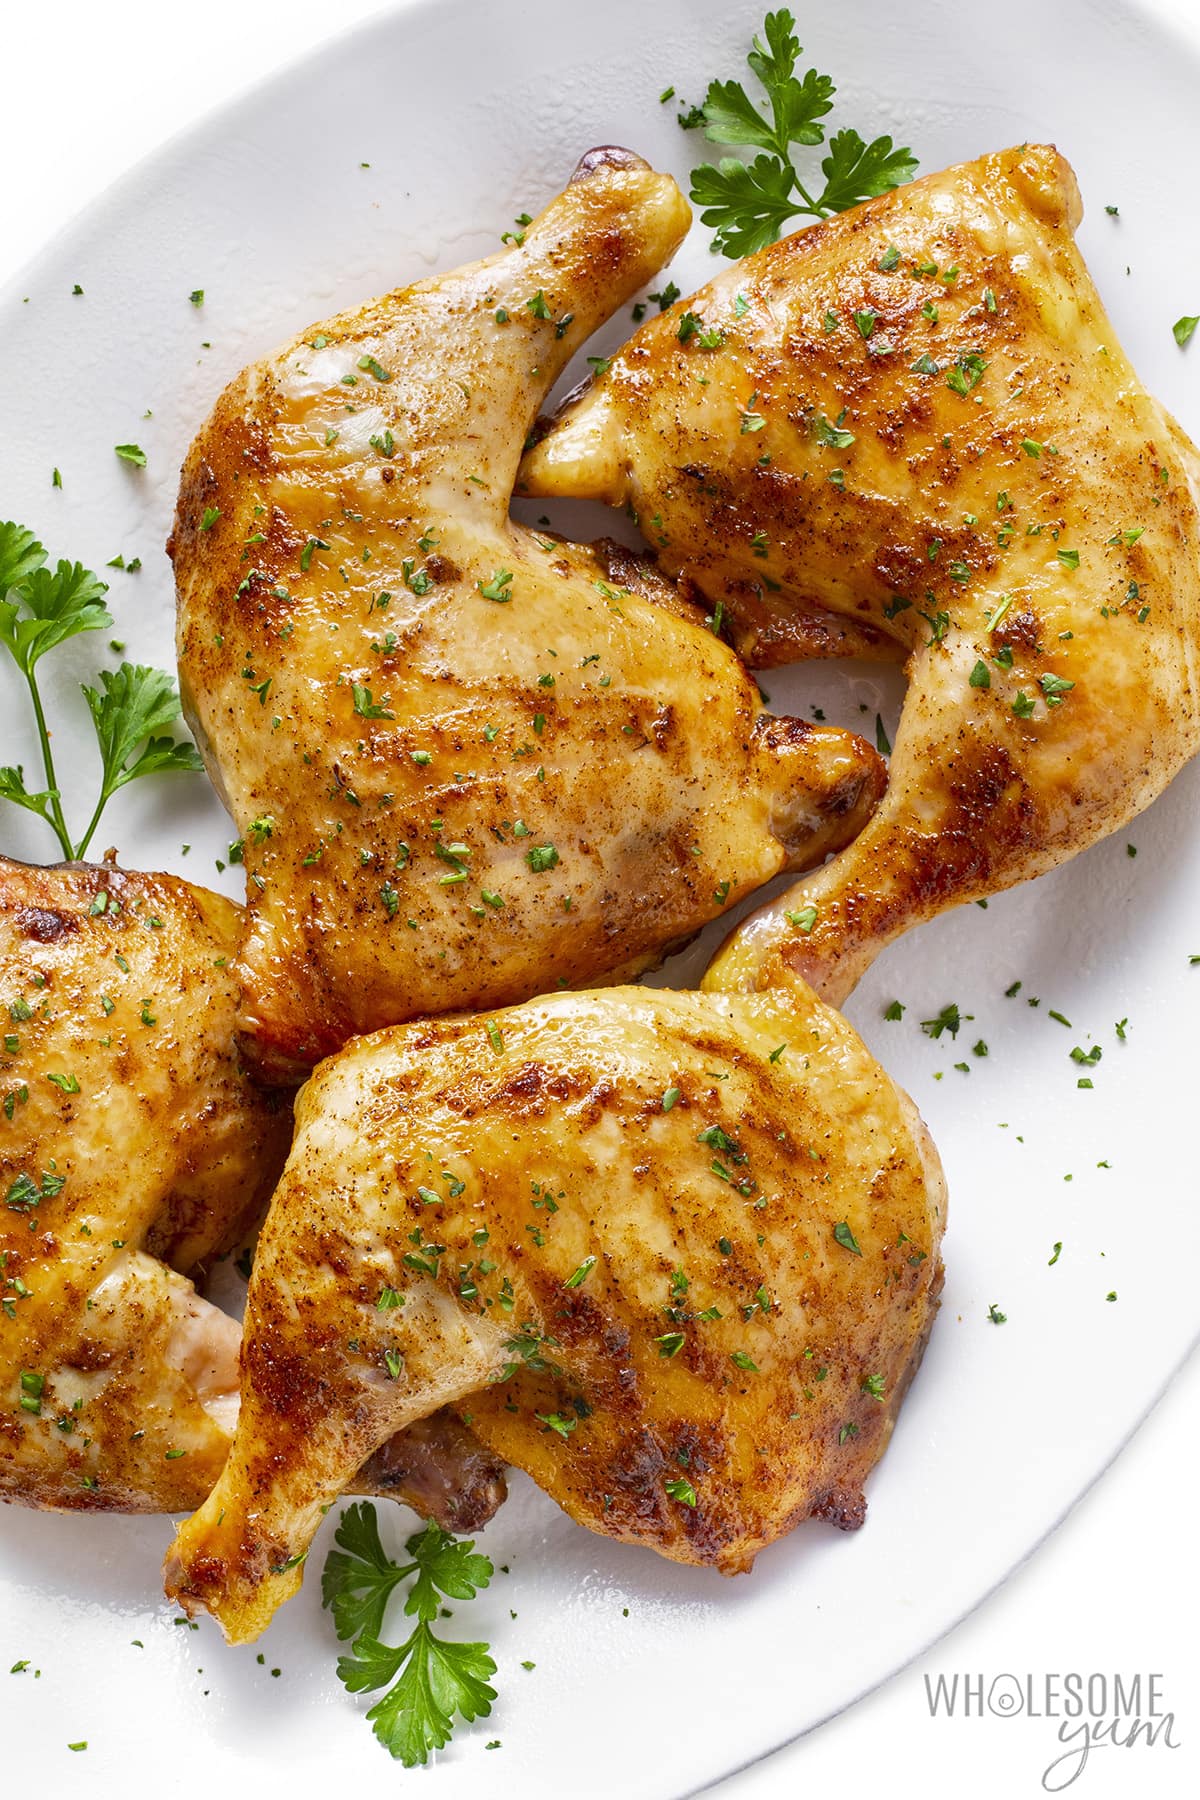
GET IT NOWMy Crispiest, Juiciest Baked Chicken Leg Quarters

I’ve been baking chicken drumsticks and chicken thighs for decades, but when I realized a few years ago that chicken leg quarters are a more cost-effective alternative for literally the same thing, I felt like I discovered a secret. (Now I just feel silly… am I the only one that didn’t know?!) I make these baked chicken leg quarters all the time now — here’s why:
- Juicy and tender with crispy skin – Golden and crispy outside, practically fall-off-the-bone juicy inside. It’s the best.
- Effortless flavor – Chicken leg quarters are entirely dark meat, which means loads of flavor! Don’t get me wrong, a healthy baked chicken breast can be juicy, but it can’t beat dark meat in the flavor department.
- Quick and easy – I season the chicken with pantry basics (chances are you have them on hand) and pop them in the oven. The prep takes just minutes!
- Cost effective – This cut of chicken is such a good value. Just like whole chicken wings are cheaper than ones that are cut, chicken quarters cost less than thighs and drumsticks separately.
Serve these chicken leg quarters with a healthy side dish and you’ve got a winner of a chicken dinner. Make them with me!

Ingredients & Substitutions
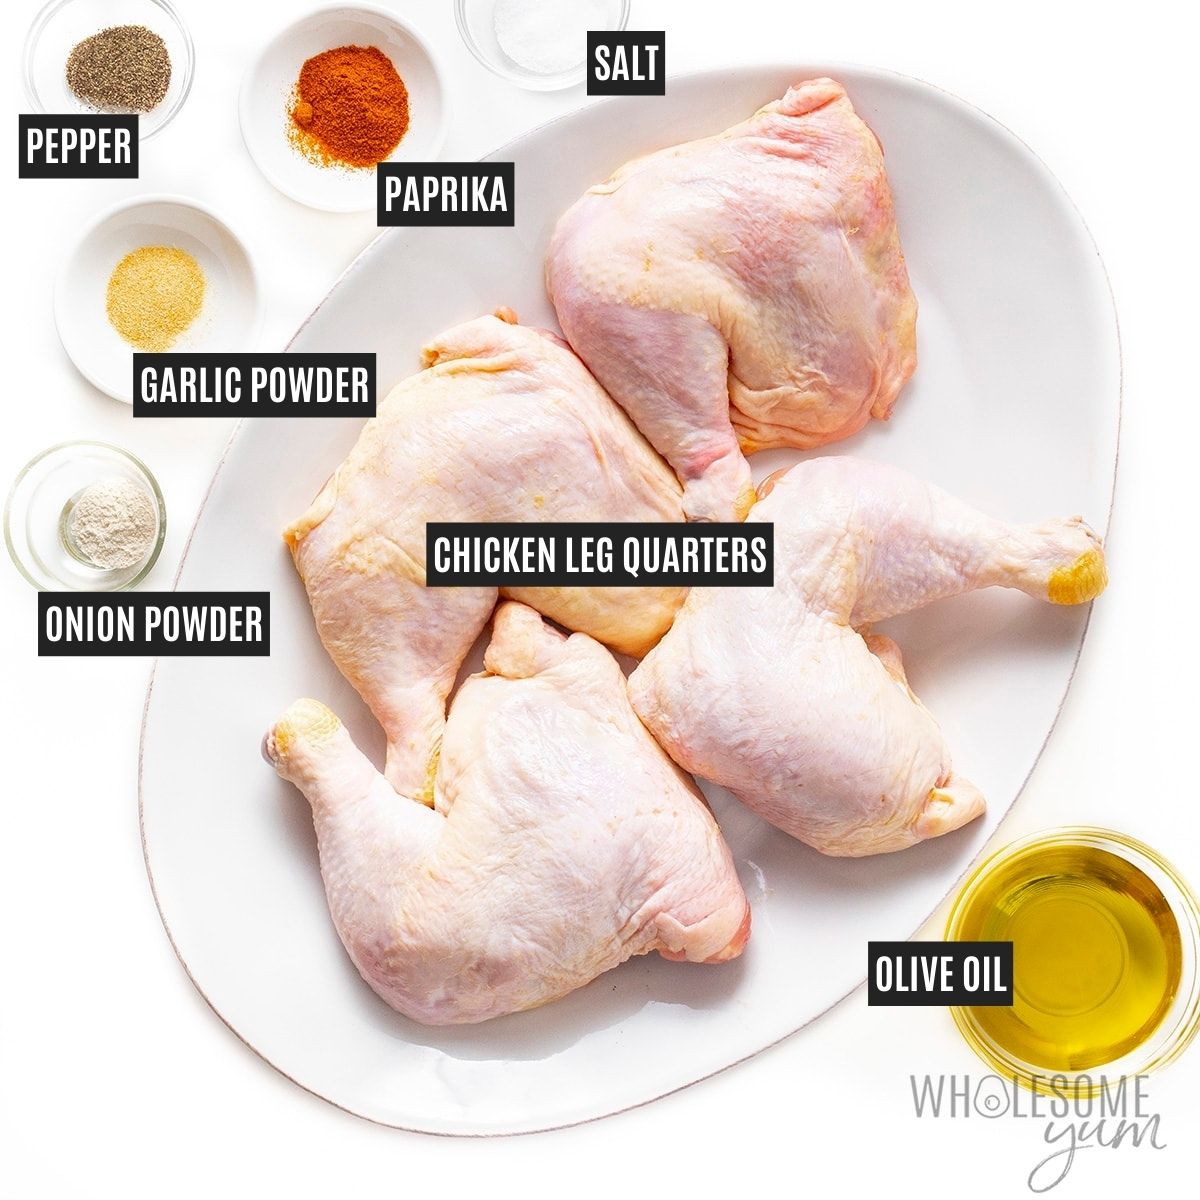
Here I explain the best ingredients for my crispy baked chicken leg quarters, what each one does in the recipe, and substitution options. For measurements, see the recipe card.
- Chicken Leg Quarters – Sometimes I see them called chicken quarters or chicken hindquarters at the grocery store. They are simply whole chicken legs (thighs and drumsticks) that also have a piece of the back attached.
- Olive Oil – Oil adds flavor, helps the seasonings stay on, and most importantly, gets the skin crispy. Any heat-safe oil works — sometimes I use avocado oil instead.
- Spices – You can season these with any spices you’d normally use for chicken. My go-to blend is paprika, garlic powder, onion powder, sea salt, and black pepper. If you like a kick, 1/4 teaspoon of cayenne pepper makes a nice addition. Or if you want some comforting flavor, use my homemade poultry seasoning.
How To Cook Chicken Leg Quarters
I have step-by-step photos here to help you visualize the recipe. For full instructions, including amounts and temperatures, see the recipe card.
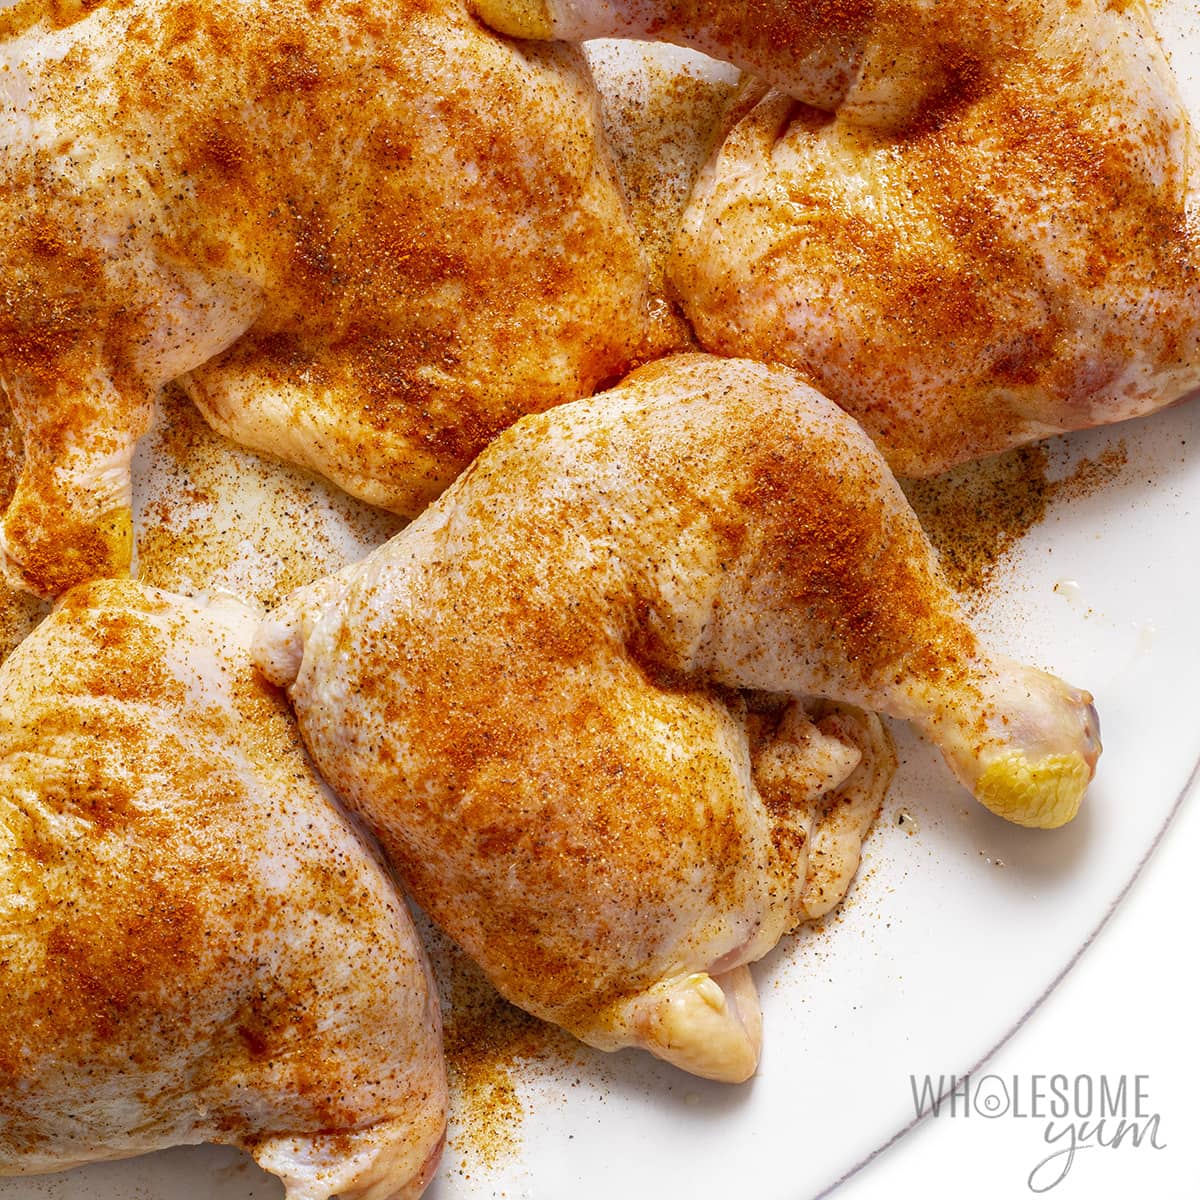
- Prep and dry. Preheat your oven. Pat the chicken dry with a paper towel to remove excess moisture. This allows the skin to get crispy later!
- Season. Brush the chicken with olive oil. Season with paprika, garlic powder, onion powder, salt, and pepper. Make sure to get both sides!
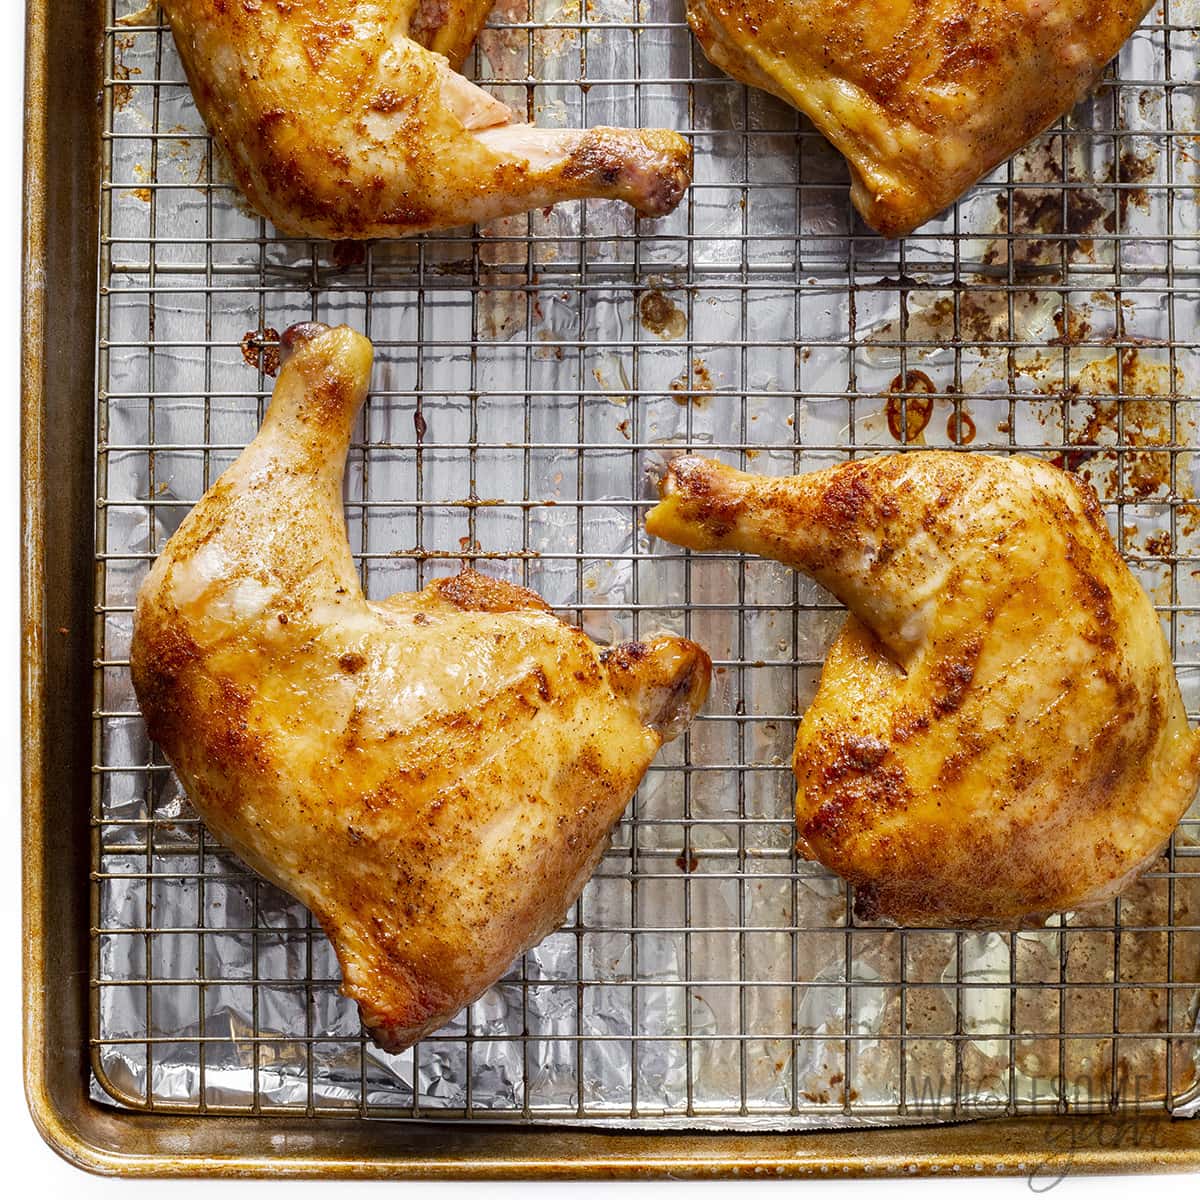
- Bake. Arrange the chicken on an oven-safe rack fitted over a baking sheet (I love this thing!), skin side down. Bake chicken leg quarters in the oven, flipping halfway through, until crispy and cooked through.
- Rest. Let the chicken rest for 5 minutes before serving. This helps the juices settle so that the chicken won’t be dry.
You can serve the chicken quarters whole, but they are very large. So, in my family we usually cut them apart (separate the thighs and drumsticks), and everyone chooses the cut they prefer.
My Recipe Tips
- You can pre-mix the spices. I find that it can save time to mix them in a small bowl and then season the chicken with the mixture all at once. The flip side is it’s one more dish to wash, so it depends on your needs.
- Want extra crispy skin? Mix a couple teaspoons of baking powder with the spices, like I do for my other baked chicken recipe.
- Baking on a rack isn’t a must, but improves results. I have this set and it allows air flow all around the chicken while baking. Translation: even cooking and crispier skin! But if all you have is a regular sheet sheet pan, that’s totally fine as long as it’s not crowded.
- Line the pan with aluminum foil (underneath the rack) if you like. Lining the pan is not required, but makes for easier cleanup.
- Bake skin-side-down first. It’s best to have the chicken leg quarters skin-side-up last, because this keeps the skin crispy. When I cooked them skin side down last, the skin was softer.
- Use a meat thermometer for perfect results. Cooking times can vary depending on the size of your chicken quarters. I like this instant-read thermometer, but actually use this probe thermometer the most because it beeps when ready and I don’t have to keep checking. It’s hard to overcook dark meat, so don’t stress if you don’t have a thermometer, but having one allows you to take advantage of my next tip…
- Cook to 170 degrees F for the juiciest results. Like all chicken recipes, baked chicken quarters are safe to eat once they reach 165 degrees F. However, because leg dark meat has more connective tissue than white meat, it will be more tender if you cook it to 170-175 degrees F. I always do this for dark meat and you’ll taste the difference!
- Broil if you need to crisp the skin more. I don’t usually need to, but you can place the chicken under the broiler for a few minutes at the end.
- Can you air fry them? Absolutely! I bake the chicken for this recipe, but if you want an even faster method, you can air fry chicken leg quarters, too.
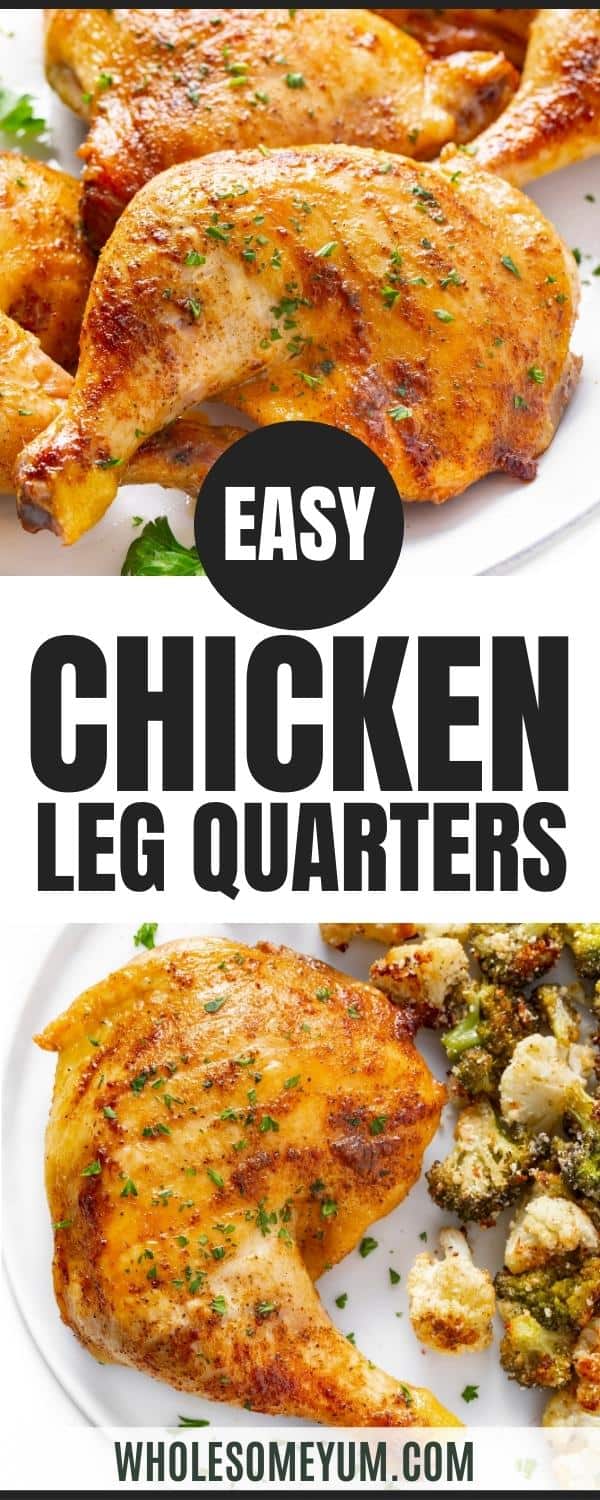
Baked Chicken Leg Quarters (Crispy & Juicy)
My easy recipe for baked chicken leg quarters in the oven makes juicy, crispy chicken every time. You need just 5 simple ingredients!
Instructions
Tap on the times in the instructions to start a kitchen timer.
-
Preheat the oven to 400 degrees F (218 degrees C). Line a baking sheet with foil and place an oven safe rack on top.
-
Pat the chicken leg quarters dry with paper towels, which will help them get crispy.
-
Brush the chicken quarters with olive oil on both sides. Season both sides with paprika, garlic powder, onion powder, salt, and pepper.
-
Arrange the chicken on the rack, skin side down. Bake the chicken leg quarters in the oven for 15 minutes. Flip and bake for another 20-30 minutes, until the internal temperature reaches 170 degrees F (74 degrees C).
-
Optional step: If they are not crispy enough for your liking, place under the broiler for 2-3 minutes to crisp up the skin even more.
-
Rest for 5 minutes before serving.
LAST STEP: Leave a rating to help other readers, or tag me @wholesomeyum on Instagram. I’d love to hear from you!
Maya’s Recipe Notes
Serving size: 1 chicken leg quarter
- Tips: Check out my recipe tips above to help you get the juiciest chicken leg quarters, ways to crisp up the skin more, how to make cleanup easier, and more.
- Storage: Keep leftovers in an airtight container in the refrigerator for up to 3-4 days. The skin does soften, so I usually remove the meat from the bones and repurpose it for soups or salads.
- Reheat: If you want to reheat the chicken leg quarters whole, the best method is the oven at 350 degrees F. You can place them under the broiler in the last few minutes if the skin isn’t crisp.
- Freeze: You can freeze the cooked chicken in zip lock bags for up to 3 months, or raw chicken quarters for up to 6-12 months. Thaw in the fridge overnight.
I provide nutrition facts as a courtesy. Have questions about calculations or why you got a different result? Please see my nutrition policy.
Add Your Notes Your Notes
Try More Of My Recipes


© Copyright Maya Krampf for Wholesome Yum. Please DO NOT SCREENSHOT OR COPY/PASTE recipes to social media or websites. We’d LOVE for you to share a link with photo instead.
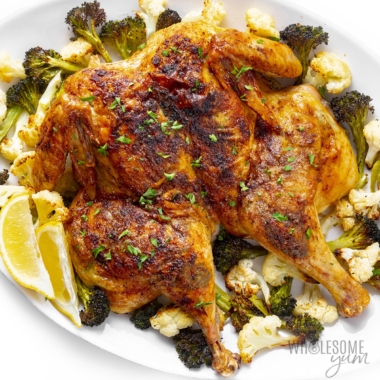
Baked Chicken Leg Quarters
Serving Ideas
Somehow, these baked chicken leg quarters are flavorful and neutral in flavor at the same time. Does that make any sense? The point is they go with anything. Here are some of my favorite sides to serve with them:
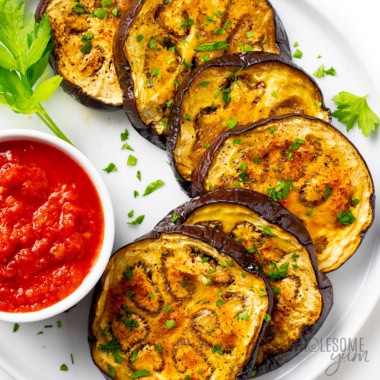
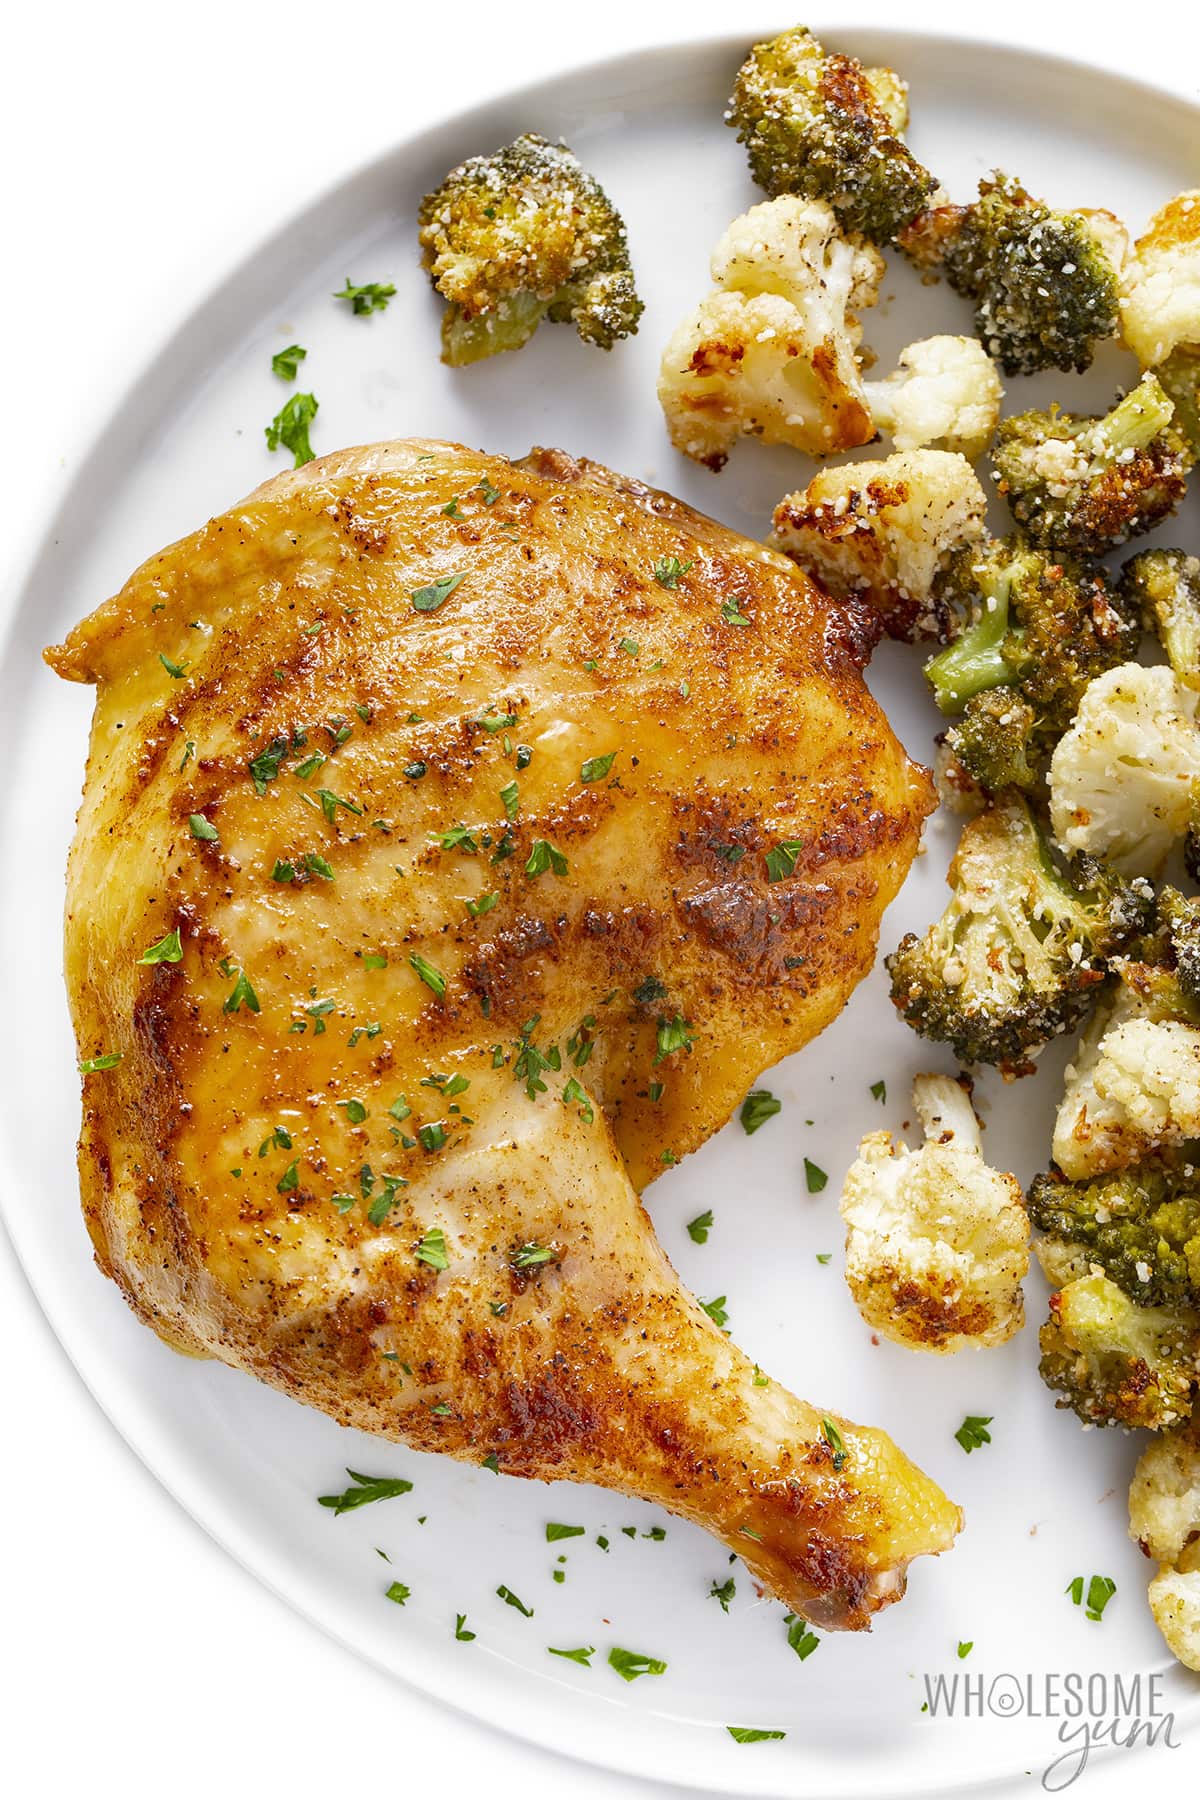
- Vegetables – Chicken and veggies is literally the meal I make most often. Particularly with chicken leg quarter recipes, though, vegetables can balance the heavy main dish. I like to saute eggplant, air fry cauliflower, or whip up some patty pan squash while I have the chicken quarters in the oven. But you can also roast broccoli, broccoli and cauliflower (pictured above), or asparagus first and just cover to keep warm.
- Potatoes – For a more comforting meal, make my Instant Pot sweet potatoes or even Greek lemon potatoes. My family’s go-to is simple, buttery air fryer potatoes — my kids ask for them often.
- Salads – For a lighter meal, try my creamy cucumber salad, earthy beet salad, or simple arugula salad.
More Baked Chicken Recipes
If you love chicken as much as I do, check out my other easy baked chicken recipes:


202 Comments
Hank
1This is a great recipe! I had to cook mine a little more than 30 min. I added some slap ya mama seasoning and it turned out juicy and crispy! Mine turned out like blackened / jerk chicken . I usually don’t cook quarters (which is my favorite part) I will now! Thank you so much!
Wholesome Yum D
0That sounds delicious, Hank! I love that you made it your own with the seasoning and crispy, juicy quarters are the best. So glad you enjoyed it!
Jonetta
1Best quarters I’ve had in a long time. Juicy & crispy. Just the way I like them. Have also used your recipe for chicken breasts &/thighs. Love that the ingredients are things usually on hand.
Musa
0I’d like to get more recipe and salad recipe
Maya | Wholesome Yum
1Hi Musa, You can find all my recipes here, and my salad recipes here.
Maya | Wholesome Yum
0I’m so glad to hear that, Jonetta! Yes, I try to make my recipes with easily accessible ingredients. Enjoy!
Heather Fritsch
1Kids and I all loved it! Have to add to our regular rotation. I used melted butter, instead of olive oil, as we were out.
Maya | Wholesome Yum
0Thanks, Heather! I’m happy you and your family liked these chicken quarters.
tracey
1Very easy. Great for beginner cooks.
I sent this recipe to my Granddaughter she and her friends loved it.
Thank you
Dee Em
1Terrific! Chicken quarters are the best priced poultry option – if you live near a Walmart, they may provide 10 pound bags of quarters for just $7.50, not per pound, but TOTAL – check it out! This recipe not only provided me with a fast go-to meal, but gave a lot of more general tips that I will continue to use for other recipes. Thank you, Maya – this is great!
Tracey
0I bought 2 of those same bags at Walmart last week, good to know it wasn’t just a one time sale price. But I only paid $5.57 per bag of 8 leg quarters. Currently it’s the only meat I can afford. I’m using this recipe today if I can borrow some olive oil. If not may try regular veg oil.
Sandra
0You won’t notice the difference enough in this recipe to go ‘borrow’ olive oil for. Best save that for a recipe where you really taste the difference! Enjoy!
Chris C.
0Totally! I was shopping for quarters late this past week at my local H‑E‑B (big in Texas), found only a big bag…for $5.72!! Regardless, the smoked ones I did were great, and I have some leftover to tackle this recipe with. I love how simple yet tasty it will be!!
Julie Hasting
0Can you brush on bbq sauce at the end?
Maya | Wholesome Yum
0Hi Julie, Yes, of course! Enjoy!
Rosemarie Ann Terhune
0Finished. Looks delicious. Made for 2 neighbors and myself. Ty.
Wholesome Yum D
0That’s so thoughtful of you, Rosemarie! I love that you made it to share with your neighbors too. 🙂
Rosemarie Ann Terhune
0Easy to make. Thank you. ❤️
Wholesome Yum D
0Hi Rosemarie, so glad you found it easy to make! Thanks for sharing! ❤️
Abby
0It should called Chicken Whole Leg not Chicken leg quarters or chicken quarters or chicken hindquarters.
Maya | Wholesome Yum
1Hi Abby, Chicken quarters or chicken leg quarters are the most common names for this cut of chicken, but feel free to call it whatever you’d like.
Bonnie Betts
0What is the oven temperature? I don’t see one listed
Maya | Wholesome Yum
0Hi Bonnie, This info is on the recipe card above. Make sure you read it so you don’t miss a step or amount.
Brenda
0I made this chicken recipe and OMG. It was so good. I made two so I have my lunch for tomorrow.
Wholesome Yum D
0Brenda, I love that you planned ahead with a second one for lunch… so smart! I’m thrilled you thought it was that good. Thank you for trying it!
David F
0Bookmarked! Simple and very delicious!
Wholesome Yum D
0I’m so glad you enjoyed it, David! Thanks for bookmarking it!
ANNA M GRACE
0I made this tonight and the chicken came out so good and juicy! I plan on using this recipe again. I did have to omit the onion powder due to not having any, but I’ll make certain to add it next time!
Wholesome Yum D
0Anna, I’m so happy the chicken turned out juicy for you! Great call to still make it without the onion powder, and I bet you’ll enjoy it even more with that added next time.
Ariela
0Can I add some veggies around the baked chicken like potatoes and carrots?
Maya | Wholesome Yum
0Hi Ariela, Yes, definitely! Those are great ones to add since they can handle the longer roasting time. Please let me know how they turn out.
Brenda Weaver
0I wanted to comment on your method of using paper towels to dry the meat. Please don’t do that. They have chemicals on them that we do not want in our bodies. Try using organic material such as linen. We need to do everything we can to protect our families and ourselves. I will be using the recipe tonight. I won’t be using paper towels.
Lisa Johnson
3That’s not true at all! Please stop spreading misinformation.
Maya | Wholesome Yum
0Hi Brenda, There are non-toxic paper towels available, but yes, linen towels will work too if you don’t mind washing them. I hope you like the recipe!
Merle Kreibich
0Having guests for dinner tomorrow evening – 8-6-25. Question Can I prepare the chicken leg quarters the day before and leave them in fridge until tomorrow? Thanks for responding.
Maya | Wholesome Yum
0Hi Merle, Yes, you can season them the day before. For company I’d recommend roasting them fresh.
Vicki
0We will reduce the amount of paprika, or omit. Otherwise, GREAT!!
Wholesome Yum D
0Thanks for the feedback, Vicki! Glad to hear you still enjoyed it, hope it turns out even better next time with your tweak!
Donald Chisley
0They Turned out to be delicious, my House Guest loved the and wanted my Recipe 😀😀😀…
Wholesome Yum D
0That’s wonderful to hear, Donald! I’m so glad they were a hit with your guest. Thanks for sharing that! 😄
Kim
0Delicious. I had extra big leq quarters and added 10 minutes to the total bake time. The seasoning is perfect.
Maya | Wholesome Yum
0Thank you, Kim! Yes, the time can take longer if you had extra big chicken quarters. I’m happy you liked the seasoning and hope you make these again soon.
Charlie
0I just made this, Maya, and it was amazing. Thank you for the recipe. My dad is 93 and lives with me and he loved it also. I just need to help him get the meat off the bone. Amazing.
Wholesome Yum D
0That’s so sweet, Charlie! I’m really touched your dad enjoyed it too, thank you for sharing that with me.
Charlie
0This recipe sounds amazing and I just bought the chicken to make it tomorrow. The macros seem off a but, I see protein at 62g and fat at 23g for one leg quarter.
Maya | Wholesome Yum
0Hope you loved it, Charlie! Macros will vary depending on the size of your chicken quarters.
Angela
0I made this last night for dinner. It was so good, juicy and crispy. I’m going to add it to regular rotation.
Wholesome Yum D
0Love hearing that, Angela! So glad it’s earned a spot in your dinner rotation!
Cloie
0Crispy and DELICIOUS!
Wholesome Yum D
0Appreciate that, Cloie! So happy you enjoyed it.
Laurie A Derench
0Love this thank you so much!!
Wholesome Yum D
0So happy to hear that you loved this baked chicken, Laurie!
Walter Parsell
0You don’t even mention what to set the oven temperature at. ????
Maya | Wholesome Yum
0Hi Walter, Yes, I did. It’s on the recipe card above — please read it to ensure you don’t miss an ingredient or a step.
Micky Crmn
0I followed the instructions, but the chicken parts shrank.
Maya | Wholesome Yum
0Hi Micky, It’s normal for chicken to shrink when it cooks. It’s not specific to my recipe.
Terri
0Quick, easy and delicious!
Maya | Wholesome Yum
0Thank you, Terri!
Lori
0I made these tonight and boy oh boy, they were delicious!! So juicy and moist with wonderful seasoning and so easy to do! This will become a regular for us!
Maya | Wholesome Yum
0Thank you so much, Lori! I’m glad they’re a regular for you now.
Rena Mitchell
0This chicken recipe makes a lot of juices which makes a nice sauce. I drained off some of the fat & added 2T of dry white wine. I also added a little turmeric to the dry rub.
Maya | Wholesome Yum
0Thank you for sharing, Rena! I need to try that sauce sometime, it sounds great.
Delilah
0Loved it!
Maya | Wholesome Yum
0Thanks, Delilah!
Michael A Segreti
0If you marinade them do you still pat them dry before putting in oven
Maya | Wholesome Yum
0Hi Michael, Yes, I still recommend patting dry if you use a marinade.
bartman835
0I’m making it right now, already in the oven for 5 minutes will be flipping in 10 minutes can’t wait to try it. It smells great already.
Tina B.
0I made these a couple of weeks ago and they were delicious! They came out perfect and crispy. I had them with delicata squash last time however, tonight I have some leftover broccoli and cauliflower florets so I’m going to try roasting those as well. Thank you for these wonderful recipes!
Maya | Wholesome Yum
0I’m so glad you liked these, Tina! Those are all wonderful veggies to serve with the chicken. Enjoy!
Kenny
0Great recipe helping others in tough times. First class meal anyone can make and be happy. Great taste for the families. Thank you.
Lacy v V
0Wow! These were super crispy! I don’t know if it was the drying, oiling, two-sided baking, or the whole combination, but I’m impressed! I’ll definitely use this method again!
Heather
0Amazing recipe! Turned out perfect! I just added oregano! Thank you 🙂
Maya | Wholesome Yum
0I’m so happy to hear that, Heather! Yes, it’s super easy to customize the seasonings. Enjoy!
Erika
0What type of pastry brush do you use in this video? It looks like a silicone brush, but with very fine bristles and a short handle. It seems very easy to use and great for this recipe. Thanks 🙂
Maya | Wholesome Yum
0Hi Erika, That’s an old one I don’t have anymore and don’t remember where it’s from, but I have these silicone brushes now and love them.
Kristin Zehnder
0This was a fantastic recipe. The chicken was so moist and tasty. I turned up the broiler for 2 minutes at the end to crisp the skin. We’ll totally do this again. Also did the air fryer cauliflower, so good. Thank you! Will check out your other recipes.
Maya | Wholesome Yum
0I’m so glad you liked these, Kristin! Sounds like the perfect meal.
Shelley Constable
0Very tasty and easy to make.
Maya | Wholesome Yum
0Thanks, Shelley! Enjoy!
Donna Moss
0I absolutely love this recipe. Easy to make. Easy to follow and sent to my daughter that is kind of a beginner cook! Delicious! Thanks for sharing!
Maya | Wholesome Yum
0Thank you so much, Donna! And thanks for sharing my recipes with your daughter.
Randy Bernard
0So that I could make a pan sauce for the chicken, I didn’t line the pan with foil. While the chicken was resting, I added some vegetable stock to the pan, put it back in the still-hot oven for a couple of minutes, then took it out, scraped up the browned bits from the pan, mixed it all together, and poured the sauce into individual dipping dishes. The sauce captured all the flavors of the seasoning used on the chicken, as well as the flavors of the roast chicken itself.
Maya | Wholesome Yum
0That sounds delicious, Randy! Thanks for sharing!
Rebecca
0I love this recipe. The leg quarters come out of the oven perfect, every time! A big hit! Thank You!
Maya | Wholesome Yum
0I’m so happy you love it, Rebecca! Enjoy!
Carol Berg
0It’s scrumptious and so easy! I can make 2 great dinners for under $10 bucks. Thanks for the trick of starting skin side down. I love it!!!
Maya | Wholesome Yum
0I’m so glad you love this recipe, Carol! And you’re very welcome. 🙂
Ruth
0Love this recipe. I buy 10 lbs of leg quarters every other week to cook for dog food. I save back two pieces to cook for supper. So easy and delish and can be baking while I’m cleaning up from dog food mess.
Maya | Wholesome Yum
0Thank you, Ruth! You have one lucky dog!
Jeff Mccarthy
0Well this looks so good but you never put a cooking temperature. You put a reheat temp of 350. But not the 1st time.
Maya | Wholesome Yum
0Hi Jeff, I did, it’s on the recipe card as always, in step 1. Make sure you read the recipe card so you don’t miss the precise amounts and all the steps. 🙂
Theresa
0The whole house smells so yummy. Waiting on cooking 😁 4 ⭐⭐⭐⭐ on easy prep time. Let you know in about 25-30 minutes
Maya | Wholesome Yum
0Thanks, Theresa! Let me know how they turned out!
Lisa
0So good. I also put poultry seasoning under the skin. Cooked it the air fryer for 40 minutes. Took it out and put Sweet Baby Rays barbecue sauce on it. Gave it another 20 minutes in the air fryer. Let it cool for 5. Delicious! So juicy! Gonna make again!
Maya | Wholesome Yum
0I’m happy you liked your chicken leg quarters, Lisa! Thank you for sharing your version. I do love these in the air fryer too, here is my air fryer chicken quarters recipe if anyone needs it.
Veronica
0I’ve made it before with leg quarters, making it again today with thighs. Perfect for cooking a large package of chicken to debone and freeze. Yum!!!
Maya | Wholesome Yum
0Thank you, Veronica! Yes, this method works with other skin-on cuts, the baking times just vary. Baked chicken thighs will be faster.
adrienne_robles
0So easy even I could make it and so delicious even my kids loved it! Definitely will repeat.
K. Palo
0I made this recipe per the instructions and the author is correct; the chicken quarters were plump and juicy! Next time I’ll add some of the seasoning under the chicken skin in addition to the outside skin to give the meat a little more flavor. We will be making this recipe at least bi-monthly! Kudos!