 Shop
Shop My
My Custom


FREE 5-Ingredient Recipe EBook
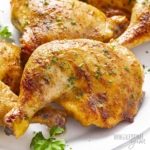
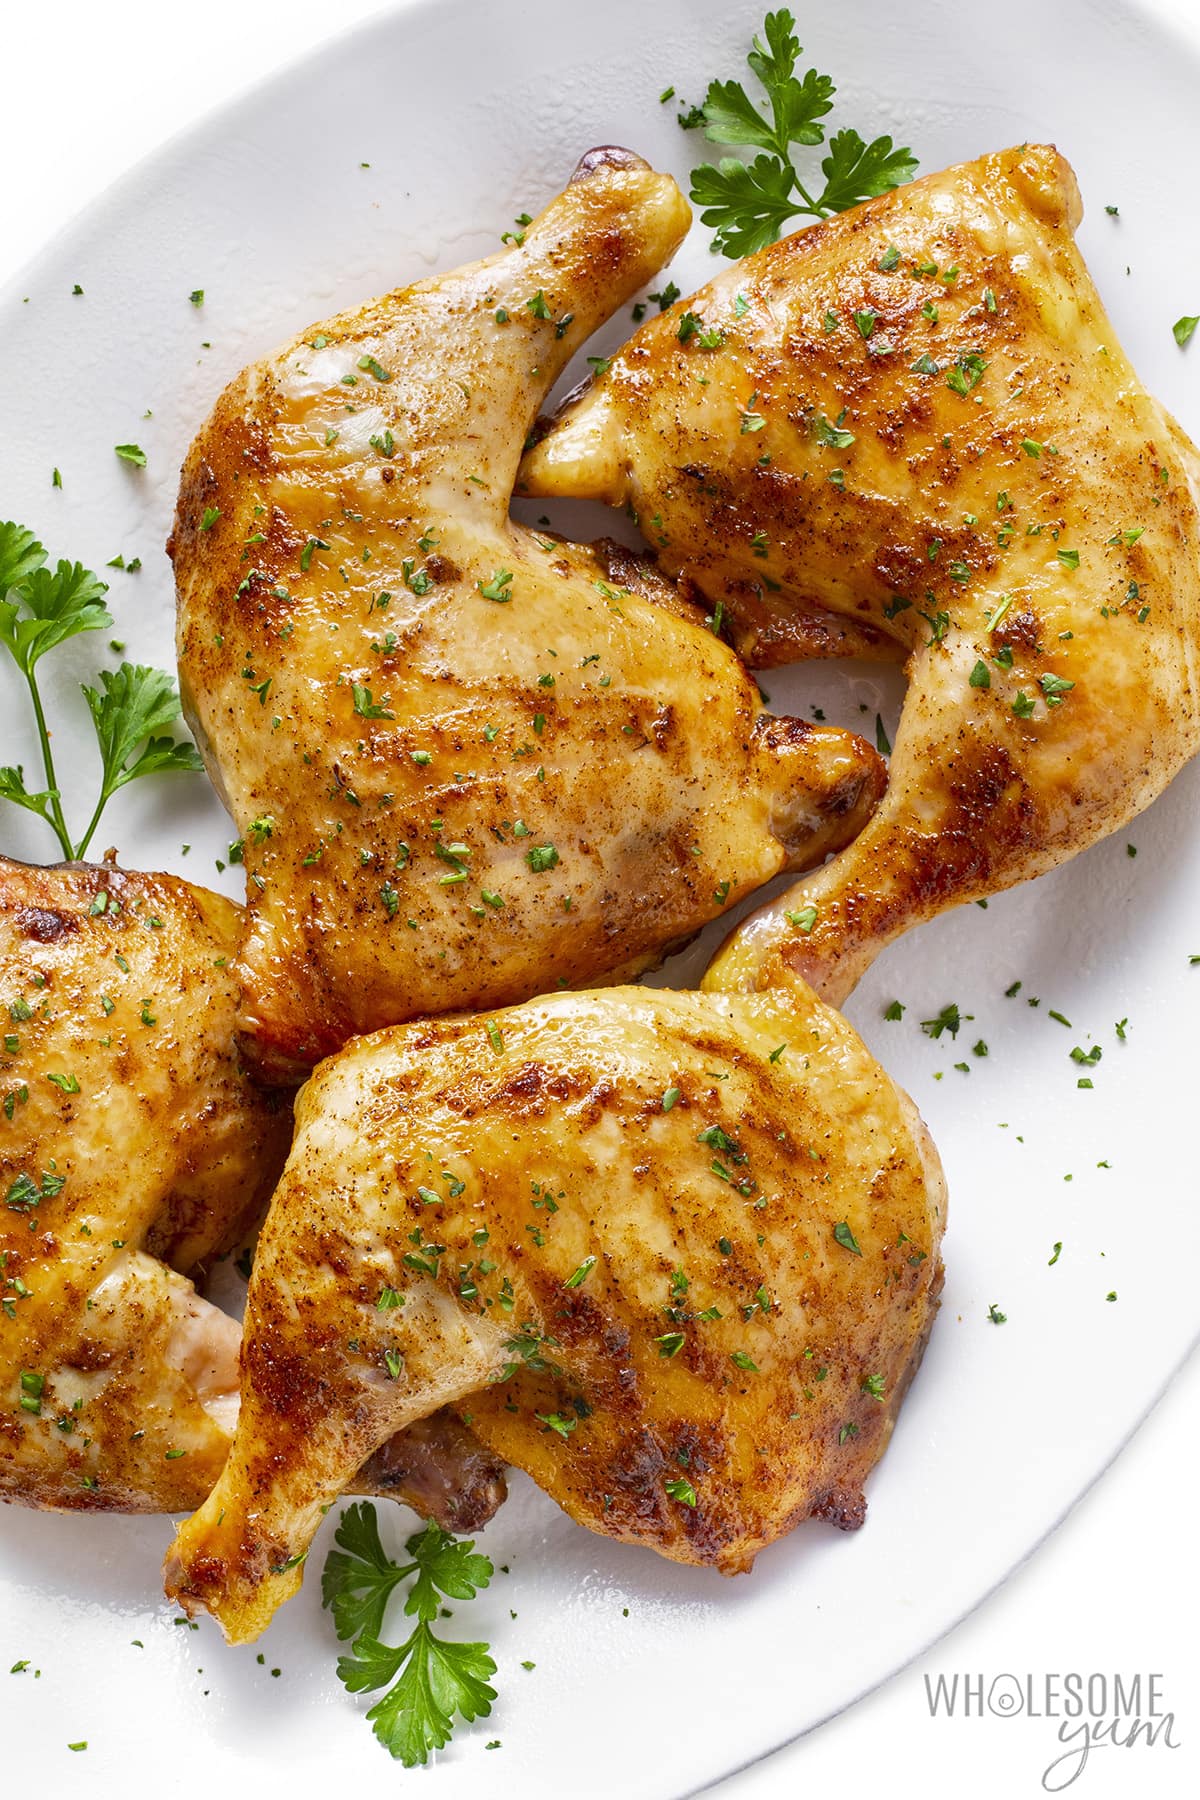
GET IT NOWMy Crispiest, Juiciest Baked Chicken Leg Quarters

I’ve been baking chicken drumsticks and chicken thighs for decades, but when I realized a few years ago that chicken leg quarters are a more cost-effective alternative for literally the same thing, I felt like I discovered a secret. (Now I just feel silly… am I the only one that didn’t know?!) I make these baked chicken leg quarters all the time now — here’s why:
- Juicy and tender with crispy skin – Golden and crispy outside, practically fall-off-the-bone juicy inside. It’s the best.
- Effortless flavor – Chicken leg quarters are entirely dark meat, which means loads of flavor! Don’t get me wrong, a healthy baked chicken breast can be juicy, but it can’t beat dark meat in the flavor department.
- Quick and easy – I season the chicken with pantry basics (chances are you have them on hand) and pop them in the oven. The prep takes just minutes!
- Cost effective – This cut of chicken is such a good value. Just like whole chicken wings are cheaper than ones that are cut, chicken quarters cost less than thighs and drumsticks separately.
Serve these chicken leg quarters with a healthy side dish and you’ve got a winner of a chicken dinner. Make them with me!

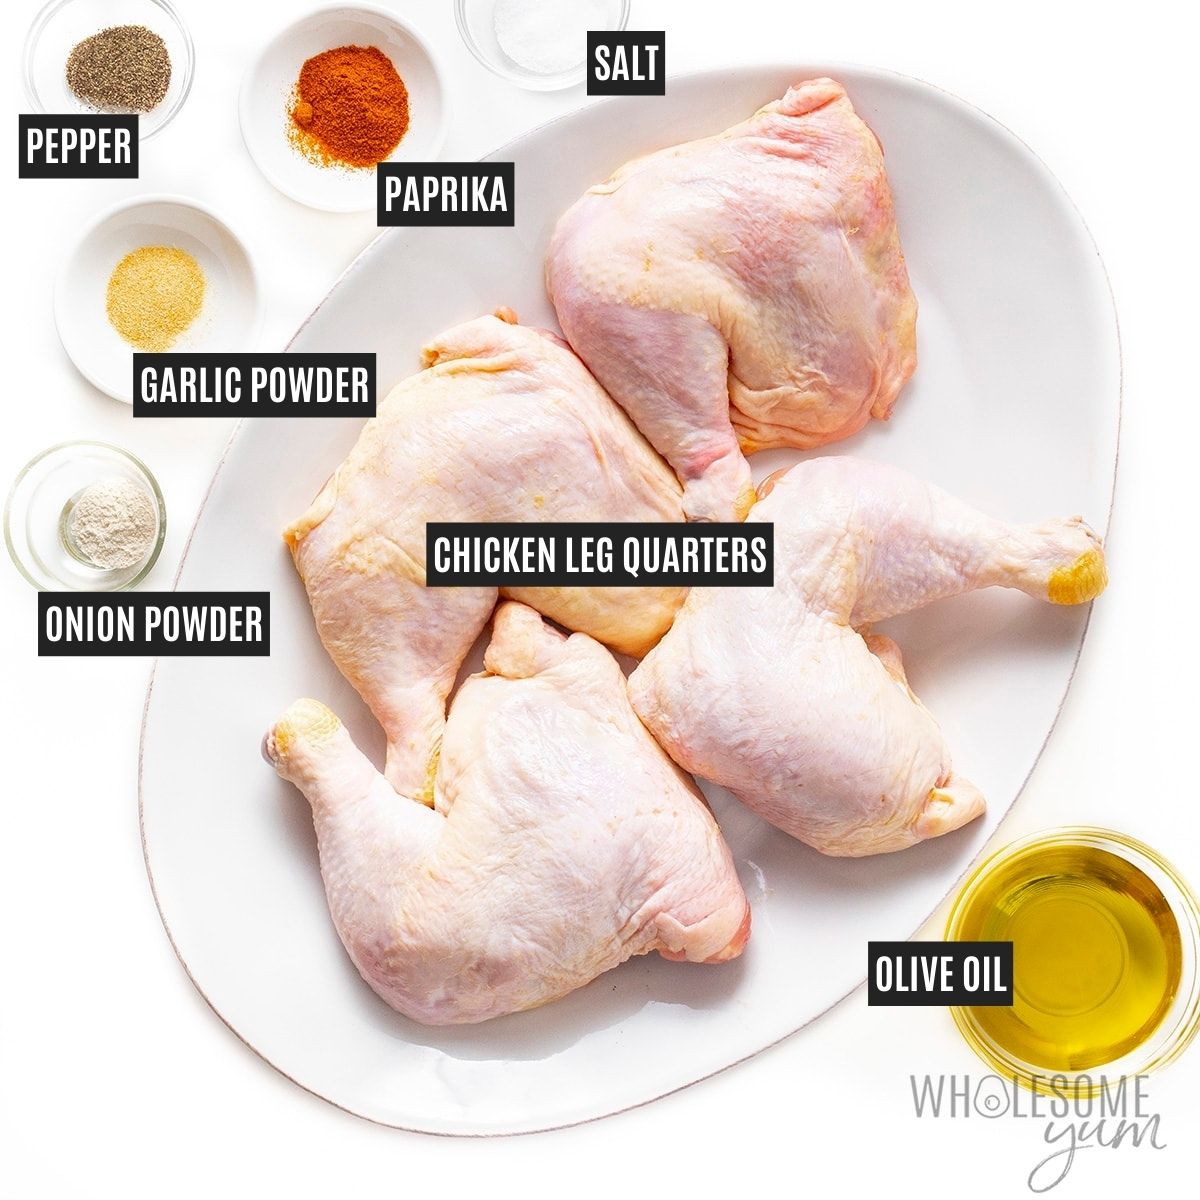
Ingredients & Substitutions
Here I explain the best ingredients for my crispy baked chicken leg quarters, what each one does in the recipe, and substitution options. For measurements, see the recipe card.
- Chicken Leg Quarters – Sometimes I see them called chicken quarters or chicken hindquarters at the grocery store. They are simply whole chicken legs (thighs and drumsticks) that also have a piece of the back attached.
- Olive Oil – Oil adds flavor, helps the seasonings stay on, and most importantly, gets the skin crispy. Any heat-safe oil works — sometimes I use avocado oil instead.
- Spices – You can season these with any spices you’d normally use for chicken. My go-to blend is paprika, garlic powder, onion powder, sea salt, and black pepper. If you like a kick, 1/4 teaspoon of cayenne pepper makes a nice addition. Or if you want some comforting flavor, use my homemade poultry seasoning.
How To Cook Chicken Leg Quarters
I have step-by-step photos here to help you visualize the recipe. For full instructions, including amounts and temperatures, see the recipe card.
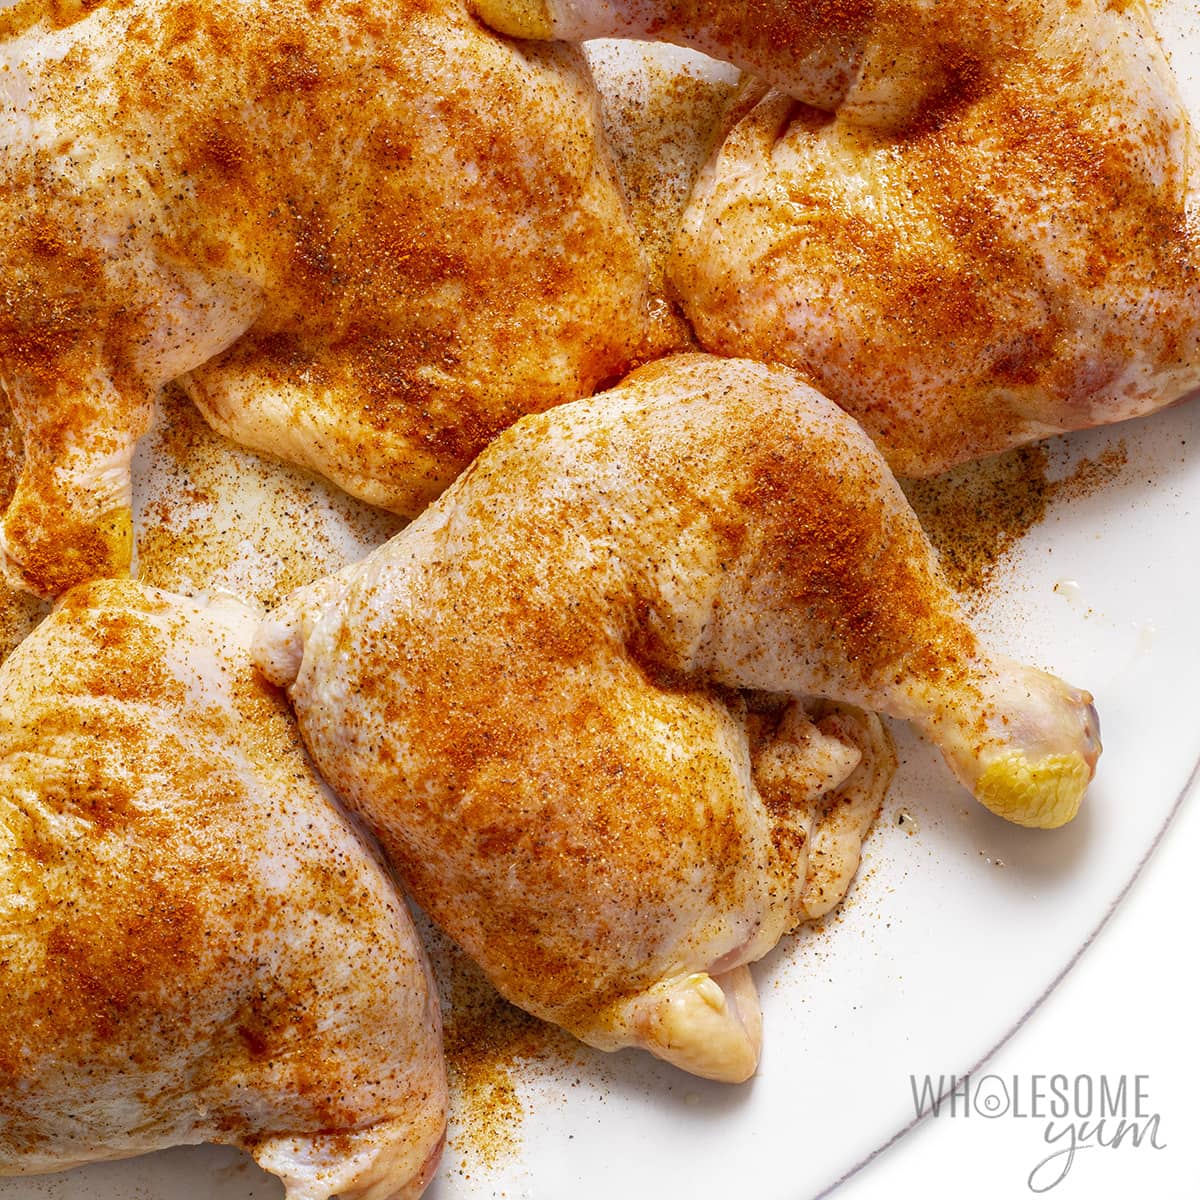
- Prep and dry. Preheat your oven. Pat the chicken dry with a paper towel to remove excess moisture. This allows the skin to get crispy later!
- Season. Brush the chicken with olive oil. Season with paprika, garlic powder, onion powder, salt, and pepper. Make sure to get both sides!
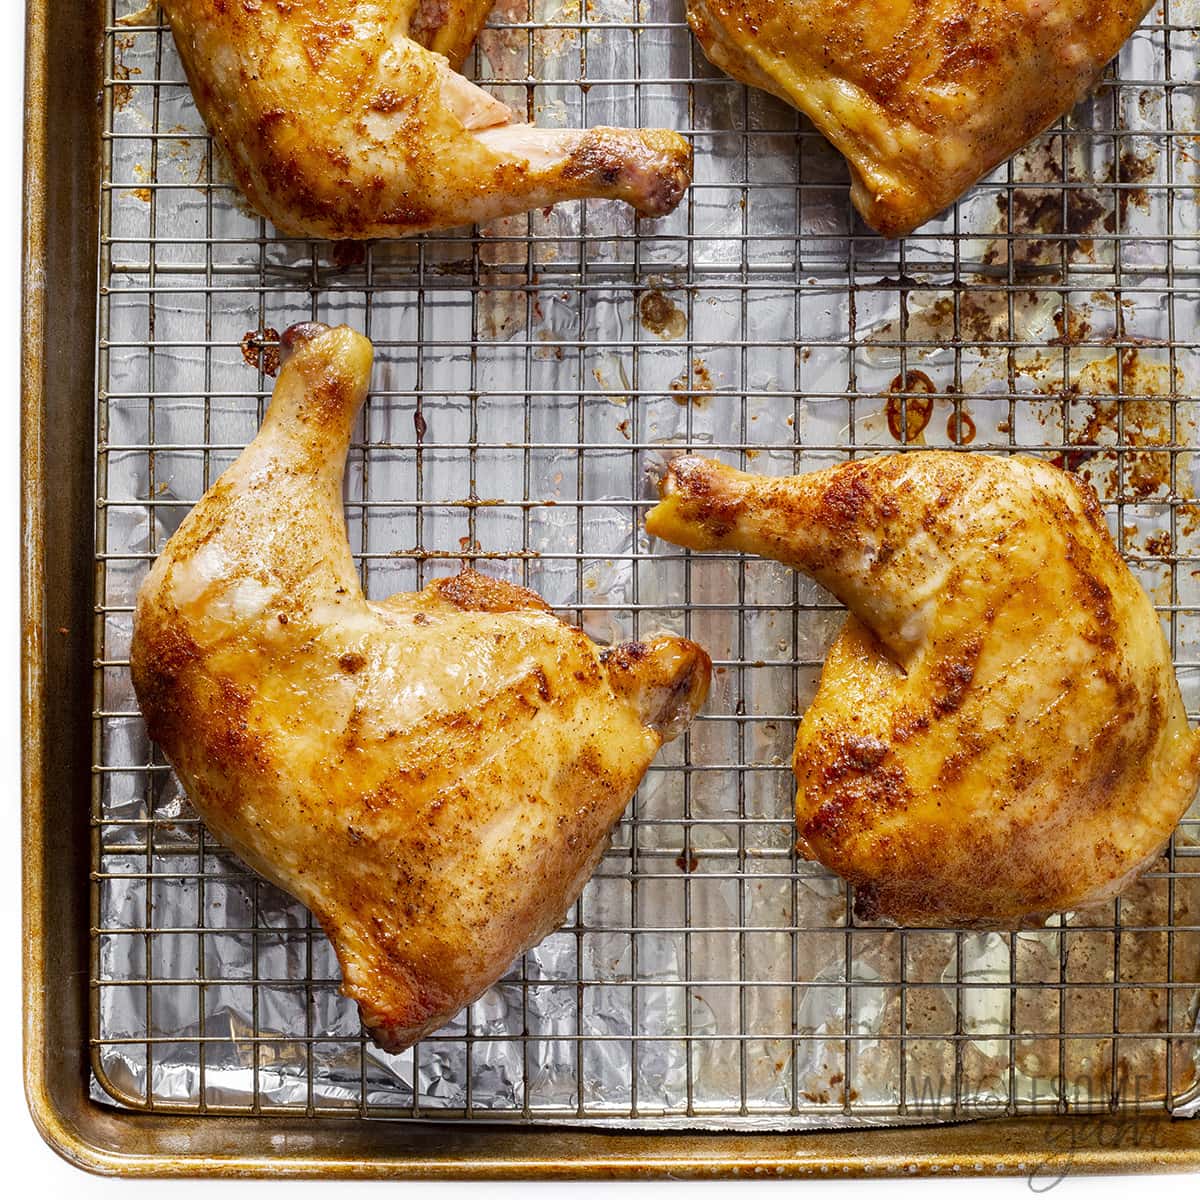
- Bake. Arrange the chicken on an oven-safe rack fitted over a baking sheet (I love this thing!), skin side down. Bake chicken leg quarters in the oven, flipping halfway through, until crispy and cooked through.
- Rest. Let the chicken rest for 5 minutes before serving. This helps the juices settle so that the chicken won’t be dry.
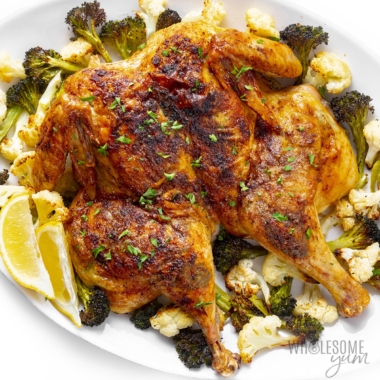
You can serve the chicken quarters whole, but they are very large. So, in my family we usually cut them apart (separate the thighs and drumsticks), and everyone chooses the cut they prefer.
My Recipe Tips
- You can pre-mix the spices. I find that it can save time to mix them in a small bowl and then season the chicken with the mixture all at once. The flip side is it’s one more dish to wash, so it depends on your needs.
- Want extra crispy skin? Mix a couple teaspoons of baking powder with the spices, like I do for my other baked chicken recipe.
- Baking on a rack isn’t a must, but improves results. I have this set and it allows air flow all around the chicken while baking. Translation: even cooking and crispier skin! But if all you have is a regular sheet sheet pan, that’s totally fine as long as it’s not crowded.
- Line the pan with aluminum foil (underneath the rack) if you like. Lining the pan is not required, but makes for easier cleanup.
- Bake skin-side-down first. It’s best to have the chicken leg quarters skin-side-up last, because this keeps the skin crispy. When I cooked them skin side down last, the skin was softer.
- Use a meat thermometer for perfect results. Cooking times can vary depending on the size of your chicken quarters. I like this instant-read thermometer, but actually use this probe thermometer the most because it beeps when ready and I don’t have to keep checking. It’s hard to overcook dark meat, so don’t stress if you don’t have a thermometer, but having one allows you to take advantage of my next tip…
- Cook to 170 degrees F for the juiciest results. Like all chicken recipes, baked chicken quarters are safe to eat once they reach 165 degrees F. However, because leg dark meat has more connective tissue than white meat, it will be more tender if you cook it to 170-175 degrees F. I always do this for dark meat and you’ll taste the difference!
- Broil if you need to crisp the skin more. I don’t usually need to, but you can place the chicken under the broiler for a few minutes at the end.
- Can you air fry them? Absolutely! I bake the chicken for this recipe, but if you want an even faster method, you can air fry chicken leg quarters, too.
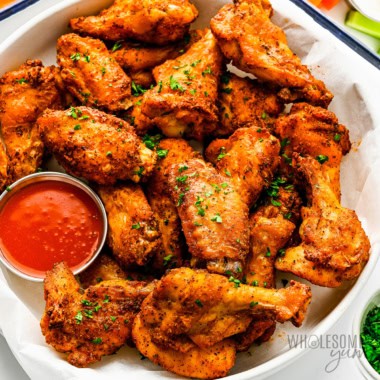
Baked Chicken Leg Quarters (Crispy & Juicy)
My easy recipe for baked chicken leg quarters in the oven makes juicy, crispy chicken every time. You need just 5 simple ingredients!
Instructions
Tap on the times in the instructions to start a kitchen timer.
-
Preheat the oven to 400 degrees F (218 degrees C). Line a baking sheet with foil and place an oven safe rack on top.
-
Pat the chicken leg quarters dry with paper towels, which will help them get crispy.
-
Brush the chicken quarters with olive oil on both sides. Season both sides with paprika, garlic powder, onion powder, salt, and pepper.
-
Arrange the chicken on the rack, skin side down. Bake the chicken leg quarters in the oven for 15 minutes. Flip and bake for another 20-30 minutes, until the internal temperature reaches 170 degrees F (74 degrees C).
-
Optional step: If they are not crispy enough for your liking, place under the broiler for 2-3 minutes to crisp up the skin even more.
-
Rest for 5 minutes before serving.
LAST STEP: Leave a rating to help other readers, or tag me @wholesomeyum on Instagram. I’d love to hear from you!
Maya’s Recipe Notes
Serving size: 1 chicken leg quarter
- Tips: Check out my recipe tips above to help you get the juiciest chicken leg quarters, ways to crisp up the skin more, how to make cleanup easier, and more.
- Storage: Keep leftovers in an airtight container in the refrigerator for up to 3-4 days. The skin does soften, so I usually remove the meat from the bones and repurpose it for soups or salads.
- Reheat: If you want to reheat the chicken leg quarters whole, the best method is the oven at 350 degrees F. You can place them under the broiler in the last few minutes if the skin isn’t crisp.
- Freeze: You can freeze the cooked chicken in zip lock bags for up to 3 months, or raw chicken quarters for up to 6-12 months. Thaw in the fridge overnight.
I provide nutrition facts as a courtesy. Have questions about calculations or why you got a different result? Please see my nutrition policy.
Add Your Notes Your Notes
Try More Of My Recipes


© Copyright Maya Krampf for Wholesome Yum. Please DO NOT SCREENSHOT OR COPY/PASTE recipes to social media or websites. We’d LOVE for you to share a link with photo instead.
Baked Chicken Leg Quarters
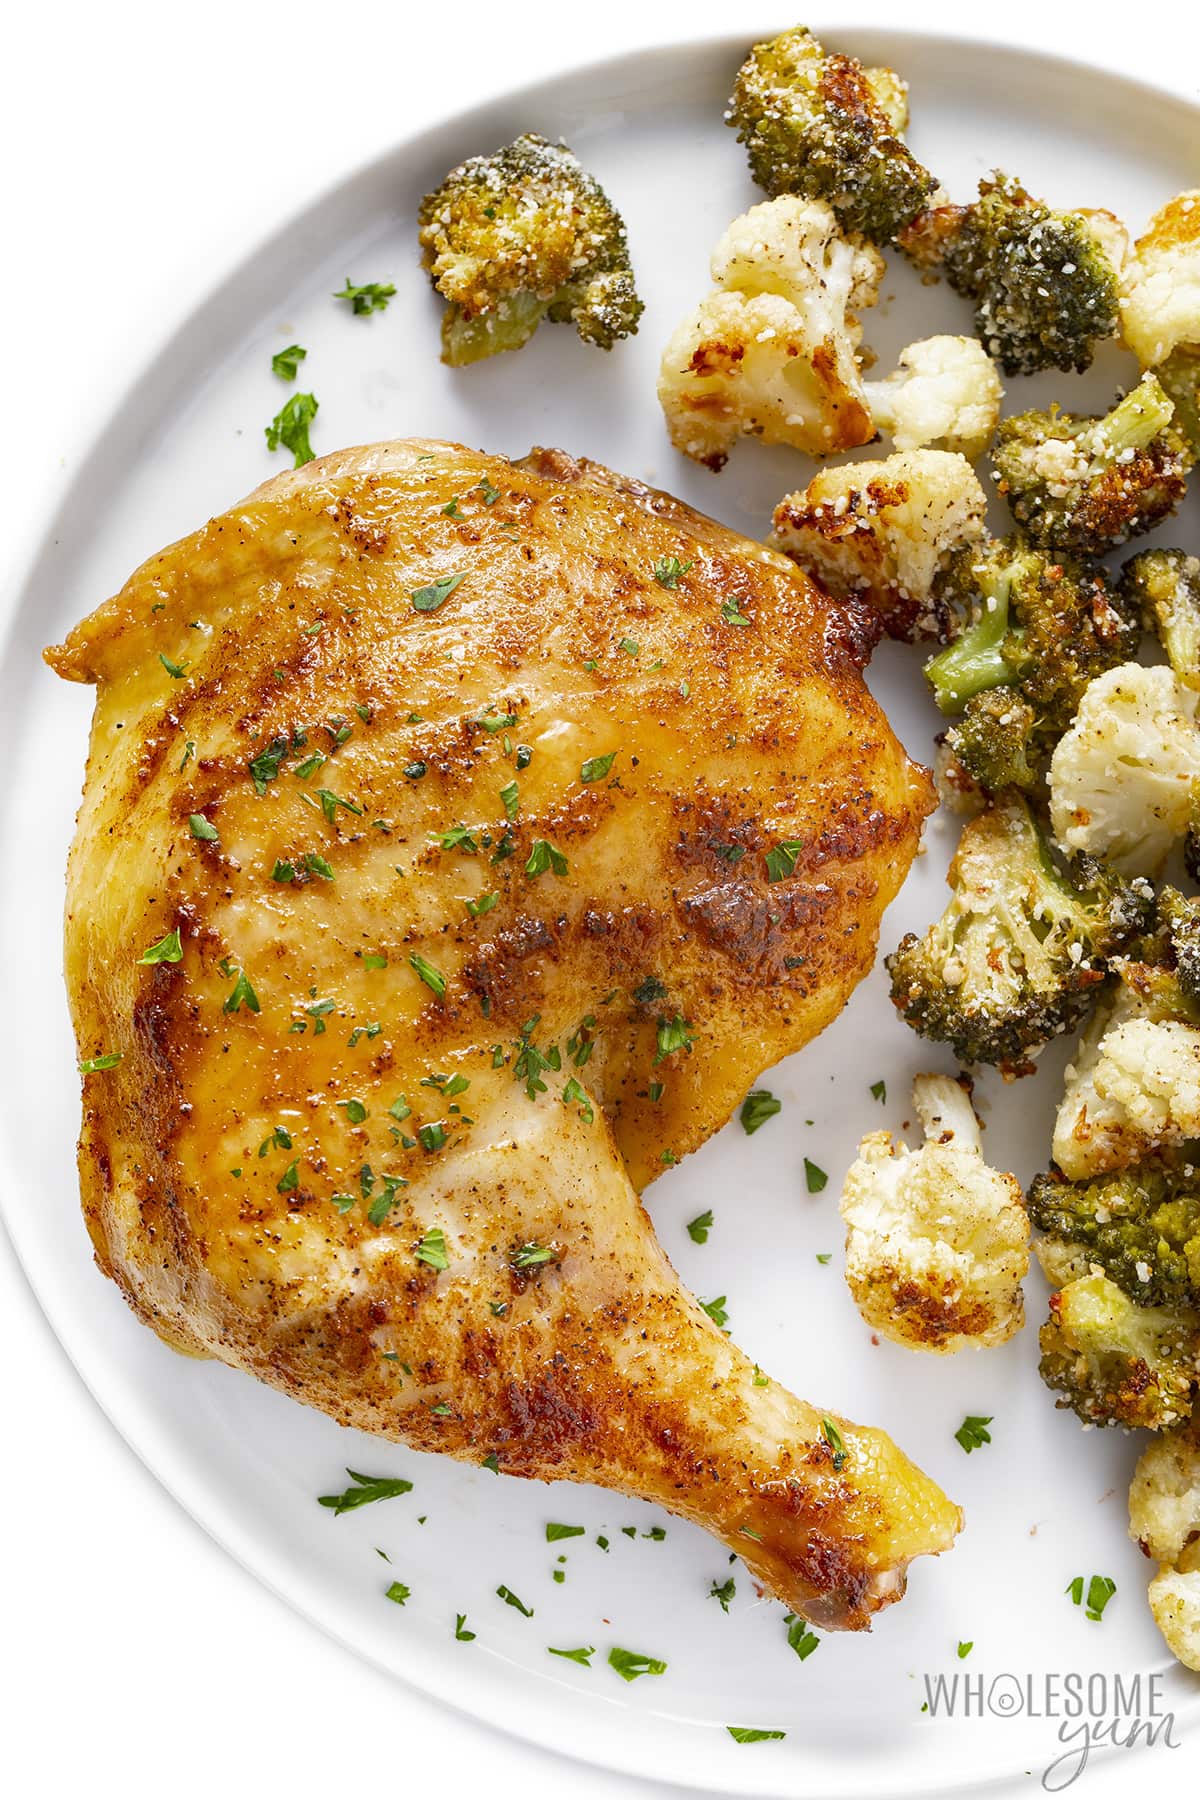
Serving Ideas
Somehow, these baked chicken leg quarters are flavorful and neutral in flavor at the same time. Does that make any sense? The point is they go with anything. Here are some of my favorite sides to serve with them:
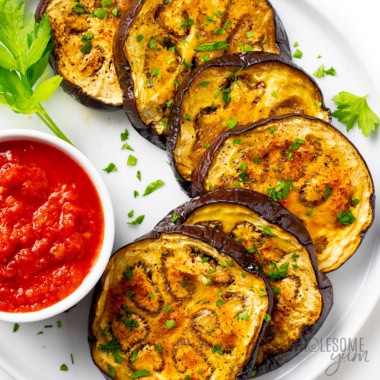
- Vegetables – Chicken and veggies is literally the meal I make most often. Particularly with chicken leg quarter recipes, though, vegetables can balance the heavy main dish. I like to saute eggplant, air fry cauliflower, or whip up some patty pan squash while I have the chicken quarters in the oven. But you can also roast broccoli, broccoli and cauliflower (pictured above), or asparagus first and just cover to keep warm.
- Potatoes – For a more comforting meal, make my Instant Pot sweet potatoes or even Greek lemon potatoes. My family’s go-to is simple, buttery air fryer potatoes — my kids ask for them often.
- Salads – For a lighter meal, try my creamy cucumber salad, earthy beet salad, or simple arugula salad.
More Baked Chicken Recipes
If you love chicken as much as I do, check out my other easy baked chicken recipes:


202 Comments
Jo Ann MacMillan
0Just finished dinner! This was excellent! Thank you for sharing this recipe. It certainly is a keeper!
Brenda
0It took a whole lot longer to get done than it said. But once it was done it was really good .
Maya | Wholesome Yum
0Hi Brenda, The time can vary based on the size of your chicken leg quarters, your oven, the amount of space between the chicken pieces (they will take longer if they are crowded), and even the pan you use. I’m glad you liked these when they were done!
AC
0I’m confused. I read where I’m supposed to put the chicken in the oven “skin side down, but in the video, the chicken got seasoned on the skin and was placed on the rack skin side up. I wanted to see the video again but it seems to be gone and other “how to cook” recipes are in its place. Maybe it doesn’t really matter in the long run, but ??
Wholesome Yum D
0Hi AC, The chicken should be seasoned on both sides and then placed skin side down for the first 15 minutes.
Ver
0This was outstanding! Everyone at the table agreed that we will eat baked chicken more often because of this recipe. Thank you so much!
** how I wished I had followed your advice about lining the pan with goin under the baking rack. Clean up was q but of a task. But still worth it because the chicken was crispy, juicy, baked in perfection
Amber Bledsoe
0I’m sure this recipe will turn out fine… however I have “leg quarters”.. that is what the recipe calls for… these are by no means “done” at this amount of time… I have now read other recipes that call for longer cooking times or higher temps… but mine were definitely not done with the stated time frame…
Jane
0The chicken leg quarters were delicious, thank you!!
Lynn
0I followed the instructions exactly (except I omitted the salt) and started checking the temperature after 40 minutes. After another 40 minutes, I finally got 170 degree readings. After letting it rest, it was beautiful with crispy skin, but it wouldn’t come off the bone easily and was red next to the bone. So frustrating! I’m going to have a lot of chicken broth, but not what I hoped for with 10 lbs of chicken.
Wholesome Yum D
0Hi Lynn, Was your chicken breast previously frozen?
Dina
0Perfect! Made as per the recipe. Would make it again without any changes.
Jessica Templet
0I didn’t have an oven rack so I had to cook them a bit longer in my pyrex dish. But they still came out perfect. The seasoning was excellent and the skin was nice and crisp. Definitely one of the best chicken recipes I’ve tried. Thanks a million.
Doug Wilder
0I like the verbiage you utilized around the comments section here to make sure everything’s honest and sincere. Oh yea…the chicken! Excellent!! I put diced potatoes on the aluminum foil, on the baking sheet, under the rack (so the juices from the seasoned chicken fell down and beautified the potatoes) YUM. Thanks!
Charlie
0Definitely making this again. ??
Patrick S Broderick
0The meat came out well, nice and juicy but the skin DID NOT get crispy. I usually don’t flip leg quarters, just bake skin side up the whole time. I’d definitely recommend not flipping the chicken, that seems to work better.
Sandy
0Wonderful flavor and easy to prep. I was able to go to the garden, gather some fresh veggies and steam them while the chicken was in the Dutch oven on the fire! Great meal
Rosemarie Mielke
0This was simple and delicious. The only issue I had was it took well over an hour to bake to get to 170°. But I was using a 3-quarter sized pan in my smaller wall oven,so the meat pieces were overlapped a bit.
Jayden
0I love how basic this recipe is and the seasoning is amazing on this chicken! Thank you for sharing!
Amy L Huntley
0These are so tender and juicy. Thanks for the great tips!
Donna
0These worked out perfectly! Definitely a keeper
Andrea Thueson
0These were so tasty and had the perfect texture. I will be making them again on repeat.
Kristyn
0Simple ingredients, but lots of flavor!! We use it a lot!!
Glenda
0This was so easy and your seasoning choices are the exact ingredients in my homemade all purpose spice blend, so it went together even more quickly for me. Absolutely delicious! We enjoyed them for a wonderful comfort-food Sunday dinner.
Amy
0These are so juicy and packed full of delicious flavor! Thanks for the great tips!
Katie
0These are always so juicy and delicious. We love baking chicken this way!
Kristyn
0Perfectly seasoned & tender!! This chicken would be so good for so many different recipes, too!
Robin Donovan
0Great recipe! The chicken turned out perfect!
Toni
0It turned out really good! Everyone at my house loved it!
Taylor
0This recipe was so simple yet SO delicious! The chicken came out perfectly tender and juicy, with great flavor. The crispy outside skin was my favorite part!
Debby
0These leg quarters were the bomb! We’ll be eating more baked chicken thanks to this recipe. Thank you!
Scarlet
0These are a great staple and I will be making the leg quarters again.
Jen Dart
0So simple to make and the falvors are perfect! My new go-to recipe!