 Shop
Shop My
My Custom


FREE 5-Ingredient Recipe EBook
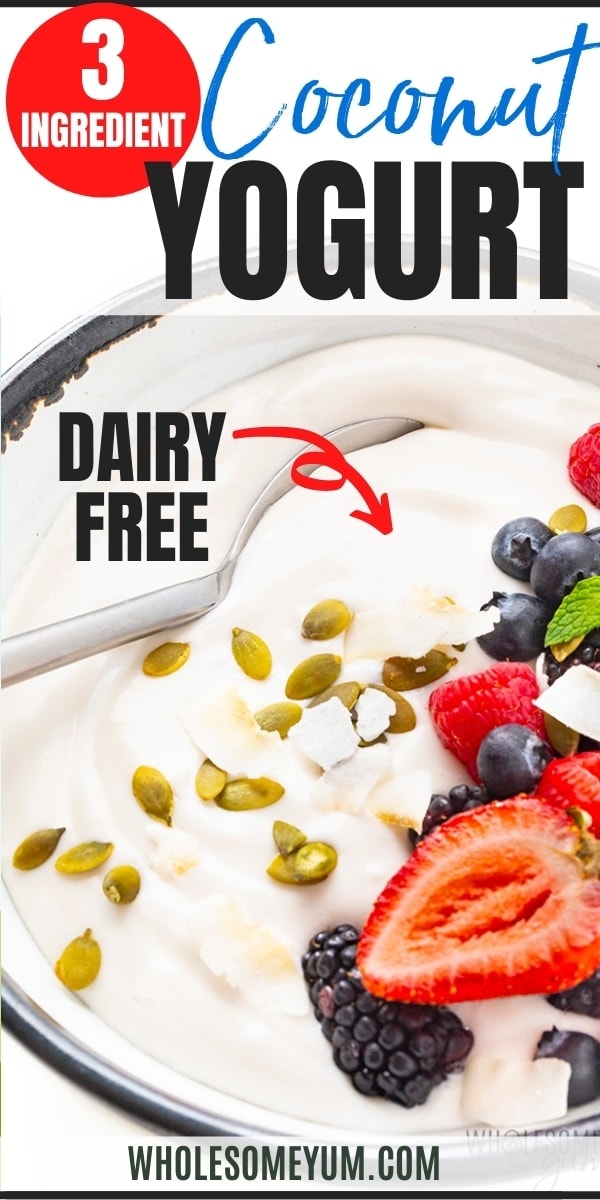
GET IT NOWEver since I published my keto yogurt recipe, people have been asking me for a high protein, dairy free yogurt recipe. Well, here it is, and it’s super easy! My coconut yogurt is just as creamy as the regular kind. While I’m using coconut milk instead of dairy milk, the process is nearly the same. I’ll show you how to whip up coconut milk yogurt, as well as some delicious topping ideas and my best tips to ensure it turns out perfectly. Make a batch with me, and you might never go back to store-bought!
Why You Need My Coconut Yogurt Recipe

- Creamy and tangy – My coconut milk yogurt has a thick, creamy texture, the perfect amount of tang, and a light coconut flavor.
- Simple, natural ingredients – You only need 3 of them, and I don’t add any of the sugar or fillers you’d find in store-bought versions.
- Easy to make – The prep only takes me about 20 minutes. The rest is hands-off to incubate and set.
- Dairy-free and gut friendly – If you need to be dairy-free, you get to enjoy yogurt again — and feel good about the live probiotics in it! While I’m not lactose intolerant myself, I really enjoy this dairy-free alternative. It’s gluten-free as well.
- Versatile – You can use this homemade coconut yogurt in the same way as regular. Of course it’s great for breakfast or as a snack, but I also love it as a base for my detox smoothie. Add your favorite toppings for extra flavor and texture (see my ideas below)!


Ingredients & Substitutions
Here I explain the best ingredients for my coconut yogurt recipe, what each one does, and substitution options. For measurements, see the recipe card.
- Coconut Milk – You need thick full-fat canned coconut milk (I like this one made from organic coconuts). Don’t use light varieties, and definitely avoid the liquid coconut milk beverage from the dairy case. This is key!
- Gelatin Powder – This thickens without any fake stabilizers. I prefer grass-fed gelatin, but any unflavored type is fine. Agar agar powder might work for a vegan option, but you’d need a little more (I’d estimate about 2 teaspoons) and it does add carbs.
- Probiotic Capsules – These make the magic happen! They ferment the coconut milk to turn it into yogurt. I usually use these probiotic capsules, but any should work as long as they are fresh. Avoid ones that have added prebiotics or enzymes, as these might prevent fermentation. If you don’t have probiotics, you can use 2-3 tablespoons of yogurt starter culture or store-bought plain coconut yogurt that has live bacteria cultures.

How To Make Coconut Yogurt
I have step-by-step photos here to help you visualize the recipe. For full instructions with amounts and temperatures, see the recipe card.
- Sterilize your jars. I just run the jars through the dishwasher, but you can also wash with hot, soapy water. Make sure they are completely dry afterward.
- Heat the coconut milk. Add the cans of full-fat coconut milk to a saucepan, including both the coconut water and cream from the can if they are separated. Heat gently until bubbling at the edges. (Do not boil!) Sprinkle the gelatin over the milk and whisk to incorporate.
- Let the mixture cool. Pour the yogurt base into the sterilized jars. Allow to cool on the countertop until its internal temperature is between 100-110 degrees F.
- Add the probiotics. Cut or open a probiotic capsule over each jar and dump the probiotic powder inside. Stir, then cover with a lid.


- Let it incubate. Place the jars on a sheet pan and place in your oven, with the oven light on (don’t turn on the oven itself!). Leave the door closed for 12-24 hours. The longer you leave them in there, the tangier your coconut milk yogurt will turn out, so choose the time based on how tangy you want it.
- Refrigerate to set. At this point, the coconut yogurt will still be runny. Give it a stir, then place in the refrigerator overnight to set. Stir again before serving.

My Tips & Troubleshooting
There are a few reasons that your coconut yogurt can turn out runny, and they are easy to avoid:
- Temperature – The most common, but less obvious culprit is that the yogurt base may have been too warm or cold. I use a thermometer to make sure the temperature is between 100 and 110 degrees F when adding the probiotics. That’s warm enough to activate the cultures, but not too hot to kill them. If the temperature is off, the yogurt won’t ferment and set properly.
- Type of coconut milk – I mentioned this above, but it’s so important! You have to use full-fat canned coconut milk, or the recipe won’t work.
- Fresh probiotics – You need live cultures for the yogurt to ferment. If your capsules are old, pick up a fresh bottle.
- Refrigeration time – My coconut milk yogurt recipe needs at least 24 hours in the fridge to thicken. It’s normal for it to be thin and runny before this step.
If you do end up with runny coconut yogurt, it’s still safe to eat. When I had batches like this during my testing, I just added it to smoothies!
Aside from the consistency, check the color and smell. It’s normal for the yogurt to taste tangy, or have a little foam on top before it sets. If it has a gray or pink film, or smells bad, those are signs that it fermented too long and spoiled. I recommend discarding it.
Flavor Variations
You can customize the flavor after your coconut yogurt is set. Try these add-ins:
- Vanilla – Add a teaspoon of vanilla extract, and your favorite sweetener. (I like Besti Powdered for a natural option without the refined sugar.)
- Maple – Stir in a tablespoon of maple syrup, or my personal fave, natural sugar-free maple syrup.
- Chocolate – Stir in a couple tablespoons of cocoa powder. You can adjust the amount depending on how chocolaty you like it.
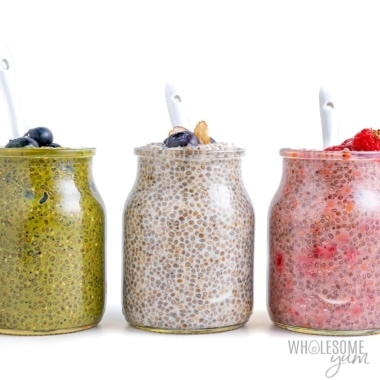
- Fruit – I like to swirl in strawberry chia jam, but any flavor will work.
Storage Instructions
I store this yogurt in the same glass jars I use to make it, with their lids. So convenient! Keep it in the refrigerator for up to 1-2 weeks.

Toppings & Other Uses
My favorite way to eat coconut yogurt is simply loaded up with toppings, but you can also use it in recipes! Here are some ideas:
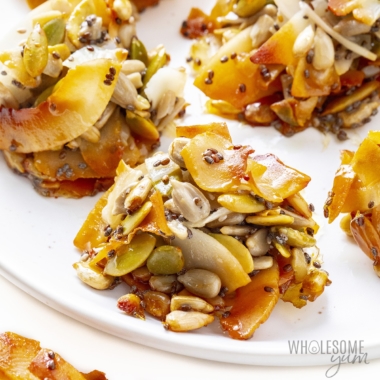
- Toppings – My go-to is a bowl with nuts or seeds, unsweetened coconut chips (or toasted vanilla coconut chips from my Easy Keto Cookbook), and fresh berries (or even dried cranberries). I have a version like this pictured above. You can also throw in granola for extra crunch, or chocolate chips (this is my fave sugar-free brand) for sweetness.
- Smoothies – Sometimes I add it to my banana smoothie, chocolate peanut butter smoothie, spinach smoothie, or even an acai bowl as a probiotic boost.
- Frozen Desserts – For a treat, use coconut yogurt instead of regular in my recipes for yogurt bark or frozen yogurt.
My Tools For This Recipe
- Mason Jars – I like these wide mouth jars for easy pouring and scooping, and they are the perfect size for 2 jars to hold this recipe.
- Thermometer – I love this one because it gives a quick reading in just a few seconds.
Coconut Yogurt (Easy Recipe)
Make your own coconut yogurt with just 3 ingredients! My coconut milk yogurt recipe is rich and creamy, dairy free, and so easy to make.
Instructions
Tap on the times in the instructions to start a kitchen timer.
-
Sterilize 2 12-oz or 16-oz jars in the dishwasher or with hot, soapy water. Dry and set aside.
-
Pour the coconut milk in a medium saucepan over medium-low heat. Heat gently, stirring occasionally, for 5-7 minutes, until bubbles form around the edges. (Time can vary significantly depending on your pan material – mine was a cast iron saucepan like this.) Do not simmer or boil.
-
Sprinkle (don’t dump) the gelatin over the saucepan and whisk until dissolved.
-
Pour the cream mixture into the sterilized jars. Let the jars sit at room temperature for about 20 minutes, until the mixture is below 110 degrees F (43 degrees C), but still above 100 degrees F (37 degrees C). This is critical – a temperature that is too high will kill the probiotic cultures, but one that’s too low won’t activate them.
-
Open or cut one probiotic capsule over each jar and stir in the powder. Cover with lids.
-
To incubate your yogurt, turn on your oven light (not the oven). Place the jars on a sheet pan and place in the oven, with the door closed and light on, for 12-24 hours, depending on how sour you want your yogurt to be. (Alternatively, you can wrap the jars in a warm blanket to keep them warm.)
-
At this point, the coconut yogurt will be liquid. Stir, then refrigerate for 24 hours to set the texture. Stir well again before serving (some lumps are normal, but they will disappear after stirring).
LAST STEP: Leave a rating to help other readers, or tag me @wholesomeyum on Instagram. I’d love to hear from you!
Maya’s Recipe Notes
Serving size: 1/2 cup
I provide nutrition facts as a courtesy. Have questions about calculations or why you got a different result? Please see my nutrition policy.
Add Your Notes Your Notes
Try More Of My Recipes


© Copyright Maya Krampf for Wholesome Yum. Please DO NOT SCREENSHOT OR COPY/PASTE recipes to social media or websites. We’d LOVE for you to share a link with photo instead.
Coconut Yogurt
Gratitude Moment

I haven’t mentioned one of my favorite toppings yet… my natural zero sugar honey! One of my fave breakfasts is a bowl of yogurt with berries and a drizzle of this honey.
I often make this little compilation with regular Greek yogurt, but it’s also awesome with this coconut yogurt. The regular, cinnamon, and orange flavors are perfect on it, and I’m grateful to have the variety. The spice of life!
What are your favorite yogurt toppings? Let me know in the comments below!


44 Comments
Stephnee
0Followed the recipe dividing 3 fresh “Garden of Life” probiotic capsules into 2 glass containers. The oven light was on 18 hrs yet the coconut milk separated. In your directions you say to stir then refrigerate. Do I try to pour off some of the whey? After reading some of the reviews my next batch I will use “cocoyo” plain yogurt for its probiotics. I love to experiment and appreciate reading all the comments and answers.
Maya | Wholesome Yum
0Hi Stephnee, Yes, some separated for me too but I just stirred it all together anyway. I didn’t pour anything off, but you can if you like.
Gina Klement
0I’m so excited to make this! Thank you for the wonderful information! Do you know how to increase the amount of protein in this homemade yogurt?
Maya | Wholesome Yum
0I hope you’ll love it, Gina! Please let me know how it goes. There might be a way to add protein powder to it, but I haven’t tested that version yet.
Missy
0The recipe was straightforward and the result was creamy and delicious. I enjoyed topping it with fresh berries, nuts, and a sprinkle of coconut chips. It’s also fantastic in smoothies and as a base for frozen treats. This will be a regular!
Jennifer
0I tried to see how many Billion Cafu you used but the Amazon link to the product did not work. Please let me know how many is needed if I were to use capsule(s).
Maya | Wholesome Yum
0Hi Jennifer, The ones I used are 25 billion CFU. Make sure the ones you use are fresh.
Sue
0I followed this recipe diligently..and it didn’t work out. Fresh ingredients, check. Temp check. Incubation, check. It separated and there was nothing to do about it, but either start over or forget.
Wholesome Yum A
0Hi Sue, It’s hard to say what went wrong without being in the kitchen with you. To me, it sounds like the yogurt might have gotten too hot, and that could cause it to separate.
Niomi
0Sue… I made my coconut yogurt with the recommended coconut milk and gelatin and poured it into two 16 oz jars. In one I emptied 2 capsules (50 billion bacteria) of the NOW recommended probiotics. In the other I put a heaping tablespoon of Coconut Cult Original Yogurt. The one with the NOW probiotics separated during the 24 hour oven-light incubation, but upon stirring and refrigeration thickened up. The jar made with the Coconut Cult Yogurt thickened up right away and never separated. I think your probiotic may not have been viable. From my results, it seems that using at least 1 oz of yogurt containing live bacteria works best.
Kris
0I have an electric yogurt machine and am wondering if I could use that to make this recipe. Have you ever experimented with this? Thank you
Maya | Wholesome Yum
0Hi Kris, I don’t have a yogurt maker so am not sure, but I think it should work. Please let me know how it goes if you try it!
Charles Whealton
0OK, I tried this twice – not from your page’s recipe. Once it was edible but not enjoyable. We won’t discuss the other time (LoL!).
1) I’ve read that we should keep metal away from coconut yogurt though I didn’t read it on your page. It was the same deal for making kefir. If I put this in jars, would it be reasonable to place them in my instant pot in yogurt mode, which should be about 110 degrees?
2) You mention coconut milk. How about coconut cream? Can that be used also?
Thanks in advance!
Chuck
Maya | Wholesome Yum
0Hi Chuck, I didn’t use my Instant Pot to make this, but yes, you should be able to place the jars in your Instant Pot in yogurt mode. I also haven’t made it with coconut cream, but I suspect you’d need less gelatin to prevent it from getting too thick. Please let me know how it goes if you try either of these!
Kellie
0What can I do to make it not tangy?
Maya | Wholesome Yum
0Hi Kellie, How tangy it turns out depends on how long you let it incubate. If you like it less tangy, limit it to 12 hours rather than waiting 24 hours. That being said, yogurt is always tangy by the nature of what it is.
Sue S
0Hi Maya, How much Agar Agar would I use in place of the gelatin powder and how much starter would I use in place of the probiotics? I have those on hand and not the others and can’t wait to try this recipe. Thanks!
Maya | Wholesome Yum
0Hi Sue, I’d recommend about 2 teaspoons of agar agar. For the starter, I’d recommend 2-3 tablespoons. Let me know how it goes if you try these substitutions. I haven’t tested them together at the same time.
Dianne J
0Do I always need to start with the probiotic capsules or can I use the formerly made yogurt like in dairy yogurt? Thanks!
Maya | Wholesome Yum
0Hi Dianne, Yes, you can start with dairy yogurt.
Navika
0How much of dairy yoghurt would you recommend for one 400ml can of coconut milk? Ta
Maya | Wholesome Yum
0Hi Navika, I’d recommend 2-3 tablespoons.
Pat Cummings
0My local stores no longer carry a good tasting coconut yogurt so I am happy to try this recipe! IS there a particular brand of probiotic that you recommend?
Maya | Wholesome Yum
0Hi Pat, I usually use these probiotic capsules.
Matt
0Very easy and very easy to make… Coconut yogurt is great and dairy free!
Isabella
0Hi Maya,
I have just read some comments below about using instant pot.
What temperature range should be used for making the coconut yogurt in the instant pot?
I do not have the manual for the instant pot, but I can measure the temperature.
Where can I buy probiotic culture. Can I use kefir grains I use for making milk kefir at room temperature or it must be specific probiotic culture for coconut cream?
Thanks,
Isabella
Wholesome Yum M
0Hi Isabella, Using kefir grains will make a different product – milk kefir. You will need probiotics or a yogurt starter base for making yogurt. If you want to use an Instant Pot, make sure the temperature doesn’t rise above 110 degrees F, which can destroy the culture.
Isabella
0Hello Maya. When I close the oven door, the lights automatic goes off. When I wrap the jars in a warm blanket to keep them warm, the jars will have no light. Is the light necessary ?
Thanks,
Isabella
Wholesome Yum M
0Hi Isabella, A warm blanket should be sufficient. Enjoy!
EAP
0I make regular Greek Yogurt in the Instant Pot – going to try this the same way . . .
Amy L Huntley
0I was always so intimidated by making yogurt. It really is not difficult to make at all. Especially if you use the instant pot. The coconut flavor of this yogurt is so amazing. I would even make this as a dessert!
Jen
0How do you ferment the coconut milk without adding sugar for the bacteria to feed on? Seems impossible!
Maya | Wholesome Yum
0Hi Jen, Coconut milk contains some natural sugars. It’s definitely not impossible – the pictures are of the yogurt I actually made (as always with my recipes). There are plenty of store-bought coconut yogurts that are unsweetened, too.
Pam D.
0Have you tried making your coconut milk yogurt in an instant pot?
What changes could be made to this recipe to allow for instant pot?
Wholesome Yum M
0Hi Pam, Please check the manual on your Instant Pot to make sure the yogurt setting isn’t too hot for the recipe. It should work just the same without any changes needed to the recipe.
Kristyn
0I could eat this every morning!! Love berries with coconut & can’t believe how easy it is to make!
Natalie
0I think this is my new favorite yogurt! Love the coconut flavor with some granola!
Barbara sthilaire
0CAN I DO THIS IN AN INSTANT POT?
Wholesome Yum M
0Hi Barbara, Possibly. Check the manual for your Instant Pot to make sure the yogurt setting won’t get too hot for this recipe.
Toni
0I really loved how creamy it is! Homemade is really the best!
Beth
0This is perfect for my daughter! We are always looking for new recipes that dairy-free.
Jess
0I make homemade yogurt every week but I have one child who cannot eat it. Until now! Love that I can now make a dairy-free option for her.
Beth Sachs
0I love coconut flavour yogurt. This one is so creamy and delicious.
Caitlyn Erhardt
0MHMMM! I love coconut and this yogurt is so smooth and creamy.