
 Shop
 My
 Custom





My Cheese Taco Shells Bring The Crunch Back To Low Carb Tacos

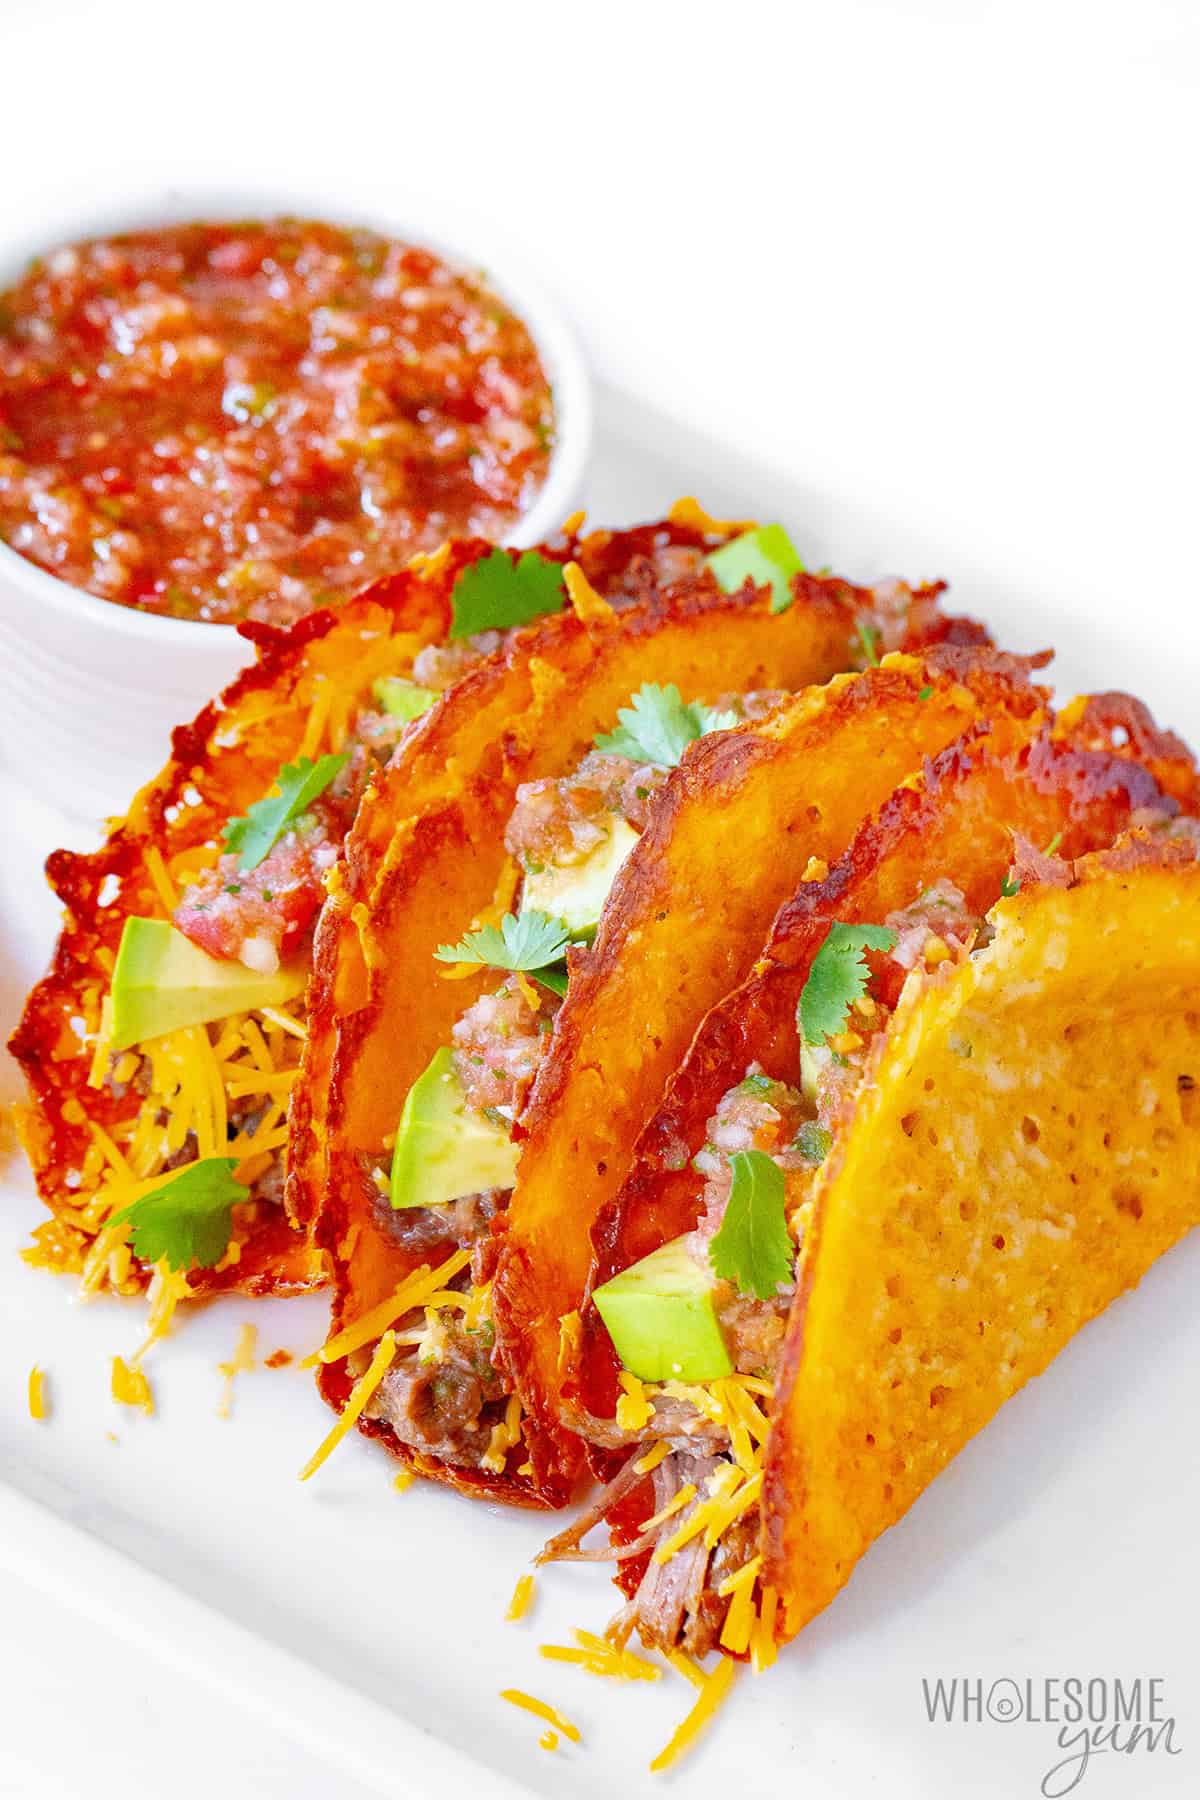
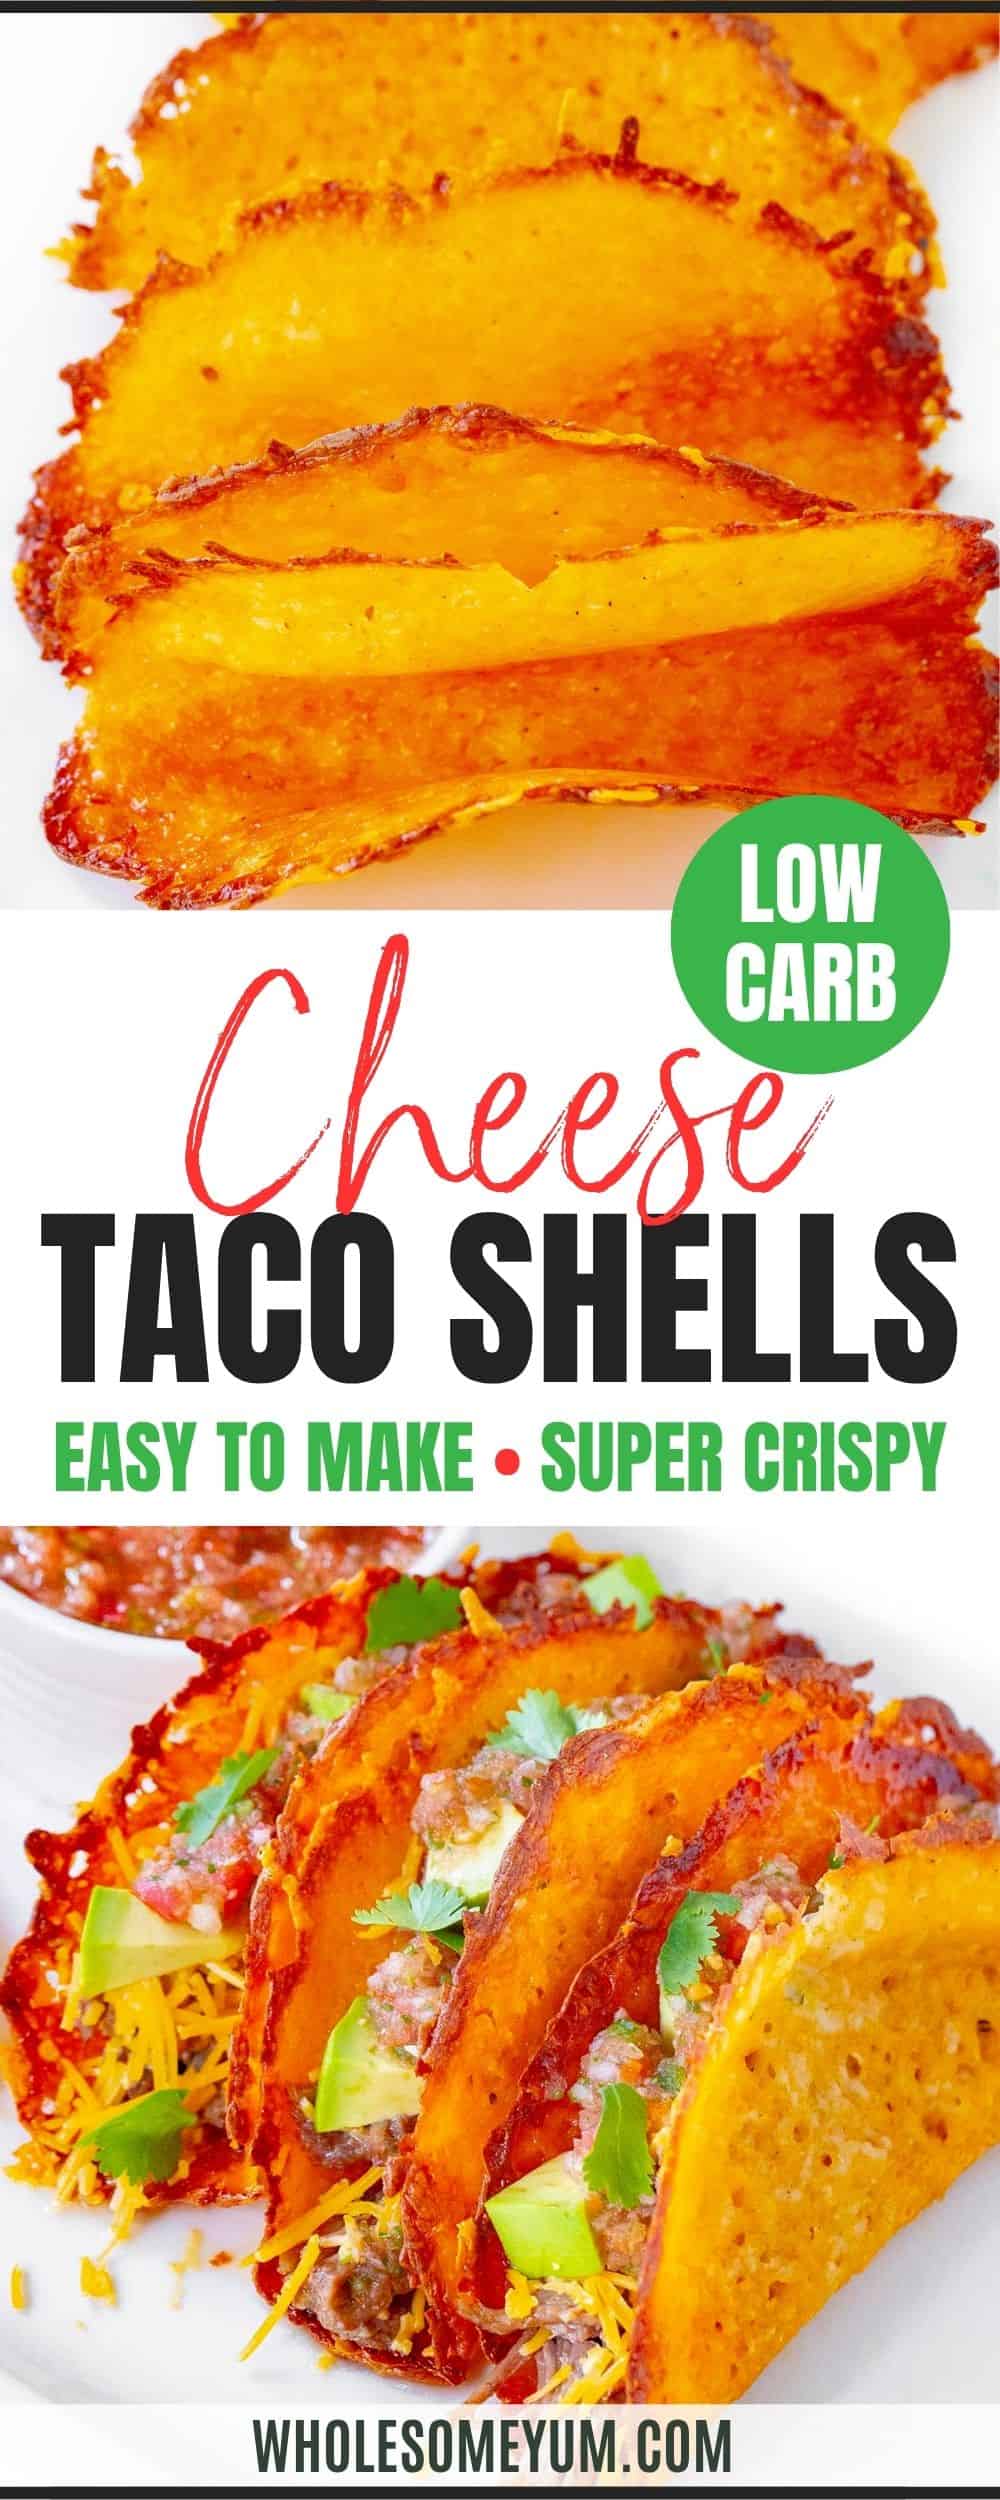
These cheese taco shells crunch like your favorite hard taco shell, but without flour or corn. I created them as a riff on my baked cheese crisps, except they’re large enough to stuff to the brim with taco fillings, and you feel like you’re eating an actual taco. Just without the carbs. And to be honest, I love these low carb taco shells even more than regular hard shell ones. Here’s why:
- Crispy, cheesy goodness – Picture wrapping your favorite taco fillings in a crunchy sheet of cheese, like those crispy bits left at the bottom of a pan of something cheesy. That’s these cheese taco shells. It turns the shell from “I need something to hold my taco” to “this is the best part of my taco”!
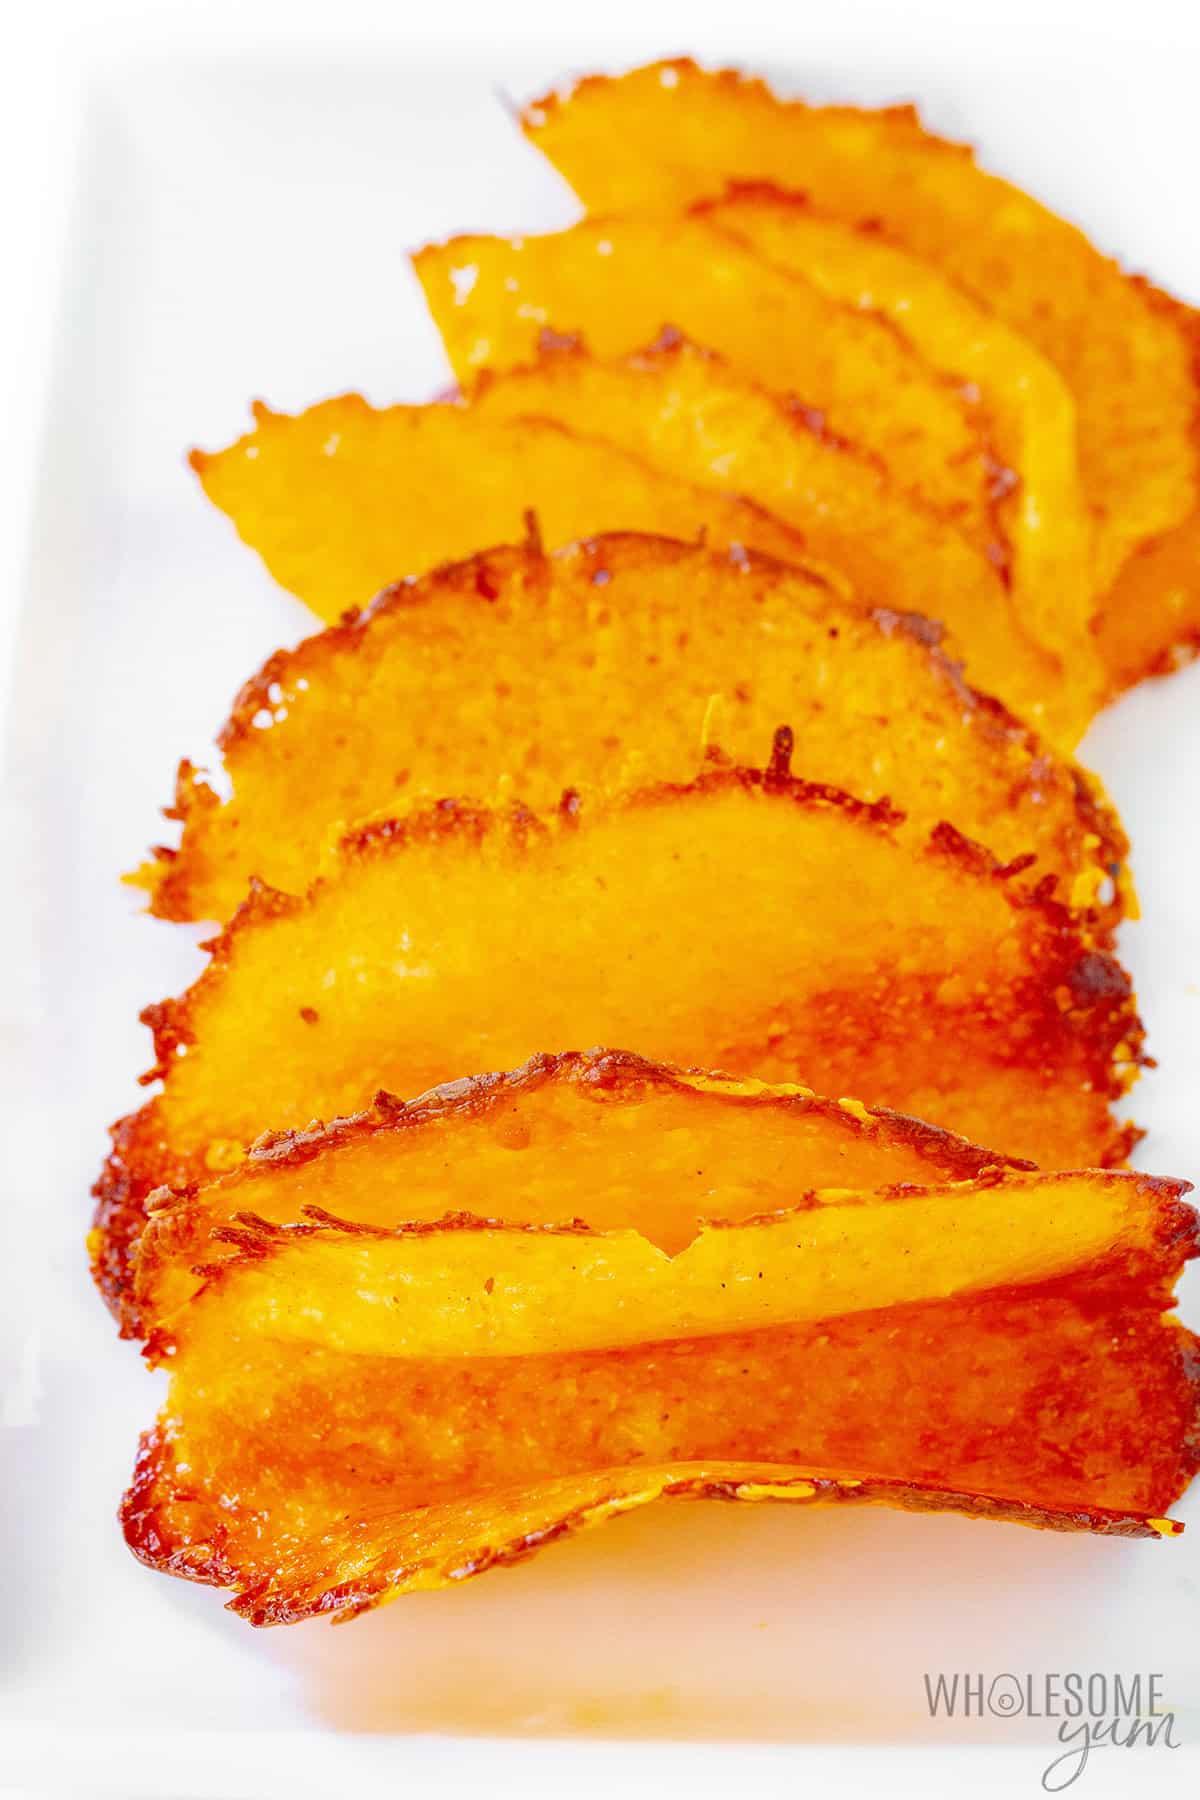
- Strong enough to fill – I bake the cheddar until the edges are deeply golden, then shape it while it is still flexible. They’re crunchy through and through (unlike my soft almond flour tortillas), and sturdy enough to hold taco meat, salsa, and sour cream without breaking.
- Just 3 ingredients – All you need is cheese and a couple spices to bring the warm taco flavor. No flours, binders, or specialty ingredients.
- Low carb and gluten free – They’re keto friendly, but even the non-keto people in my life have loved these cheese shells for tacos!
I love this recipe so much that I even included it in my Wholesome Yum Easy Keto Cookbook, filled with 99 simple low carb recipes like this. But if crunchy tacos are what you miss most — or you just love cheese and tacos — I definitely recommend starting with these crispy cheese taco shells. Make them with me!

“PERFECTION on the 1st try!! Taste SO amazing, even my picky kiddos loved them! Thank you so much for the step by step tutorial. Can’t wait to have them again next Taco Tuesday!”
-Chelsea
Ingredients & Substitutions
Here I explain the best ingredients for my cheese taco shells recipe, what each one does, and substitution options. For measurements, see the recipe card.
The Cheese
I usually use shredded cheddar cheese (preferably sharp cheddar for the best taco flavor!), because it melts into an even round and crisps well. Some notes on choosing what kind:
- Other firm cheeses that brown and crisp can work, too. Mexican cheese blend is my other favorite.
- I don’t recommend softer, high-moisture cheeses, like mozzarella, as they’re more likely to stay chewy instead of turning into a crisp shell.
- Use freshly shredded block cheese if you can. It melts most evenly. Pre-shredded works if that is what you have, though.
- Sliced cheese is okay, but not my favorite. Cheese taco shells aren’t as crispy with it, since piles of shreds tend to leave air pockets and slices don’t.
The Spices
While you can make these low carb taco shells with cheese alone, I prefer to add a dash of cumin and chili powder to add the warm, earthy flavor I associate with tacos.
You can also use my homemade taco seasoning for a more seasoned flavor, or a pinch of cayenne pepper for some heat. I don’t recommend too much of anything, so you don’t overpower the fillings.
Free Printable: Low Carb & Keto Food List
Get It Now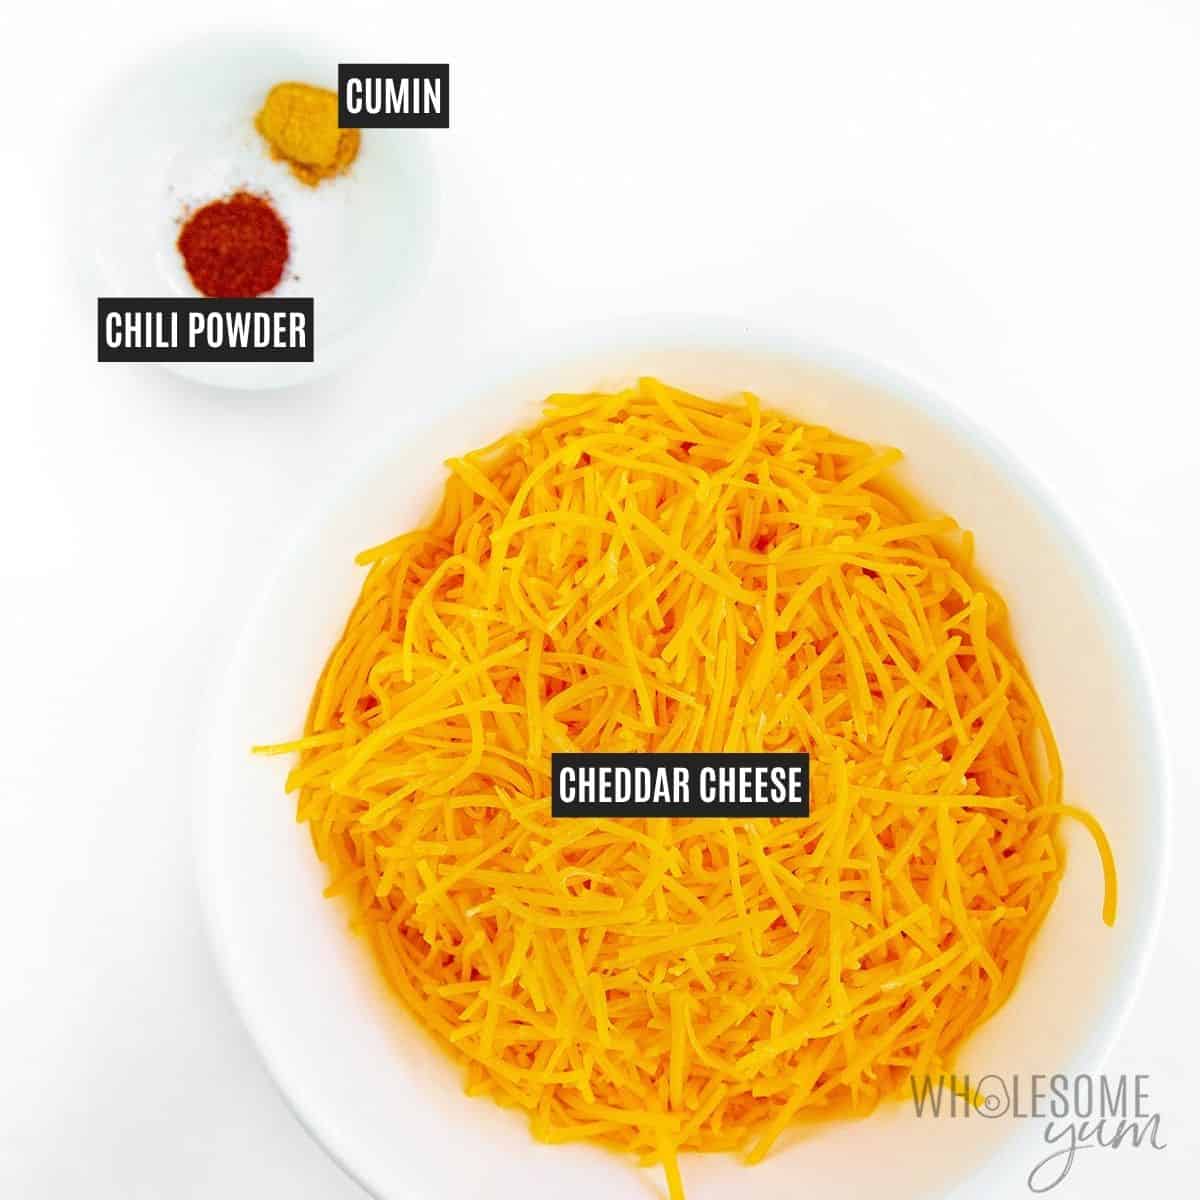
How To Make Cheese Taco Shells
I have step-by-step photos here to help you visualize the recipe. For full instructions with amounts and temperatures, see the recipe card.
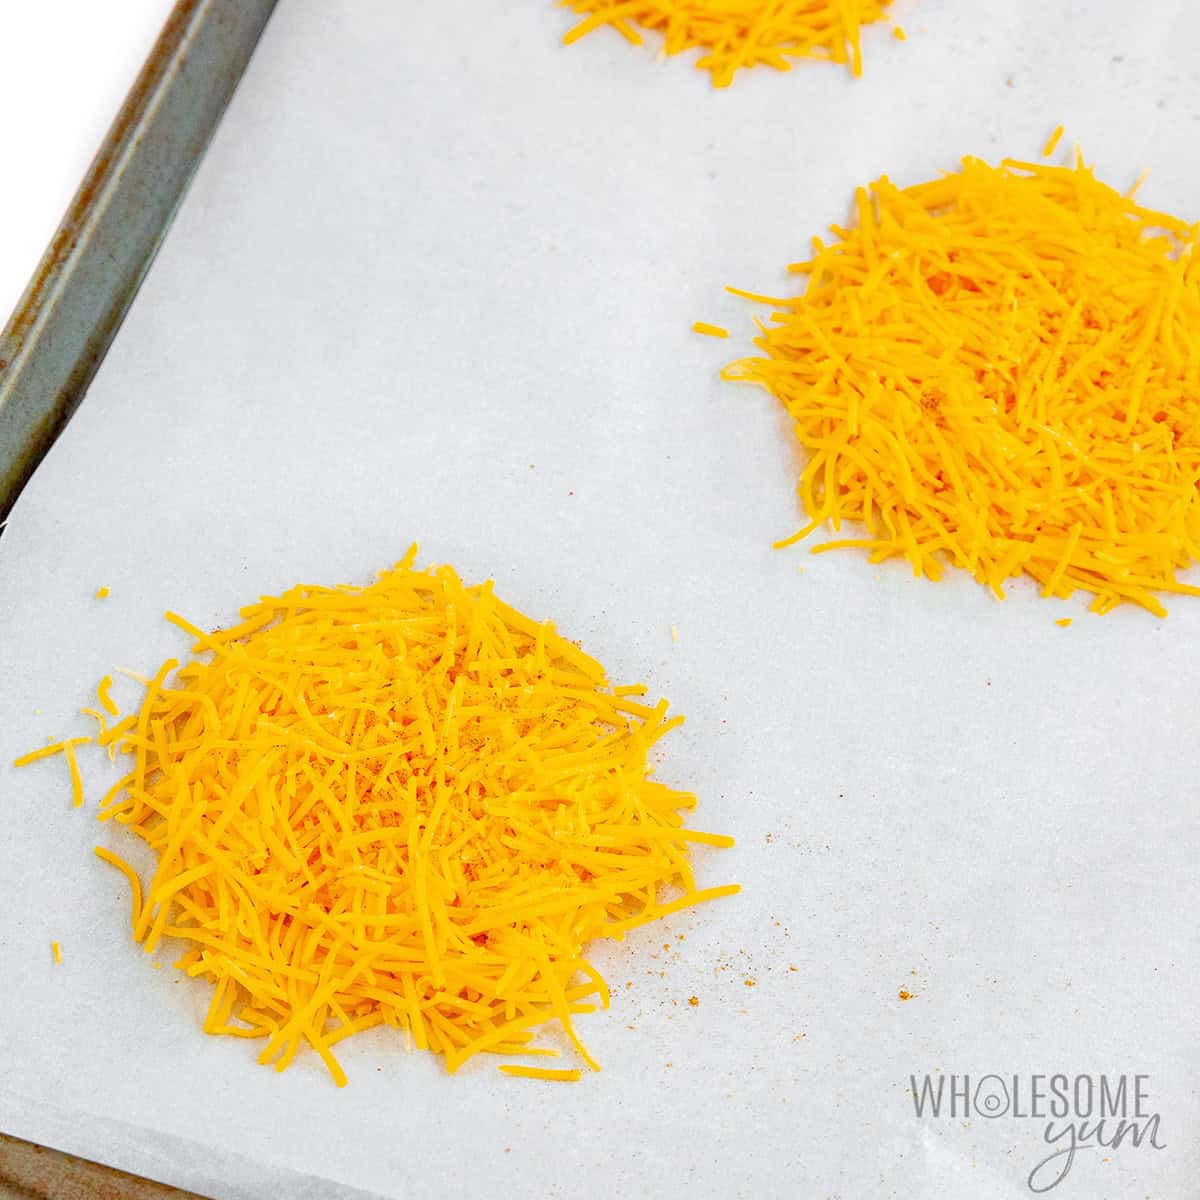
- Form the cheese rounds. Arrange the shredded cheddar in circles on a parchment-lined baking sheet. I tidy the edges with my fingers, so thin stray pieces don’t burn before the centers crisp. Sprinkle the cumin and chili powder on top.
- Bake until golden. The cheese taco shells are ready to shape when they’re bubbly all over and the edges look dark.
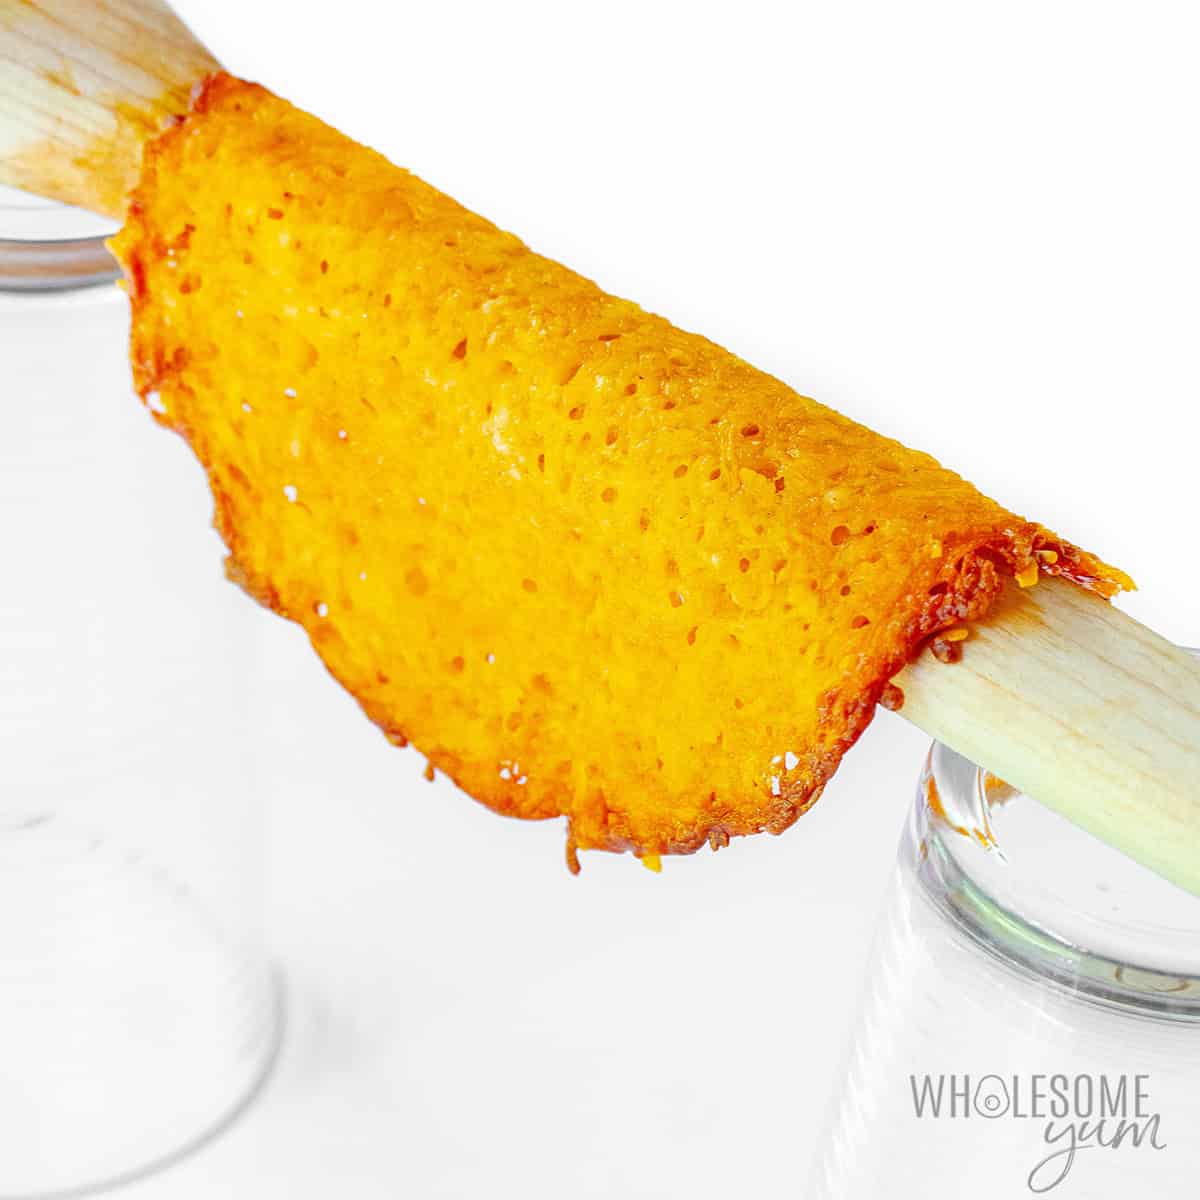
- Set up the shaping stations while the cheese bakes. For each shell, balance a wooden spoon across two drinking glasses. Have every station ready before the pan comes out, because all the rounds need to be shaped during the same short window!
- Cool briefly, then shape. Let the baked cheese rest until it’s firm enough to lift in one piece, but still flexible. Slide a large solid turner underneath (I like this one), then drape it over each spoon handle. If it tears, wait a few more seconds; if it starts cracking, shape it right away.
- Let the shells harden. Leave them over the spoon handles for 5 minutes, until they hold their taco shape. They continue to crisp as they cool. Once they get crispy, fill and serve right away for the best crunch!

My Tips For Timing & Crispy Texture
- Use two jelly roll pans to save time. I love these particular pans! They are just big enough to fit 3 shells, but small enough to fit in the oven side by side. Plus, they aren’t too dark, which helps my cheese taco shells crisp more evenly.
- Use parchment paper, not foil. The melted cheese releases cleanly from parchment once it has browned. A bare pan (even my really nice ones) or foil is pretty much always sticks.
- Keep the circles even in both size and thickness. I have found that thin edges turn brittle before a thick center firms up. Uniform rounds bake at the same speed and give you stronger low carb taco shells.
- Bake until the edges are deeply golden. The biggest mistake is removing the cheese while it is only melted! Wait for bubbling across the whole round and dark golden edges. When I’ve pulled these too soon, the shell ended up soft and greasy.
- Use a large, solid turner to lift. I like this restaurant-style turner because it supports most of the cheese. Slotted spatulas can leave dents or let the warm cheese sag through.
- Wait 45 to 60 seconds before lifting, but not longer. Straight from the oven, the cheese is too fragile. Much longer than a minute, it can harden on the pan and become too stiff to bend. For me, the sweet spot is when a solid turner can lift the whole round but it still droops easily, which is around or just under a minute. This is also why I set up the glasses and spoons before baking is done, so I’m not scrambling!
- If the cheese looks very greasy, you can drain or blot very gently. I tilt the cheese as I lift so that any excess grease can drain off. If it still looks oily, you can very lightly pat with the corner of a paper towel, but don’t press, because it’ll stick easily.

Cheese Taco Shells (Low Carb & So Crispy!)
 By
My low carb cheese taco shells have the best crunch and are ready to hold all your favorite taco fillings. Easy to make in 15 minutes!


Instructions
[ See step photos See my tips ]Tap on the times in the instructions to start a kitchen timer.
-
Preheat the oven to 375 degrees F (191 degrees C). Line either two jelly roll pans or one XL baking sheet with parchment paper.
-
Place cheese in circles on the baking sheet(s), with even thickness throughout. Sprinkle with cumin and chili powder.
-
Bake for 5-7 minutes, until the edges start to brown and bubbles start to form.
-
Meanwhile, setup wooden spoons sitting horizontally across two overturned glasses (see picture above with the cheese on it). This way, they'll be ready once the cheese taco shells are out of the oven.
-
Remove the pan(s) from the oven and cool without disturbing for about 1 minute.
-
Use a flat turner or spatula to lift the cheese circles and hang them over the wooden spoons. Let them hang until hardened, about 5 minutes.
Did you make it? Leave a review or tag me @wholesomeyum on Instagram!
Maya’s Recipe Notes
Serving size: 1 cheese taco shell
- Tips: Check out my recipe tips above to help your cheese taco shells release cleanly, shape without tearing, turn crisp instead of chewy, and how to time them perfectly.
- Storage & reheating: These taste best right after cooling slightly while they are still crispy. However, you can keep them in the fridge for a few days if needed. Re-melt them in the oven, then drape over spoons again to return to the right shape and crisp up again.
📖 Want more recipes like this? Find this one and many more in my Easy Keto Cookbook here!
I provide nutrition facts as a courtesy. Have questions about calculations or why you got a different result? Please see my nutrition policy.
Add Your Notes Your Notes
Try More Of My Recipes


© Copyright Maya Krampf for Wholesome Yum. Please DO NOT SCREENSHOT OR COPY/PASTE recipes to social media or websites. We’d LOVE for you to share a link with photo instead.
Cheese Taco Shells
How To Fill Your Low Carb Taco Shells
These cheese taco shells are crispy, but wet fillings can still soften them, so I try to add wet toppings last, away from the bottom of the shell. Here are a few combinations that work especially well:
- Classic Taco Night – Fill them with ground beef cooked with my taco seasoning, then add shredded lettuce, tomatoes, sour cream, and guacamole.
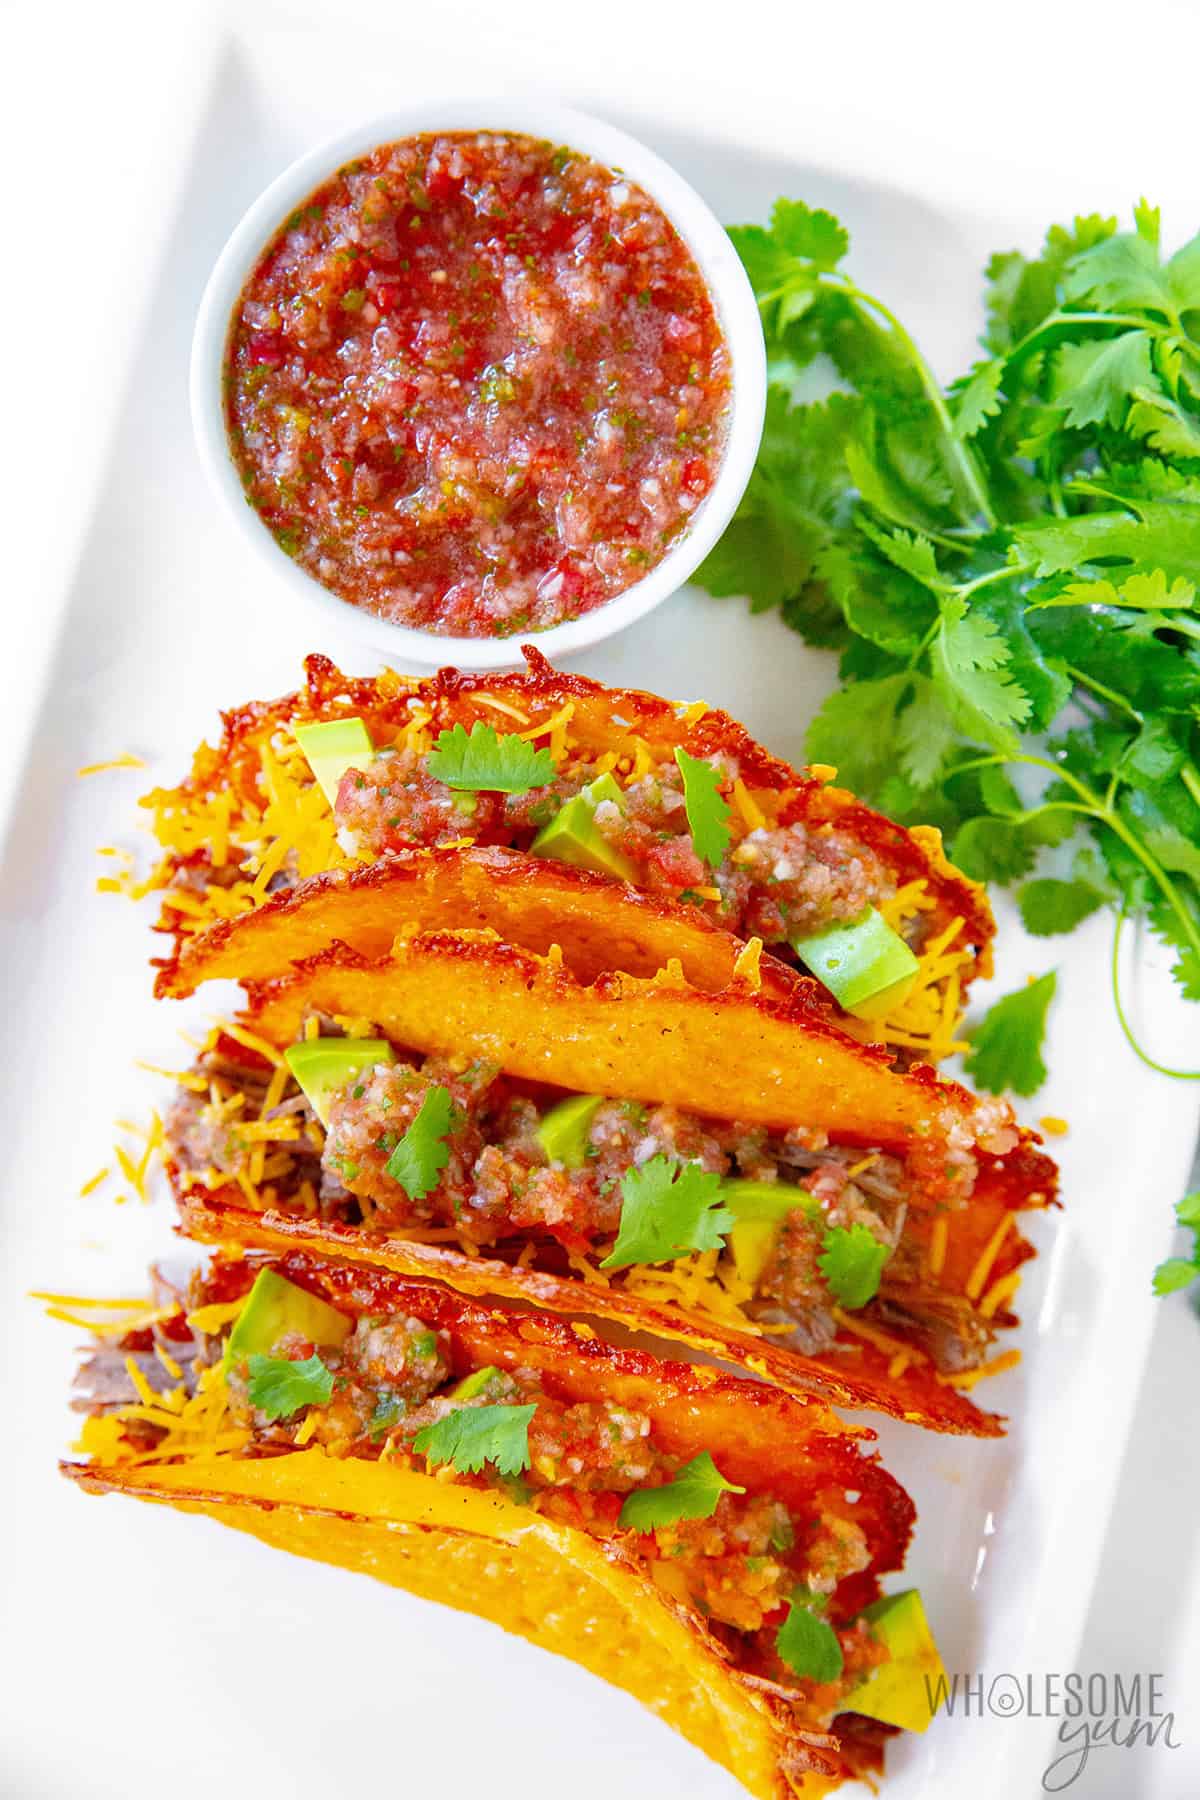
- Shredded Meat Tacos – As long as you drain off excess liquid, these sturdy shells can handle juicy fillings like barbacoa beef (pictured above), shredded Mexican chicken, or Mexican chorizo. I love these with some taco slaw on top.
- Salsas & Toppings – Spoon on a little fresh tomato salsa (also above) or avocado salsa verde, then finish with cilantro, sliced jalapenos, or diced avocado.
- Taco Bowls – If you make the cheese taco shells extra large, you can use them as a crunchy bowl! When they are done in the oven, drape the cheese over upside down bowls instead of over a spoon. Then, whip up my easy taco salad, keto burrito bowl, or regular taco bowl, and fill the cheese shells with that!











53 Comments
Debbie Fleischer
0Sorry, didn’t like these at all. The bottom fell out. Just too much cheese. I’ll try the coconut flour ones. I’ve tried other recipes like your biscuits and really like them. I especially like that there’s only a few ingredients and nothing complicated.
Maya | Wholesome Yum
0Hi Debbie, If the bottom fell out, it means they needed to bake for longer (they need to be browned on the edges), the circles were too thick, or they needed to cool more before adding fillings. Hope that helps, or that you like the coconut tortillas better.
Marilyn Brennan
0If you had to estimate how much per taco shell, would it be about 1/3 cup? Maybe 1/4 cup?
Maya | Wholesome Yum
0Hi Marilyn, It would be 1/3 cup per shell.
Shayla M Kelley
0This is probably silly, but I’m going to ask anyway because I really want to try these! The taco hanging part has got me hung up lol.
So that spoon you are using looks rather large, I’m not sure I have one that large, much less 6 of them. Yo do hang them individually, right? Also I’m not sure I’ll have the counter space or cups to do 6 separately… am I understanding this right? Are there other ideas for the hanging part? Have you tried any taco shell molds or the racks? Just curious if these would work also?
Maya | Wholesome Yum
0Hi Kelley, The spoon is just a regular-sized cooking utensil. Sometimes you can fit two taco shells on one – just not on top of each other, side by side only. You can also use virtually any utensils that you have with a round handle. The shells harden fairly quickly, so you can even set them on your kitchen table to harden. Taco molds or racks might also work, you’d just need something where you can place or hang them upside down.
Regina
0Happy anniversary! Your delicious and helpful recipes help make the keto WOE sustainable. Ty!
My question is, does it make a difference if you shred your own cheese vs using preshredded? I like to shred my own to avoid the extra starches, but this can sometimes cause inconsustent recipe results. Do you have a preference?
Maya | Wholesome Yum
0Thank you so much, Regina! I really appreciate that.
It doesn’t matter for this recipe – you can use pre-shredded or shred your own!
Jenette Kerr
0I’m looking for a good keto multigrain bread recipe. I buy one now it’s nice but I’m a senior, and on a fixed income and her bread is 10.00 a loaf. Thank you.
Maya | Wholesome Yum
0Hi Jenette, While grains are not suitable for keto, you can definitely make keto bread. Some of my favorites are keto bagels, keto almond flour bread, and keto white bread. I also have a multi-seed bread recipe coming soon that might have more of that multi-grain texture you want.
Michelle E
0Congratulations on 3 years! Love the site and amazingly awesome recipes. I look forward to seeing each new entry. You make eating low carb fun and exciting.
Maya | Wholesome Yum
0Thank you so much, Michelle! I love hearing that!
Dorothy
0Happy 3rd anniversary and thank you for this wonderful site.
Maya | Wholesome Yum
0Thank you, Dorothy!
Michelle
0Happy 3rd Anniversary Maya! Your site is my absolute favorite. It has come a long way in such a short time. You are doing a fabulous job!
Maya | Wholesome Yum
0Thank you so much, Michelle! Your support means a lot.
Noline from Essential Keto
0Happy 3rd birthday Maya. You’ve created an awesome low carb resource with Wholesome Yum. All the best for the next year…
Maya | Wholesome Yum
0Thank you so much, Noline!!