
 Shop
 My
 Custom




FREE 5-Ingredient Recipe EBook
GET IT NOWIf you’ve ever made my low carb pizza, you’re going to love this twist: protein pizza! I started with my trusty base, but swapped some ingredients to pack this crust with even more… you guessed it, protein. The texture is just the right balance of crispy and chewy, and the perfect blank canvas for all your favorite toppings. Make this protein pizza crust with me for a more satisfying, more nutritious pizza night!
Why You Need My Protein Pizza Recipe

- Crispy, chewy, and sturdy – This crust gets crispy around the edges and on the bottom, and stays chewy in the middle. It’ll stand up to all your favorite toppings even if you want to pile it high!
- Just 5 ingredients – Plus salt. I love the simplicity, and almost every ingredient in this crust has protein in it.
- Protein-packed – The crust alone has 13 grams of protein per slice, and that’s before you even add any toppings! You can easily enjoy 2 or even 3 slices for a meal, and you’d get more protein than a serving of chicken.
- Gluten free – Most protein pizza options use white or wheat flour as the base, but not mine! This one is gluten-free, naturally low carb, and a lot better for you.


Ingredients & Substitutions
Here I explain the best ingredients for my protein pizza crust, what each one does in the recipe, and substitution options. For measurements, see the recipe card.
- Whey protein powder – I use whey protein isolate like this, because it has the highest protein content and no fillers, plus it gives your crust the best texture. (It’s the same one I use to make protein pudding, too.) Collagen or plant-based protein might work, but I can’t say for sure. I would avoid egg white protein, as it tends to make baked items dense.
- Almond Flour – Unlike all-purpose flour that some recipes use, mine uses almond flour for even more added protein (and no gluten). I highly recommend Wholesome Yum Blanched Almond Flour here, because it’s ground finer than other brands.
- Greek Yogurt – For another protein boost in the crust!
- Egg – Adds structure and helps hold the crust together (and yes, more protein again). Most egg alternatives with binding power will probably work, but let me know if you try one.
- Mozzarella Cheese – This gives the crust that chewy, pizza-like texture without relying on gluten to do it. Use low-moisture, part-skim for best results—fresh mozz is too watery. Other types of shredded cheese will work too, but you’ll taste their flavor more.
- Sea Salt

How To Make A Protein Pizza
I have step-by-step photos here to help you visualize the recipe. For full instructions with amounts and temperatures, see the recipe card.
- Mix the dry ingredients. In a large food processor, combine the almond flour, protein powder, and salt, and process until uniform.
- Add the egg and Greek yogurt. Process again until smooth. The mixture will be very wet at this point.


- Add melted cheese. Melt the mozzarella in a medium bowl using the microwave, then add it to the food processor near the blades. Process until a sticky dough forms, scraping down the sides as needed.


- Chill the dough. Transfer the dough ball to a bowl, cover with plastic wrap, and refrigerate for at least 2 hours (or overnight). This is important to firm up enough to work with.
- Roll it out. Spray parchment paper and a spatula with oil, then scoop the dough onto the paper. Top with another oiled sheet and roll it out into a circle, about 1/8 inch thick. Peel off the top paper and poke holes with a fork to prevent bubbling.


- Bake the crust. Use a pizza peel to slide the parchment paper onto a pizza stone (or use a pizza pan or baking sheet — see my notes on this in the tips below). Bake just until lightly golden—don’t let it get too dark!
- Add toppings and bake again. Let the protein pizza crust cool partially, then spread on your favorite pizza sauce, sprinkle with cheese, and add toppings. Pop it back in the oven, either on the pizza stone (without paper this time) or directly on the oven rack, until the cheese is bubbly and golden. For extra browning, give it a quick broil!


I topped my high protein pizza with marinara sauce, mozzarella, bell peppers, a combo of pepperoni and Italian sausage for extra protein, and fresh basil leaves. You can use any toppings you like — I have more pizza topping ideas for you in my cauliflower pizza post.


My Recipe Tips
- Can you mix this recipe by hand? Sorry, no. I tried! Unlike my other pizza recipe that this was based on, the ratios here make the dough too sticky to mix well by hand. A stand mixer or hand mixer might work if you don’t have a food processor like this.
- Want more flavor in your protein pizza crust? Feel free to add garlic powder, dried oregano, or Italian seasoning together with the other dry ingredients.
- Add the cheese quickly after melting. If it starts to solidify, it won’t mix in evenly. It can also help to position the cheese so the blade is sticking into it and can break it up when processing.
- Note on cooking spray: This pizza dough is very sticky, so it’s crucial to oil your parchment paper before rolling, and your spatula to transfer it to the paper. I usually use either this avocado oil spray or this olive oil spray, but also love this glass spray bottle if you want to just pour your oil into it.
- Still having trouble with sticky dough? The chilling step is crucial, and if you still find it’s sticky afterward, you might need to refrigerate for longer. Also, work quickly to roll out the dough after removing from the fridge, so you can do it before it starts to soften again.
- How to get the best texture: Use a pizza stone like this, and a pizza peel to transfer the pizza to and from the stone. This is key for that crispy outside! Yes, you can use a baking sheet or pizza pan, but the texture isn’t as nice.
- Prefer a thicker crust? This recipe makes a large 13-inch pizza with a thin crust. You can easily make it thicker (1/4 inch or even 1/2 inch thick), but you’ll need to bake it for longer. If you opt for 1/2 inch thick, I recommend baking it at 350 degrees F instead to make sure it cooks through by the time the top is golden.
- Keep the first bake light—just slightly golden. If it’s too dark, the edges might burn when you bake it again with toppings. I like my protein pizza on the crispier side (you’ll see in the pictures), but if you prefer it chewier, bake it even lighter the first time!

Make Ahead Options
If you like to meal prep like I do, I’ve got multiple ways you can do it for protein pizza:
- Make the dough ahead: You can make it up to 3 days before rolling and baking. If you’ll be storing it for more than a few hours, I recommend pressing the plastic wrap flush against the top to prevent it from drying out, or wrap in the plastic if you manage to wrap it around (it’s hard with how sticky it is).
- Make the crust ahead: You can pre-bake the crust and store in the fridge for up to 5 days. I don’t recommend adding the toppings if refrigerating, because the crust will get soggy.
- Make the pizza ahead: Not the same as fresh, but you can store leftovers for up to 3-5 days in the refrigerator.
- Freeze: Let the protein pizza crust cool, then add toppings and freeze on a baking sheet. Once solid, wrap in plastic wrap followed by foil and store in the freezer for up to 3 months. You can pop it in the oven right from frozen for about 15 minutes to heat.
I recommend reheating the pizza on a pizza stone again for the best texture.
More High Protein Recipes
I love making higher protein versions of recipes where you might not expect it! If you want a little boost in other ways, try these:


Protein Pizza
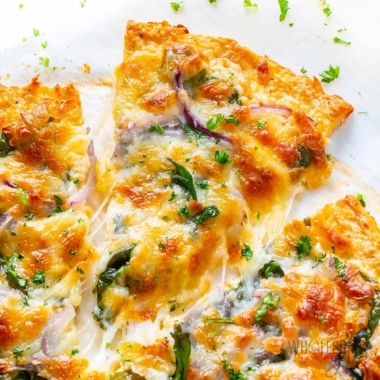
This protein pizza has an amazing crispy, chewy texture! The crust is naturally low carb and gluten-free, and a game-changer for pizza night.


Instructions
[ See step photos See my tips ]Tap on the times in the instructions to start a kitchen timer.
-
In a large food processor, combine the almond flour, protein powder, and salt. Process until uniform.
-
Add the egg and Greek yogurt. Process again until uniform.
-
In a medium bowl, melt the mozzarella cheese in the microwave, until melted.
-
Add the melted cheese to food processor, positioning it near the blades. Process again, until a thick, sticky dough forms. Scrape the sides of the food processor as needed to confirm it’s mixed well.
-
Use a spatula to transfer the dough to a bowl and cover with plastic wrap. Refrigerate for at least 2 hours, until it’s less sticky, or overnight is even better. (It will still be somewhat sticky, but more firm.)
-
Preheat the oven to 400 degrees F (204 degrees C). If you have a pizza stone and pizza peel (my recommendation for the best crust texture), place the pizza stone in the oven before preheating.
-
Spray a large piece of parchment paper with olive oil spray. Spray a rubber spatula with oil as well, and use it to scoop the dough onto the paper. Top with a second sprayed piece of parchment paper, with the oil side down against the dough. Use a rolling pin (or your hands if you don’t have one) to roll or spread the dough into a circle, about 1/8 inch thick and 12-13 inches across.
-
Peel off the top piece of parchment paper. Use a toothpick or fork to poke a few holes throughout the crust to prevent bubbling.
-
Slide the parchment paper onto your pizza peel if you have one, and slide onto the pizza stone in the oven. If you don’t have these, you can just place the parchment paper on a pizza pan or extra large baking sheet. Bake the crust for 6-8 minutes, until very lightly golden. (Don't let the crust get too dark at this step, or the edges will burn by the time you cook the pizza with toppings.)
-
After pre-baking the crust, remove it from the oven and let it sit for 5 minutes. Then, top with your favorite sauce and toppings.
-
Return the pizza to the oven, either directly on the pizza stone or directly on the oven rack (no parchment paper), for about 10 minutes, until the cheese is melted and golden brown. If needed, place under the broiler for 1-2 minutes to brown the cheese more.
LAST STEP: Leave a rating to help other readers, or tag me @wholesomeyum on Instagram. I’d love to hear from you!
Maya’s Recipe Notes
Serving size: 1 slice
- Tips: Check out my recipe tips above to help you mix the dough successfully, work with the sticky dough, get the best texture in your protein pizza crust, and avoid burned edges.
- Make ahead: You can make the dough, just the crust, or the entire pizza in advance. See my meal prep options above for instructions and reheating info.
- Note on nutrition info: Toppings are not included, as it will very depending on what you add. I calculated nutrition per slice for convenience, but you can easily eat 2 or 3 slices for a meal.
I provide nutrition facts as a courtesy. Have questions about calculations or why you got a different result? Please see my nutrition policy.
Add Your Notes Your Notes
Try More Of My Recipes



© Copyright Maya Krampf for Wholesome Yum. Please DO NOT SCREENSHOT OR COPY/PASTE recipes to social media or websites. We’d LOVE for you to share a link with photo instead.
Protein Pizza

Gratitude Moment

I love how sturdy this crust is. Many healthy crusts are too floppy to pick up, but this one is easy to eat with your hands.
Not to mention 13 grams of protein in each slice! That might not sound like a lot, but I intentionally left off the toppings from this number so you can decide what to add.
And let’s be real, who has just one slice of pizza? By the time you add toppings and have a couple slices, you can easily hit 40-50 grams of protein for your dinner. 🙌










44 Comments
Kathi
0I can’t wait to try this, I have been looking for a low carb pizza recipes that doesn’t taste like cardboard.
I want to make a 21 day menu for breakfast lunchband dinner that is high protein and low carb, so Girl I am using your recipes for that….
Maya | Wholesome Yum
0I hope you love it, Kathi! I’m firmly anti-cardboard around here, hehe. Please let me know how it goes! You might also like my Wholesome Yum meal planning app if you want to plan your meals with the calculations done for you. 🙂
julsandlar
0Awesome! As promised the skin was crispy, easy to cut, and holds up to eating out of your hand. No knife and fork needed. I’ve tried countless gluten free pizza skin recipes. Ten stars Maya!!!
Maya | Wholesome Yum
0I’m so glad you liked this protein pizza, Juls! Thank you!