 Shop
Shop My
My Custom


FREE 5-Ingredient Recipe EBook
GET IT NOW- Why You’ll Love This Cheese Crackers Recipe
- Ingredients & Substitutions
- How To Make Cheese Crackers
- Tips For The Best Cheese Crackers
- Storage Instructions
- What To Serve With Cheese Crackers
- More Healthy Crunchy Snack Recipes
- Tools For This Recipe
- Cheese Crackers (3 Ingredients) Recipe card
- Recipe Reviews
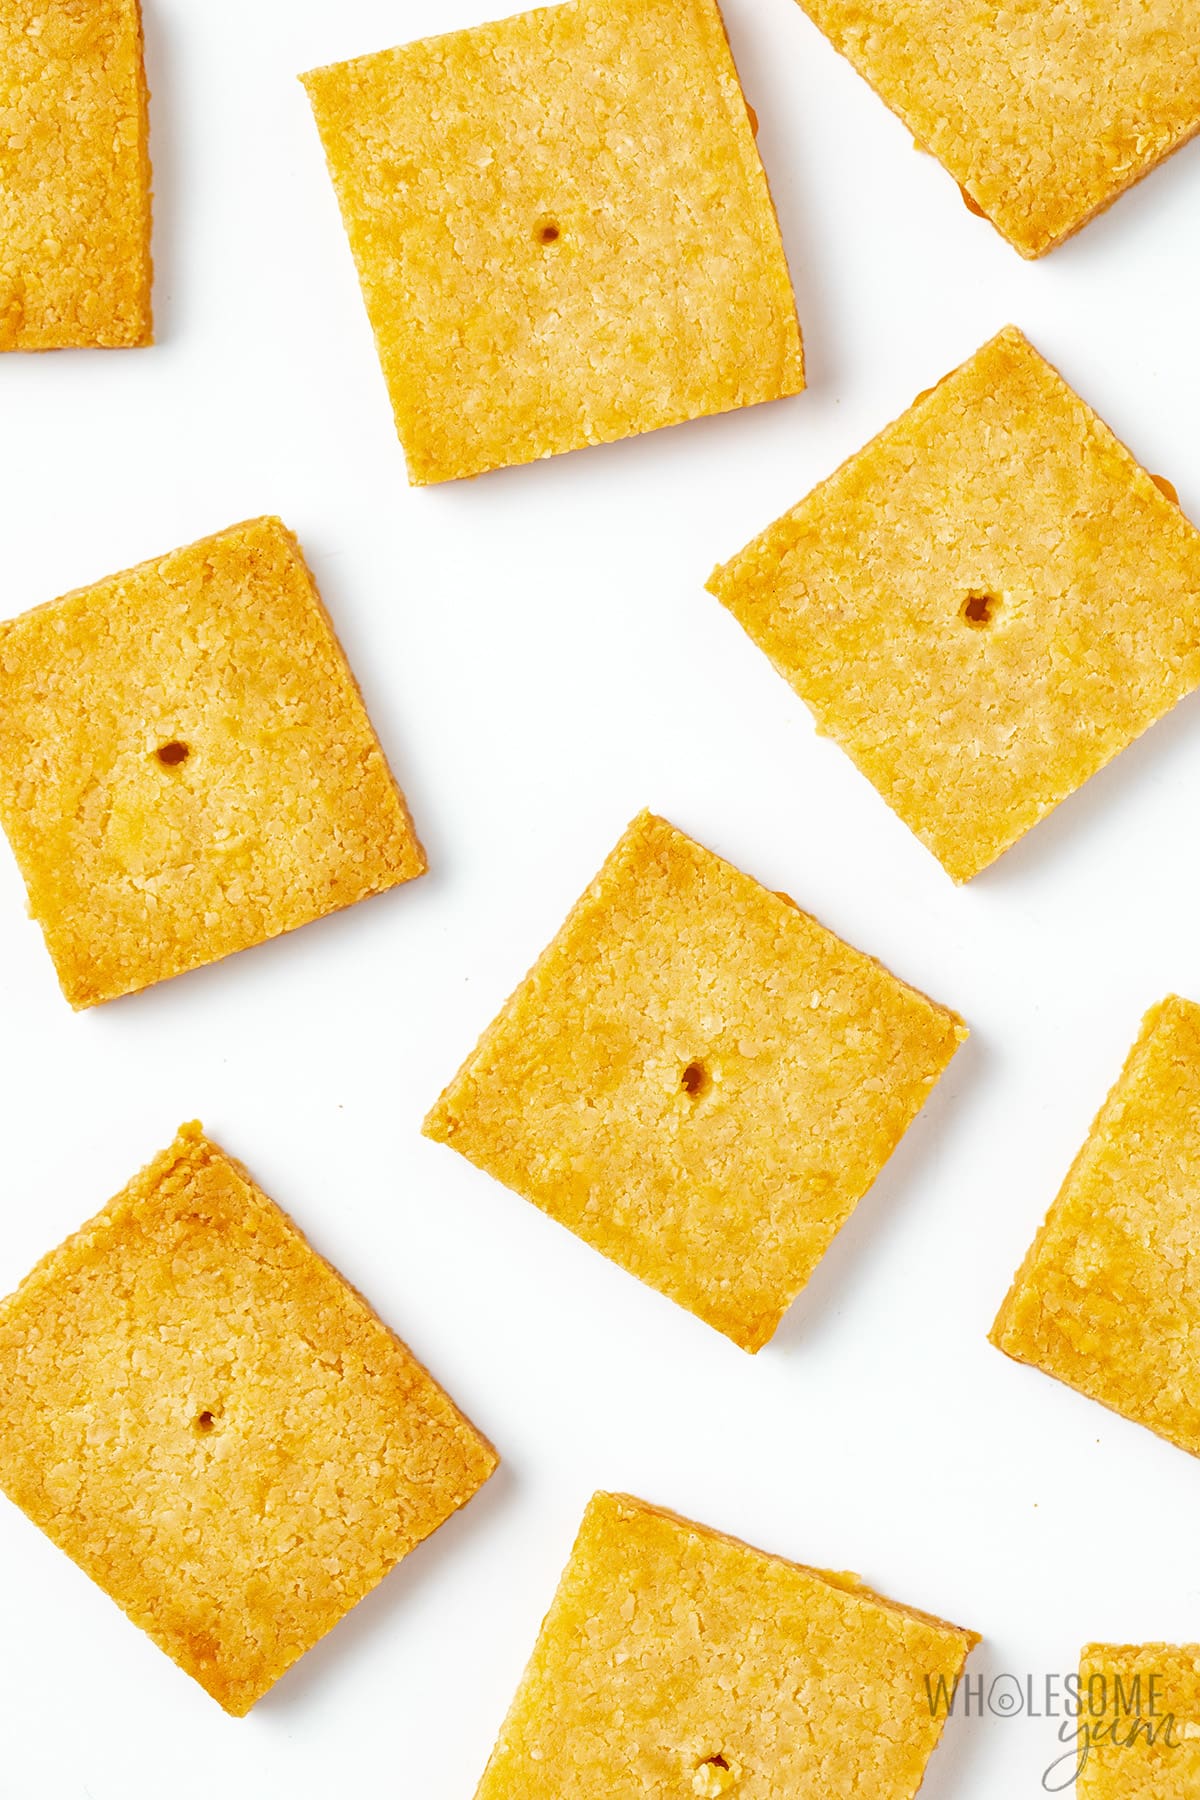
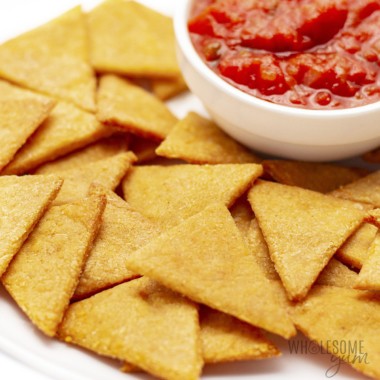
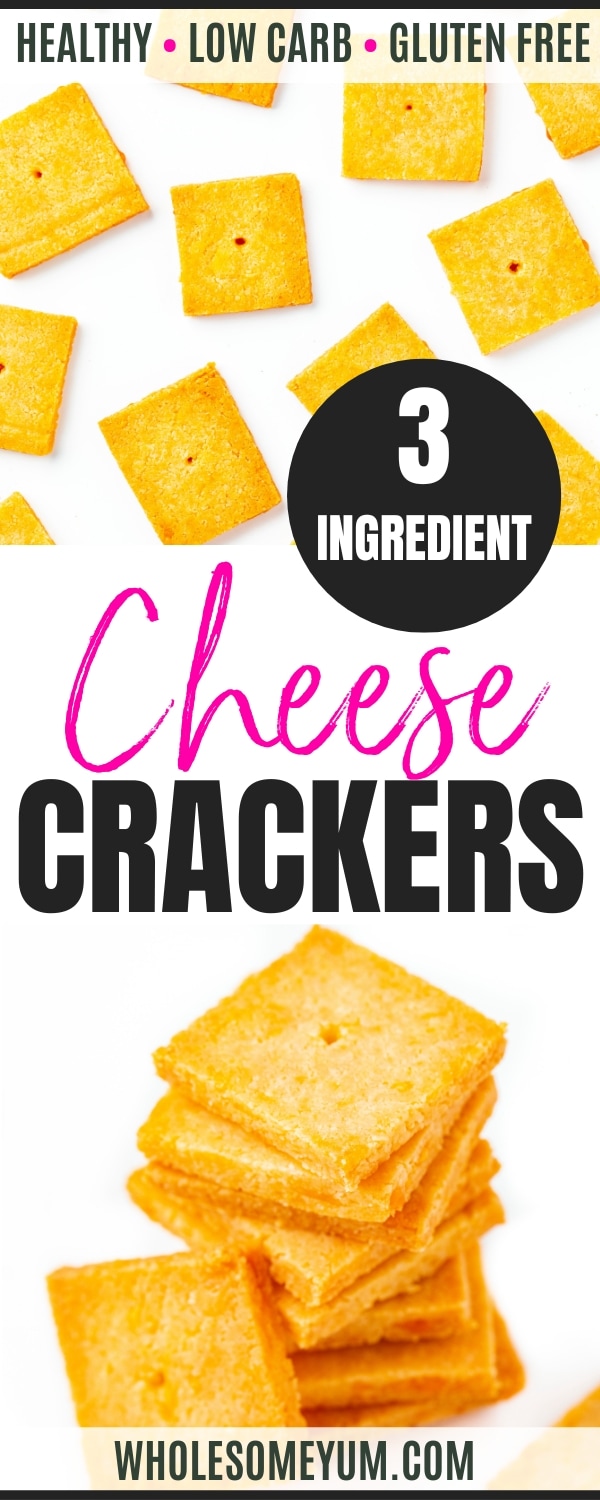
These cheese crackers are reminiscent of the bright orange crackers you might have grown up eating (Cheez-Its!), but this version is made with nutritious ingredients and real cheese as the base! Crackers may sound like a lot to make from scratch, but I think you’ll be surprised by how easy this cheddar cheese crackers recipe is. In fact, you can make them with just 3 main ingredients (just like my flax seed crackers) — but I recommend a 4th for extra cheesy-iness!
Why You’ll Love This Cheese Crackers Recipe

- Cheesy cheddar flavor
- Crunchy, buttery texture (without any butter)
- Tastes a lot like Cheez-Its — but better for you!
- Just 3 simple, natural ingredients (no preservatives)
- Easy to make, without any special tools
- Naturally gluten-free, keto cheese crackers — but delicious for everyone!
- Healthy snack for kids and adults alike

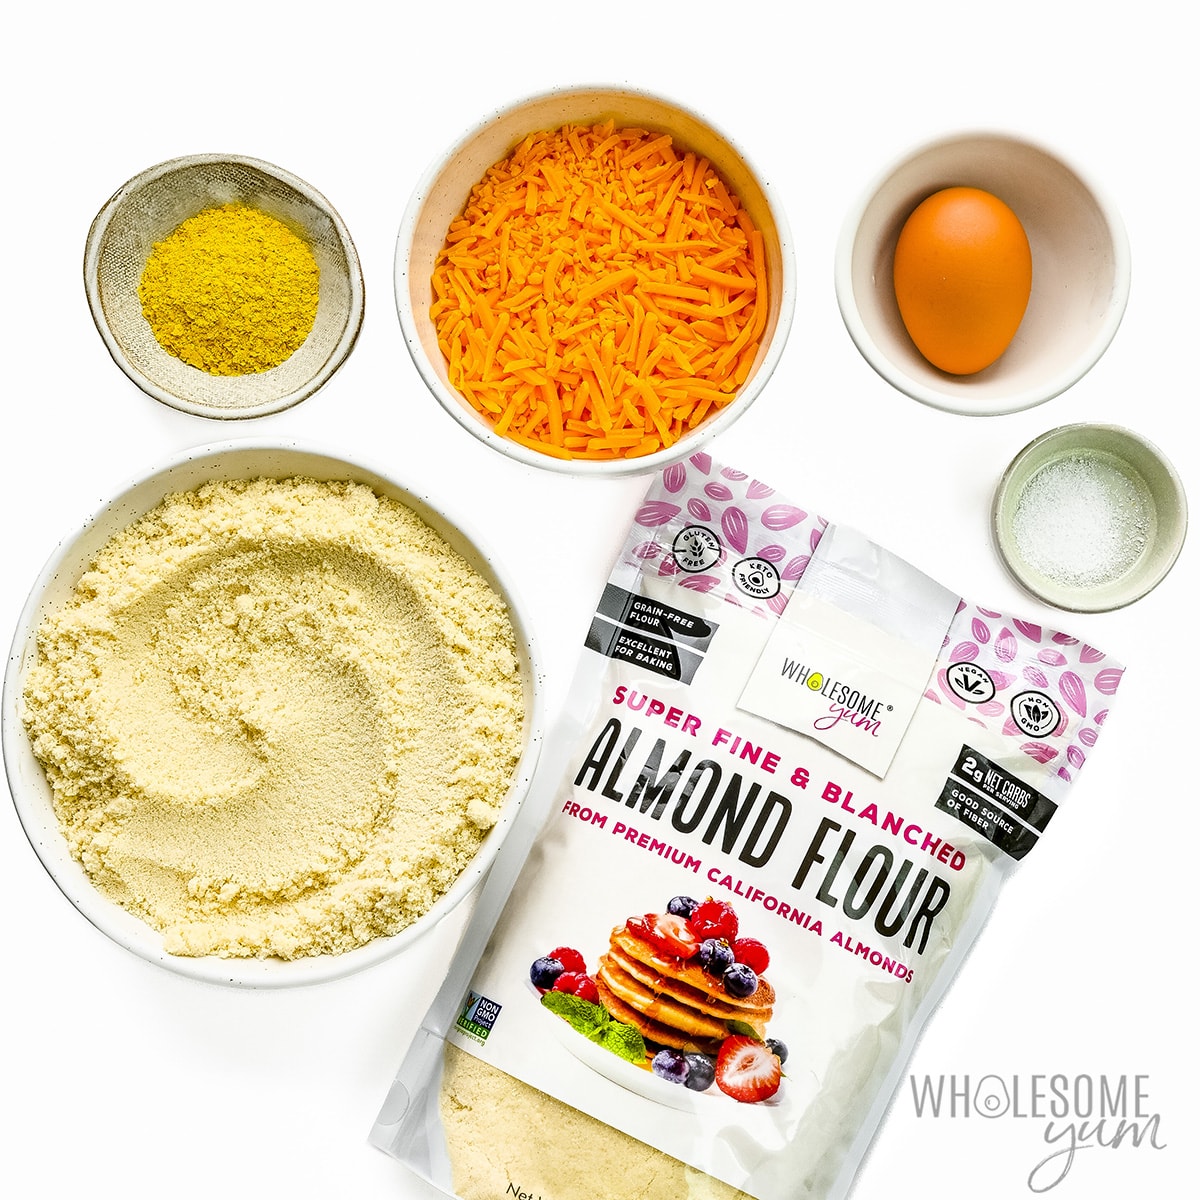
Ingredients & Substitutions
Here I explain the best ingredients for homemade cheese crackers, what each one does in the recipe, and substitution options. For measurements, see the recipe card.
- Cheddar Cheese – This is the base of the baked cheddar crackers. It gives them a rich real cheese flavor. I used mild cheddar cheese, but white cheddar or sharp cheddar cheese would work just as well. You can also use any other semi-hard or hard cheese, such as Parmesan or Gruyere, for a different flavor.
- Wholesome Yum Blanched Almond Flour – Some brands are coarse, but this one is super finely ground, for the ideal texture in crackers. Plus, using almond flour means these cheese crackers are protein packed, gluten free, low carb, and healthier than using all-purpose flour! This almond flour is the same one I use for 3-ingredient almond flour crackers, too.
- Egg – This acts as a binder to keep the dough together. I haven’t tried this cheese crackers recipe with egg substitutes, but let me know how it goes if you try one of them.
- Sea Salt
- Nutritional Yeast – This is optional, but just a tablespoon of this secret ingredient adds a cheesier flavor if you can get it. This is my favorite brand.
How To Make Cheese Crackers
This section shows how to make baked cheese crackers, with step-by-step photos and details about the technique, to help you visualize it. For full instructions with amounts and temperatures, see the recipe card.
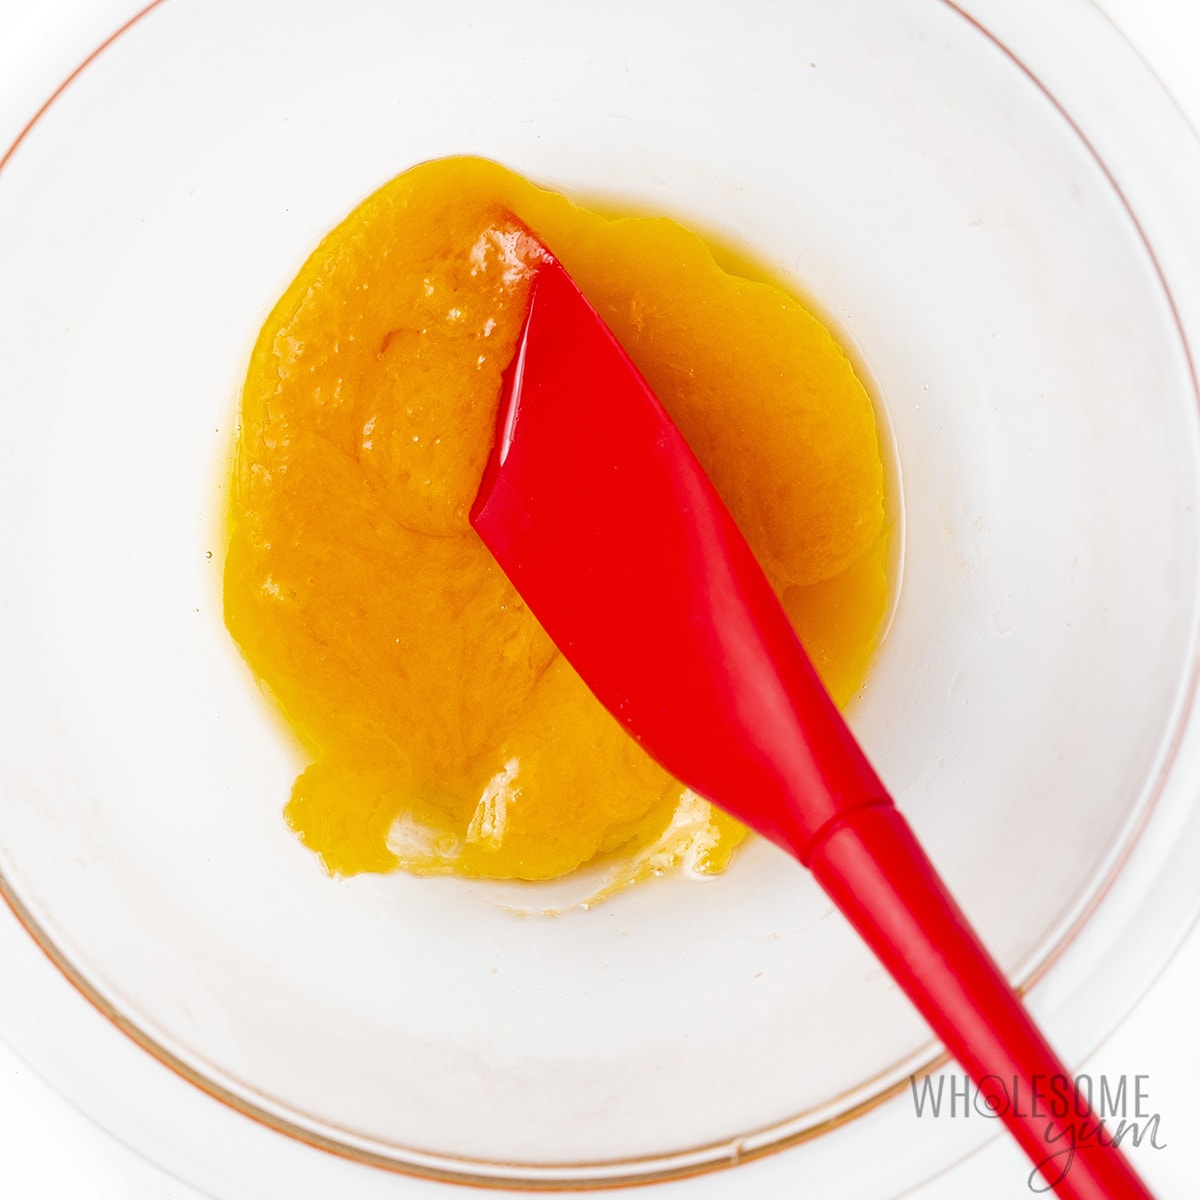
- Melt the cheese. Using the microwave or double boiler on the stove, heat the cheese until it’s smooth and easy to stir.
- Mix the other ingredients. Stir together the almond flour, sea salt, and nutritional yeast, if using. Stir in the egg, until combined. The mixture will be crumbly.
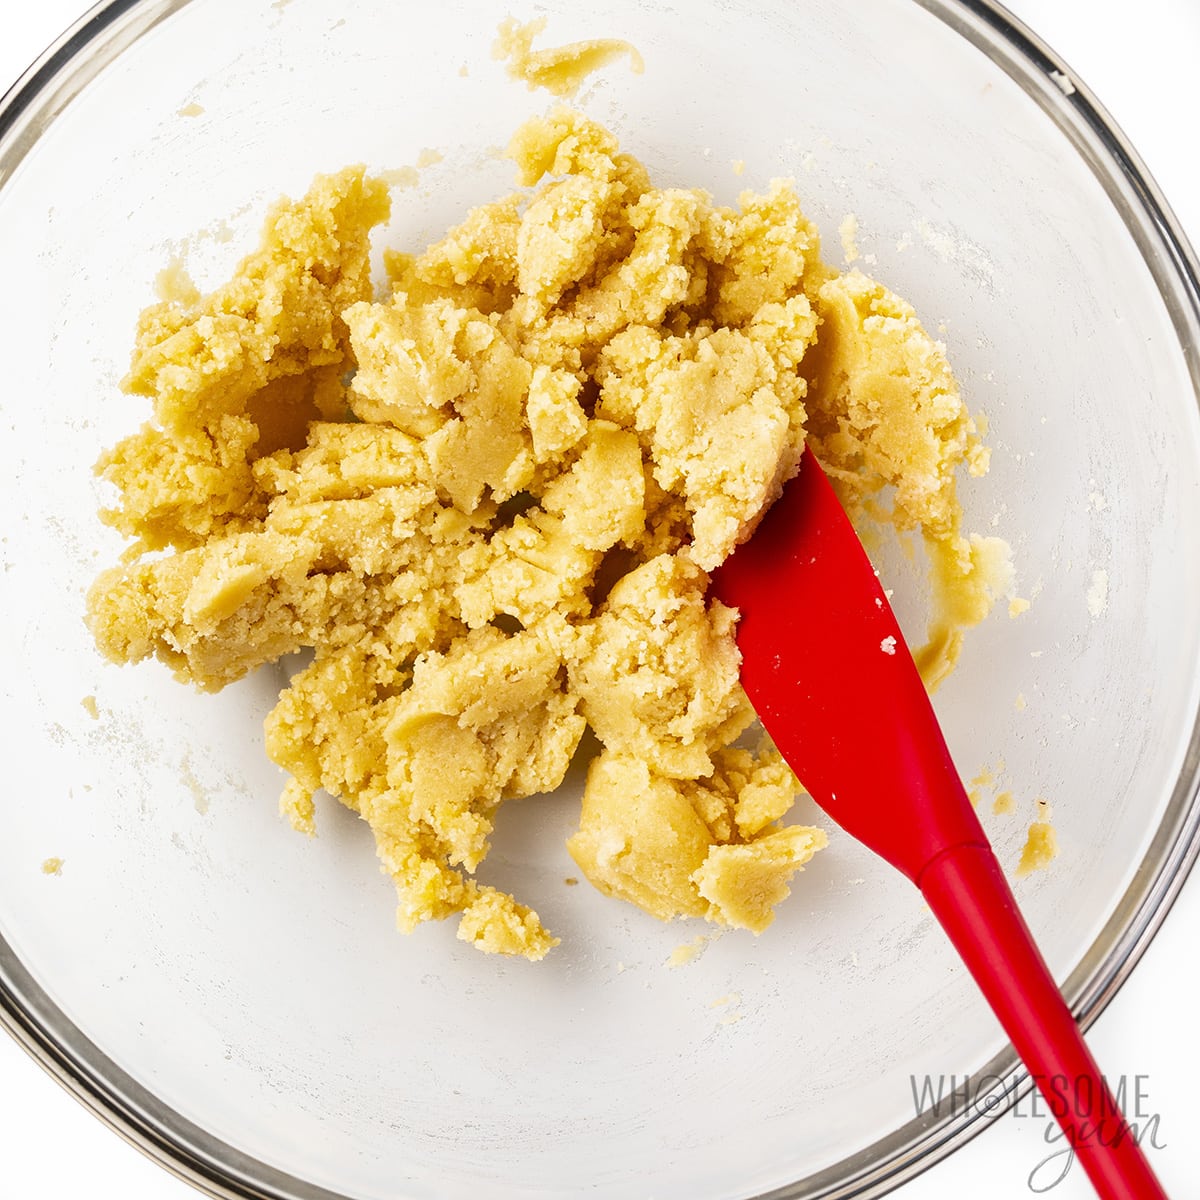
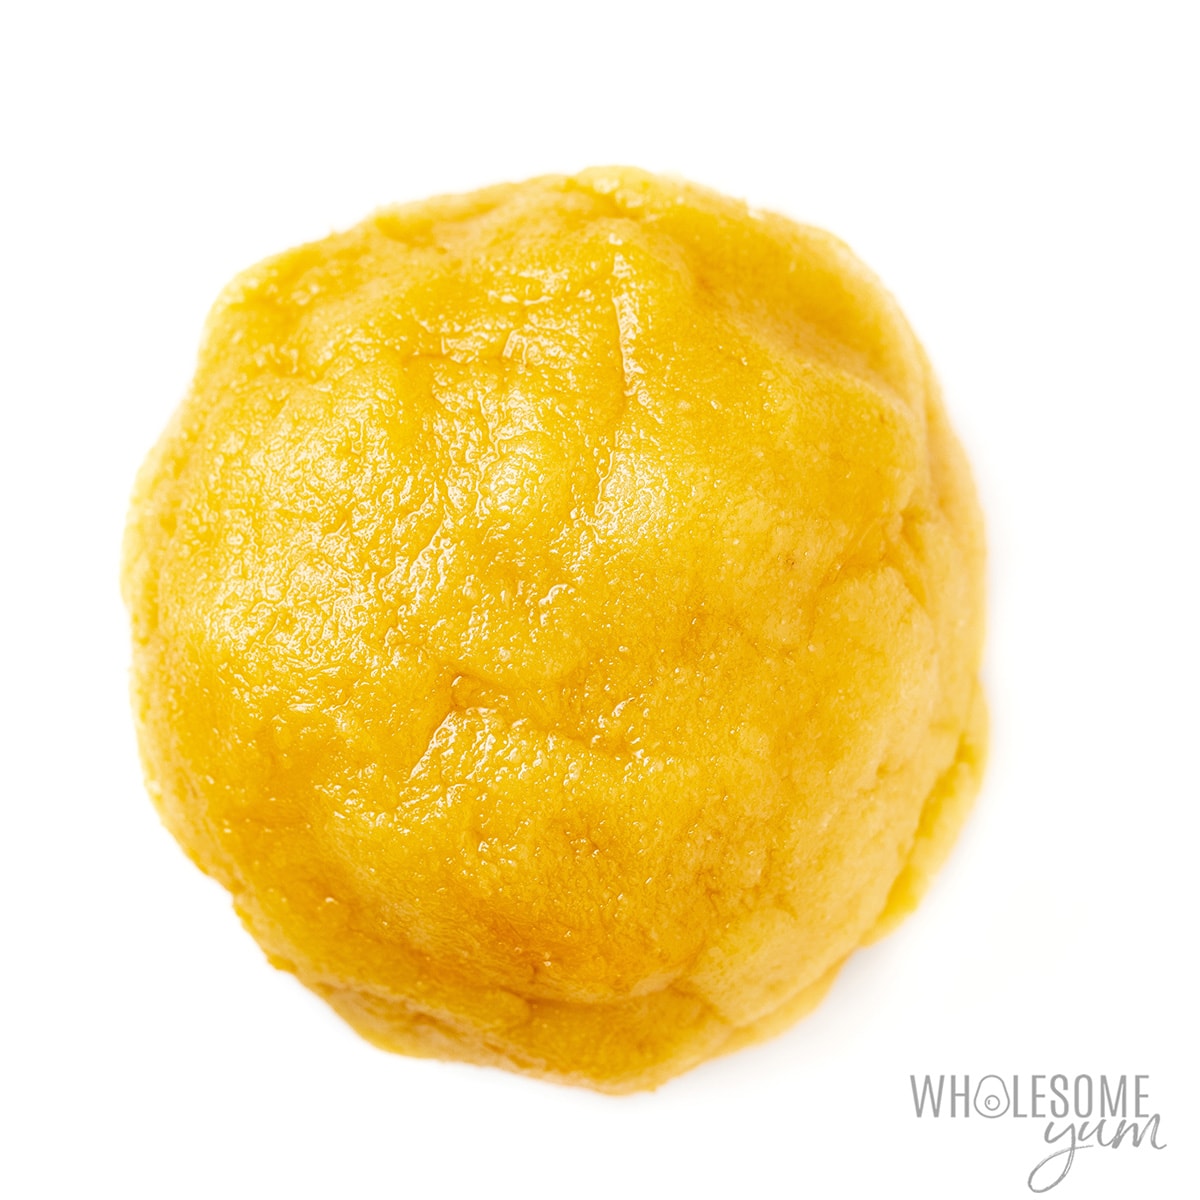
- Form the dough. Add the melted cheddar to the bowl with the flour mixture. Use your hands to knead, squeezing between your fingers, until a uniform dough forms. Form the dough into a ball. (You may need to chill it if it’s too sticky.)
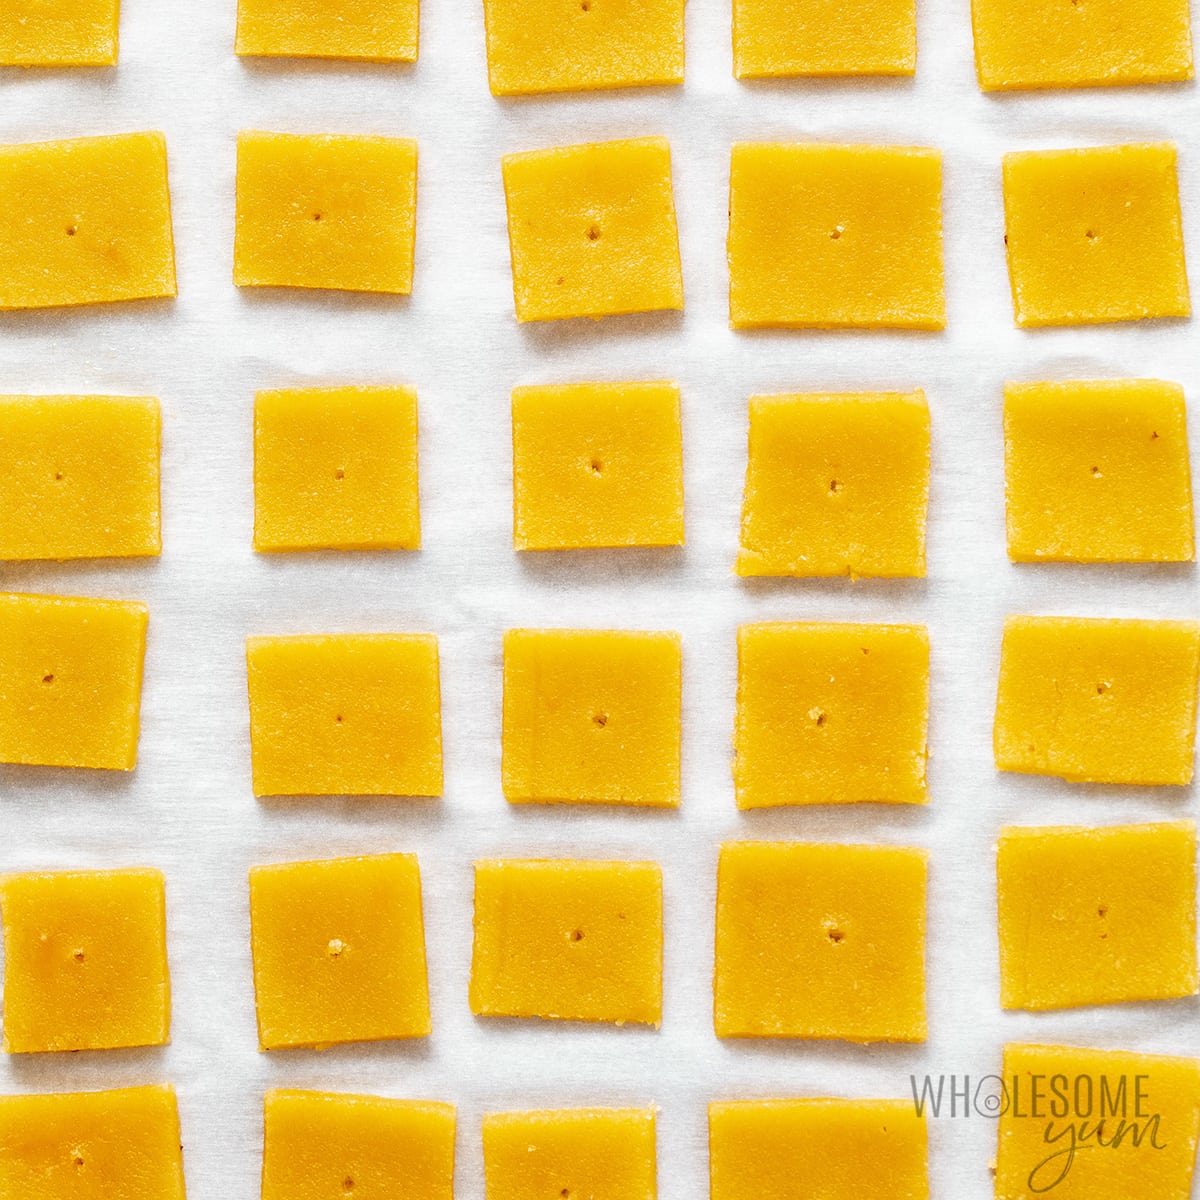
- Roll and cut the crackers. Grease 2 pieces of parchment paper lightly and place the ball of dough between them. Use a rolling pin to make a very thin rectangle, then cut into 1-inch squares or rectangles and place onto a baking sheet lined with parchment paper (or a silicone mat). Prick with a fork or toothpick to prevent bubbling.
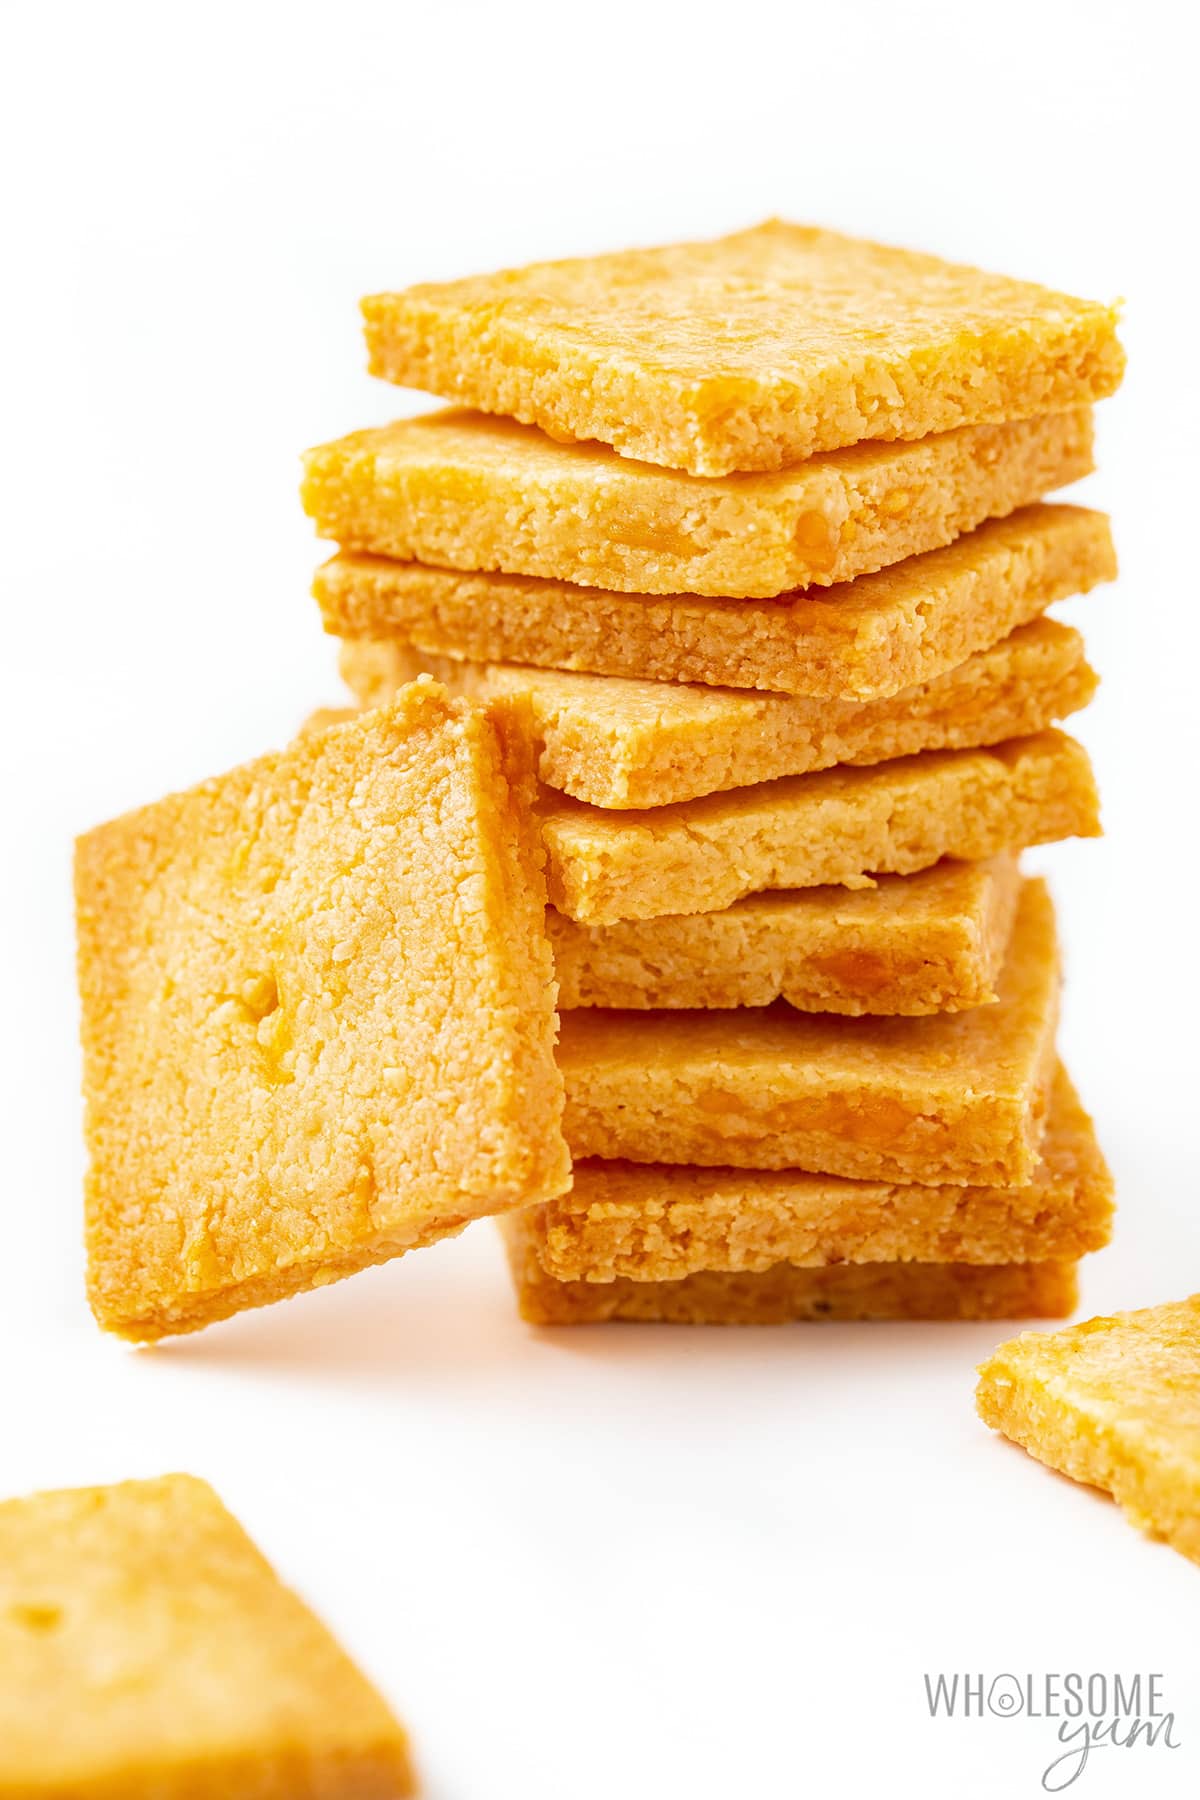
- Bake. Place the cheese crackers in the oven and bake until golden brown on the edges. If there is any oil on top of crackers after baking, pat with paper towels. Cool completely to room temperature — they will crisp up as they cool.

Tips For The Best Cheese Crackers
With just 3 ingredients, these crackers are fairly easy to make, but here are some tips I’ve learned along the way to ensure they come out perfect every time!
- Don’t worry about the oil. You may notice some of the oil separating when you melt the cheese. That’s okay! Just stir it back together as much as you can.
- A food processor is easier if you have one. This will make it easier to incorporate all the dough ingredients, but is not required. I’ve done it both ways, by hand and using the processor.
- Reheat the dough slightly if needed. If the cheese hardens before it fully mixes into the flour mixture, you can microwave for 10-15 seconds to soften it.
- Chill the dough if it’s sticky. Chilling the dough in the fridge for 20-30 minutes can make it more manageable to roll out. If it’s still difficult to work with, check my tips in my fathead pizza post.
- Roll the dough thin. The thinner you roll the cracker dough, the crispier your crackers will get! So, try to get it as thin as you can.
- A pizza cutter can come in handy. This is not required (a sharp knife works just fine), but a reader recommended using a pizza cutter and it can be a super quick way to slice the dough into squares. A pastry wheel also works in the same way.
- Don’t waste the dough. You’ll inevitably end up with strips of dough after cutting your squares. Don’t throw them out. Instead, form a ball, roll them out again, and cut more crackers.
- Make them crispier with the oven door trick. If you want them extra crisp, turn the oven off when the cheese crackers are just barely golden. Then, leave them in the oven, with the oven off and door propped open with a wooden spoon to crisp up more.
Storage Instructions
- Store: Cool completely, then store in an airtight container in the pantry for up to 2-3 days. The time can vary depending on the temperature in your kitchen. You can refrigerate them to prolong their shelf life to 1 week, but they will soften in the fridge. If the crackers do become soft (in the fridge or not), you can crisp them up in the oven. Simply place in the oven at 300 degrees F until they are warm, then cool completely. Just be careful to not over-bake!
- Freeze: Cool completely, then transfer to a zip lock bag or container and store in the freezer for up to 6 months. Line the layers of crackers with parchment paper, so they don’t stick together.
What To Serve With Cheese Crackers
Homemade cheese crackers are perfect as a snack on their own, but there are other ways to enjoy them:
- Charcuterie Board – Serve these crackers on a board with cheeses, meats, fresh fruits, and veggies for a party appetizer. Check out my charcuterie board for low carb options if you need them.
- Dips – Use them as dippers for spinach artichoke dip (or just plain spinach dip), quick cold crab dip, or even a cheese ball.
- Spreads – Top cheese crackers with nut butter, your favorite jam, or even pate.
- Sandwiches – These even make an easy side to your fave sandwich for lunch! A chicken salad sandwich makes a good combo.
- Soups & Salads – Cheese crackers are perfect for crushing and sprinkling over soups or salads as a crunchy topping.
- Trail Mix – These little crackers are small enough to blend well into my healthy trail mix.
More Healthy Crunchy Snack Recipes
Craving more crispy, crunchy snacks? Try these healthy snack recipes you can feel good about eating:

Tools For This Recipe
- Double Boiler – If you prefer not to use the microwave to melt the cheese, use this to do it on the stovetop without burning.
- Rolling Pin – This rolling pin is made from marble, which is naturally cool and prevents the dough from sticking as you roll. It’s also surprisingly cost effective!
- Baking Sheet – My go-to! You can spot it in many of my recipe photos.
Cheese Crackers (3 Ingredients)
This 3-ingredient cheese crackers recipe is like homemade Cheez-Its, but better for you! They are cheesy, crunchy, and naturally gluten-free.
Instructions
Tap on the times in the instructions to start a kitchen timer.
-
Melt the cheddar cheese in the microwave or in a double boiler on the stove, until smooth and easy to stir. It will release some oil, which is okay, but try to stir it together as much as possible.
-
Meanwhile, stir together the almond flour, sea salt, and nutritional yeast, if using. Stir in the egg, until combined. The mixture will be crumbly.
-
Add the melted cheddar to the bowl and use your hands to knead, squeezing between your fingers, until a uniform dough forms. It will feel oily – this is normal. (If you have issues getting it to incorporate, this is similar to making fathead dough – check my tips in my fathead pizza post or see the complete fathead dough guide in The Wholesome Yum Easy Keto Cookbook.)
-
Form a ball with the dough. If it's too sticky to work with, chill for about 15 minutes.
-
Grease 2 pieces of parchment paper lightly and place the ball of dough between them. Roll to a very thin rectangle, about 1/16 (.2 cm) to 1/8 inch (.4 cm) thick. (It will tend to roll into an oval shape, so just rip off pieces of dough and re-attach to form a more rectangular shape.)
-
Preheat the oven to 350 degrees F (177 degrees C). Line a baking sheet with parchment paper.
-
Cut the crackers into squares or rectangles and place onto the lined baking sheet. Prick with a fork or toothpick to prevent bubbling.
-
Bake for 8-12 minutes, until golden. If there is any oil on top of crackers after baking, pat with paper towels. Cool completely to crisp up.
LAST STEP: Leave a rating to help other readers, or tag me @wholesomeyum on Instagram. I’d love to hear from you!
Maya’s Recipe Notes
Serving size: 12 1-inch crackers, or 1/8 entire recipe
I provide nutrition facts as a courtesy. Have questions about calculations or why you got a different result? Please see my nutrition policy.
Add Your Notes Your Notes
Try More Of My Recipes


© Copyright Maya Krampf for Wholesome Yum. Please DO NOT SCREENSHOT OR COPY/PASTE recipes to social media or websites. We’d LOVE for you to share a link with photo instead.
Cheese Crackers


67 Comments
Sue
0Can you make these for a Christmas gift? How long do they last?
Wholesome Yum D
0Hi Sue, Store in an airtight container in the pantry for up to 2-3 days. The time can vary depending on the temperature in your kitchen. You can refrigerate them to prolong their shelf life to 1 week, but they will soften in the fridge
Julie
0These are super good! It’s nice to have something to munch on with soup or bone broth.I did add a half a Tb. of Monk Fruit Sweetener since I like a sweeter biscuit. I’ll be making them often.
Steve
0So the recipe makes 12×1 inch crackers and has 8 servings. That’s 1&1/2 crackers per serving. 5g carbs per serving I think, for such a small morcil, very high.
Maya | Wholesome Yum
0Hi Steve, No, it makes 8 servings of 12 crackers each, or 96 crackers total. The nutrition info is for 12 crackers. Hope that helps!
Ali
0I am so happy!! I’ve been living in Brazil, where Cheez-it’s don’t exist, and I’m so happy I was able to make these at home AND they’re healthier, too!! Delicious!! 10/10 recommend!!!
Leanne
0These cheese crackers were so tasty! I love how healthy they are, too. Will make again soon!
Janie
0These turned out great! I love that making them myself saves me a lot of money on store bought low carb crackers.
Marie
0These are such a great copycat cheese cracker recipe! A million times better for you than store bought and so easy to make. Love that we can snack again in a healthier way.
Marcella
0I make this 1-2 times a week. Awesome recipe!
Kim
0I can’t have dairy, can I skip the shredded cheese?
Wholesome Yum M
0Hi Kim, Not for this recipe. If you would like a cracker recipe without cheese, check out this one for Almond Flour Crackers.
Nicole
0have made these 3 times now.., perfect every time. I use sunflowerseed flour instead of almond and need to bake for 15 mins loungers. They are so crispy and delicious and keep crunchy in an airtight container in the fridge … not that they ever last long enough … thanks so much for this amazing recipe
Mary Walters
0We really like them!
April
0Made these but used Mexican shredded cheese, doubled the recipe, and added bagel seasoning. I love them.. probably way more than my toddler who they were intended for. They were super easy to make. I almost shredded my own cheddar but then thought it might be too sticky to work with. I think I made the right choice. It worked out. They were thicker than they needed to be because of the recipe size, but still good. I’d recommend doing two sheets if you double (if you want crispy crackers).
I will try making them again with just cheddar for her next time. I think this is a good substitute for the store bought super processed cheese crackers. Nice work, and thank you for yet another awesome recipe! I keep coming back to this site for recipes.
al
0I want to make this but i can’t find the measurements anywhere. Can anyone help?
Wholesome Yum M
0Hi Al, The measurements are located in the recipe card. If you cannot see the card, then please make sure you are not viewing the website in ‘Reader Mode.’
Becky L. McFarland
0These are keepers! Almost like indulging in a bag of goldfish. I didn’t have nutritional yeast but found in an article you can sub parm cheese so I did and they were great! Next time, I may add a bit of cayenne powder to just boost the flavor.
Margaret Walsh
0What can I use in place of almond flour for these? We have a peanut/tree nut allergy. Would sunflower seed meal work? Thank you!
Wholesome Yum M
0Hi Margaret, Yes, sunflower seed meal should work fine.
Niloufar
0Hi, I’m going to try this recipe right now. But I have a question about freezing them, can we store them in freezer longer?
Wholesome Yum M
0Hi Niloufar, I have not tried freezing these. I’m not sure they would still be crispy once they returned to room temperature.
Rita
0Even though I do not care for almond flour at all. I am cutting back on carbs and love cheese crackers and these right here were very goodn(despite the almond flour). I will be making these again. Thanks for the recipe.
Jo
0Delicious and soooo easy!!
Karla Alder
0This is probably a silly question; is regular Almond Flour (mine says Gluten Free) the same as Blanched Almond Flour? And if not, can I use the regular Almond Flour?
Wholesome Yum M
0Hi Karla, If your almond flour has brown specs in it, then it will include the skins from the almonds. Blanched almond flour does not include the almond skins. The skins are very bitter and can bring that flavor into recipes. The recipe will still work if your almond flour isn’t blanched but know that your crackers may have a bit of a bitterness to them. I think it would work best in a savory recipe (like cheese crackers) over a dessert recipe. Best wishes!
Sarah
0So I LOVED your regular flour sesame cracker recipe and was excited to try these but unfortunately, they were not as fun to make and they simply weren’t worth the effort. I followed your suggestions about putting them on a cooling rack and then storing on an airtight container but the evening I made them I went to snack on a few and they had already turned a bit stale and chewy. The next day they were almost inedible so I reheated for a few minutes at 350 like you suggested and now they are just warm and stale and chewy. Also, the process of making them was so messy because of the oil from the melted cheese. It was dripping all down my arms and all over my kitchen. It was just not a good time. I saw someone’s comment about adding the cheese on dry and I think that would work much better. If I ever make them again, I’ll try adding dry cheese and only make them if I have plans to eat them in the same day. All of your other recipes I’ve tried have been great! The pop ups and ads are incredibly annoying though and made it very difficult for me to even leave a comment. I know you are going to have an ad free option soon, but I personally would never consider paying for something like that…that’s just me though.
Rosalia Bahena
0Perhaps because I’m used to the taste of almond flour but these taste just like the actual cheez-its. Which I love by the way. I love the taste of these. Thank you for sharing. They are delicious and crunchy.
Jacki
0I can’ wait to try these but i can’t have hard cheeses, and i was wondering if mozzerella would work as a replacement.
thanks in advance,
Wholesome Yum M
0Hi Jacki, I have this recipe for Fathead Crackers that are made specifically with mozzarella cheese.
Jane
0First time I made these I added the grated cheese straight into the dry mix. This time I followed the recipe exactly and melted the cheese. Big mistake. They come out much better, less sticky dough if you add the cheese dry. Personal preference I guess and could be uk ingredients come out different. Lovely just the same and great with butter
mike blaze
0I cannot see where you get the carb count. 1.5 cups of almond flour is 12 carbs net, cheese is zero, egg 0.8.
Trish
0I’ve tried this recipe before, following it exactly, and the crackers were great! This time I added the cheese without melting it first. These also turned out great and were easier to mix. I truly love them both ways! My oven is a bit off – so I had to bake them longer in order for them to get crispy. When (if) they get chewy the next day I microwave them on a paper plate for 10 to 15 seconds and they crisp up again. Thank you for this great cracker recipe!
Wholesome Yum M
0Hi Mike, The nutrition facts listed are per serving of cheese crackers, not for the whole recipe. The recipe makes 8 servings. I hope this helps!
Eda
0Simple and yummm
Jennie
0For some reason, at night I’ve been craving cheese crackers and I’ve been demolishing packages of carb-laden gluten-free “Cheese-its”. I decided to find a recipe to make my own.
I JUST made these and wow. They are amazing! I used nutritional yeast and it lends an interesting (in a good way) flavor. These are most definitely on my “to make again” list.
Misty
0These were wonderful!! I’ve had a hard time finding a crispy cracker recipe and have tried a few… they always came out chewy and not crispy. I followed this recipe exactly except that I used one more tablespoon of nutritional yeast (because I like the cheesy taste) and baked them at 300f until they were browned (they came out extra crispy that way and just how I like them). The cheese was MESSY and greasy… I thought for sure they wouldn’t turn out but they did! I’m on my way to make some more for my work week.
Tessa Kendrick
0These are soooo good!! I put a little cajun spice on half of them just because I love the seasoning and I LOVE IT!! Thanks for the super simple and easy recipe!
Allison M Gardella
0Oh wow, these are the yummiest EVER!!
Autumn
0I love the flavor, but mine came out more chewy than crispy. Any suggestions?
Wholesome Yum M
0Hi Autumn, Letting your crackers sit out on a drying rack for several hours will help to achieve the crispy texture you are looking for.
Nora
0Can’t wait to try these!
ERod
0Love your website! Thank you! In your keto crackers notes you say to bake 8 mins. In the recipe you say 8-12. I would remove that. Anything over 8 and the crackers are ruined.
Wholesome Yum M
0Hi ERod, Thanks for your input!
Janna
0Excited to try these, love the simple recipe!!
Sarah
0These are perfect! I’m eating them as I type. Lol
My kids love them, too!
ray
0Absolutely Amazing taste! Used Sharp Cheddar, skipped the optional nutritional yeast, and added garlic, parsley and pink salt seasoning. Turned out fantastic!
April
0These are amazing! Perfect snack and great with a dip. Thank you!
Sylvia L Ives
0I made the mistake of using sharp cheddar cheese since that’s what I usually buy. The crackers are very sour and odd tasting!
Lise May
0Hi there, Could I sub out almond for coconut flour, if I added an extra egg? Thanks
Wholesome Yum A
0Hi Lise, coconut flour isn’t generally interchangeable with almond flour. You might like these fathead dough crackers instead, which only use coconut flour.
Lise May
0Thanks Maya! I’ll give both a try!
Cookilicious
0Just what I needed! Saving this and making this for sure soon!
Michele
0This is my new go to recipe, know it by heart. Only changes I made was adding some parmesan cheese and garlic and onion powder. Maybe some paprika if I’m feeling spicy Thank you for this.
Pam Greer
0These are the best low carb cheese crackers! I love them and I love all your tips!
Sara
0Yum! Cheez-its are my obsession so these were perfect for that craving. I was even able to add hot sauce (like I do to my cheez-its) and was in heaven.
Ashley F
0These turned out so great! We can’t stop snacking on them! Just delicious!
Kelly Anthony
0You had me at 3 ingredients. These will be a great alternative cracker without sacrificing flavor.
Whitney
0I love the almond flour swap! Great idea!
wessel
0These crackers satisfied my crunchy, carby snack craving! Delicious!
Sara Welch
0What a fun and perfectly crispy snack! I will have to make these for my kids for after school! Yum!
wilhelmina
0These crackers came out fantastic! Perfect for snacking!
Taylor
0These look just like Cheez-Its! I can’t wait to try out this recipe!
Jamie
0I love how simple and easy this was to make! Tasted delicious!
Krissy Allori
0Yay! These were great. I’m so glad to have a good cracker that is Keto friendly.
Dahn @savorthebest
0Wow! what a great recipe for low carb crackers. Cheese makes everything taste better 🙂