 Shop
Shop My
My Custom


FREE 5-Ingredient Recipe EBook
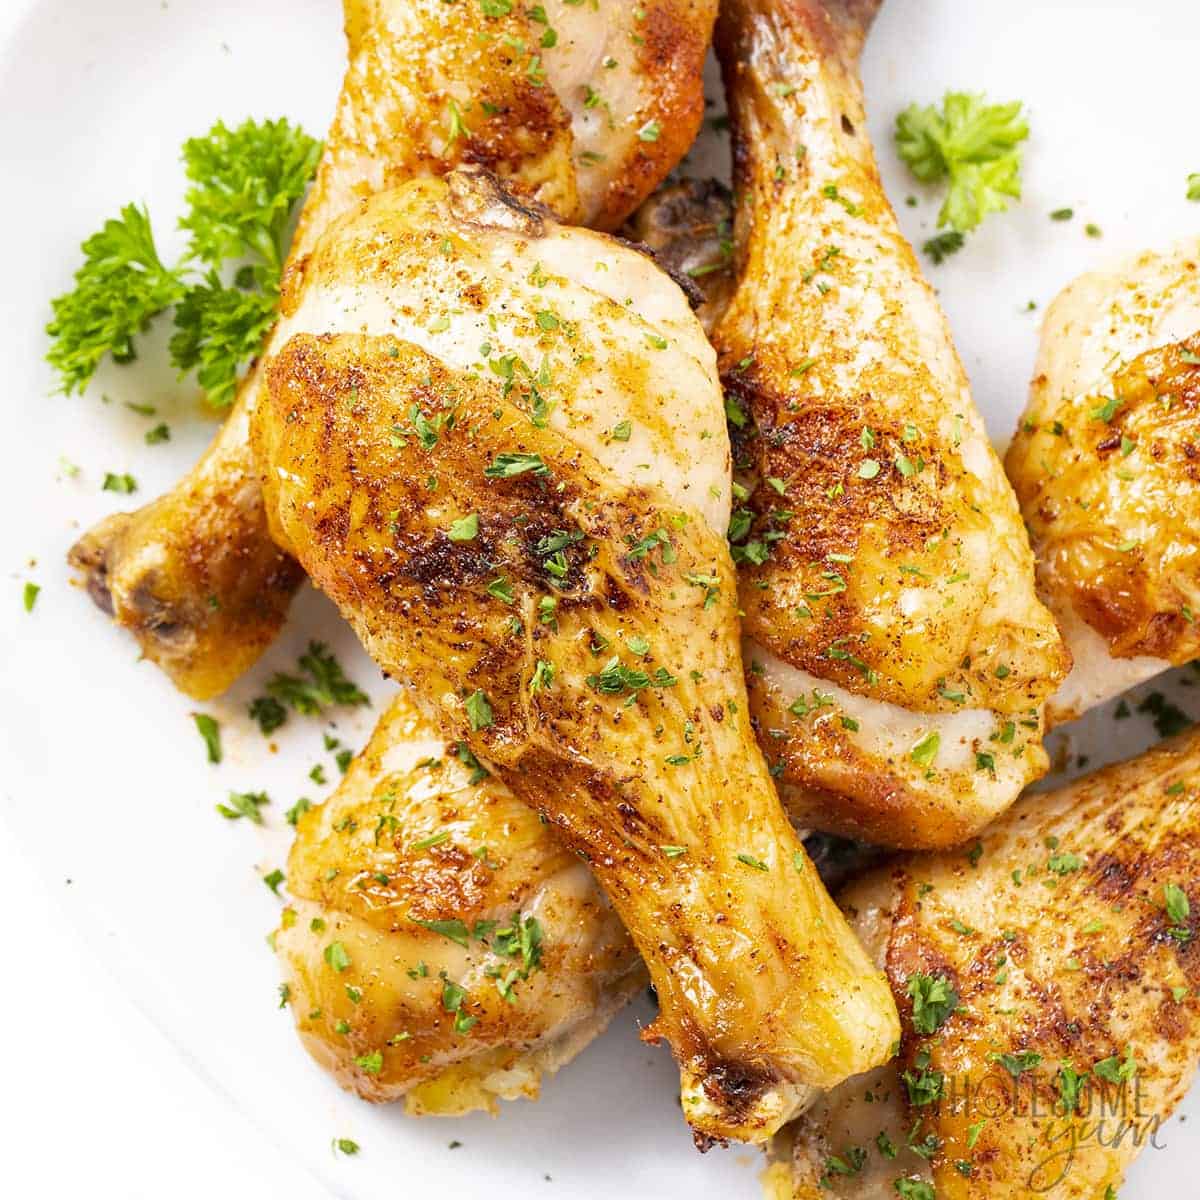
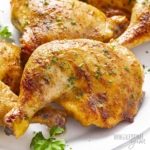
GET IT NOWMy Crispiest, Juiciest Baked Chicken Legs Recipe

Everyone needs a reliable baked chicken legs recipe to turn to, and this one is mine. It’s basically the opposite of fancy — just simple, flavorful, savory, and crispy chicken I want to make over and over again. Here’s why:
- Juicy with super crispy skin – Chicken leg recipes are harder to dry out than white meat, but these come out extra juicy with my tips. And if you’ve seen me rave about crispy skin in my chicken leg quarters, chicken wings, and chicken thighs, you know I wouldn’t have drumsticks any other way, either.
- Quick and easy – I love spices, but pared down to just the important ones here — 4 ingredients (plus salt and pepper), if you’re counting! And these oven baked chicken legs need just a few minutes of your time.
- Family friendly – They’re protein packed, simple, and a hit with kids and adults alike. It’s just all around a winner of a chicken dinner.
Clearly I’m not the only one that has those days I love this kind of easy, healthy dinner. It’s become one of my most popular chicken recipes here on Wholesome Yum. And after all these years, this method for how to bake chicken legs in the oven is still the one I use most often. Make them with me!

Ingredients & Substitutions
Here I explain the best ingredients for my baked chicken legs recipe, what each one does, and substitution options. For measurements, see the recipe card.
- Chicken Drumsticks – Choose ones that are uniform in size, so they cook at the same rate. Some of you have asked if you can use chicken breast. You can, but you’re better off following my baked chicken breast recipe — some of my tips are different for that cut.
- Butter Or Oil – For flavor, locking in moisture, and crispy skin. Butter has a low smoke point, so I don’t usually use it for roasting, but I love the flavor that it gives this recipe and haven’t had issues. Feel free to use ghee, olive oil, or avocado oil instead. Cooking spray also works — I recommend an oil mister like this to avoid chemicals.
- Seasonings – My go-to blend is smoked paprika, garlic powder, salt, and pepper. I’ve also made these baked chicken legs with other spice blends, including Italian seasoning, lemon pepper seasoning, and Cajun seasoning. If your blend contains salt, reduce or omit the salt added separately. You can make complimentary additions to the above spices, too, such as oregano, onion powder, or cayenne pepper.

How To Bake Chicken Legs
I have step-by-step photos here to help you visualize the recipe. For full instructions, including amounts and temperatures, see the recipe card.
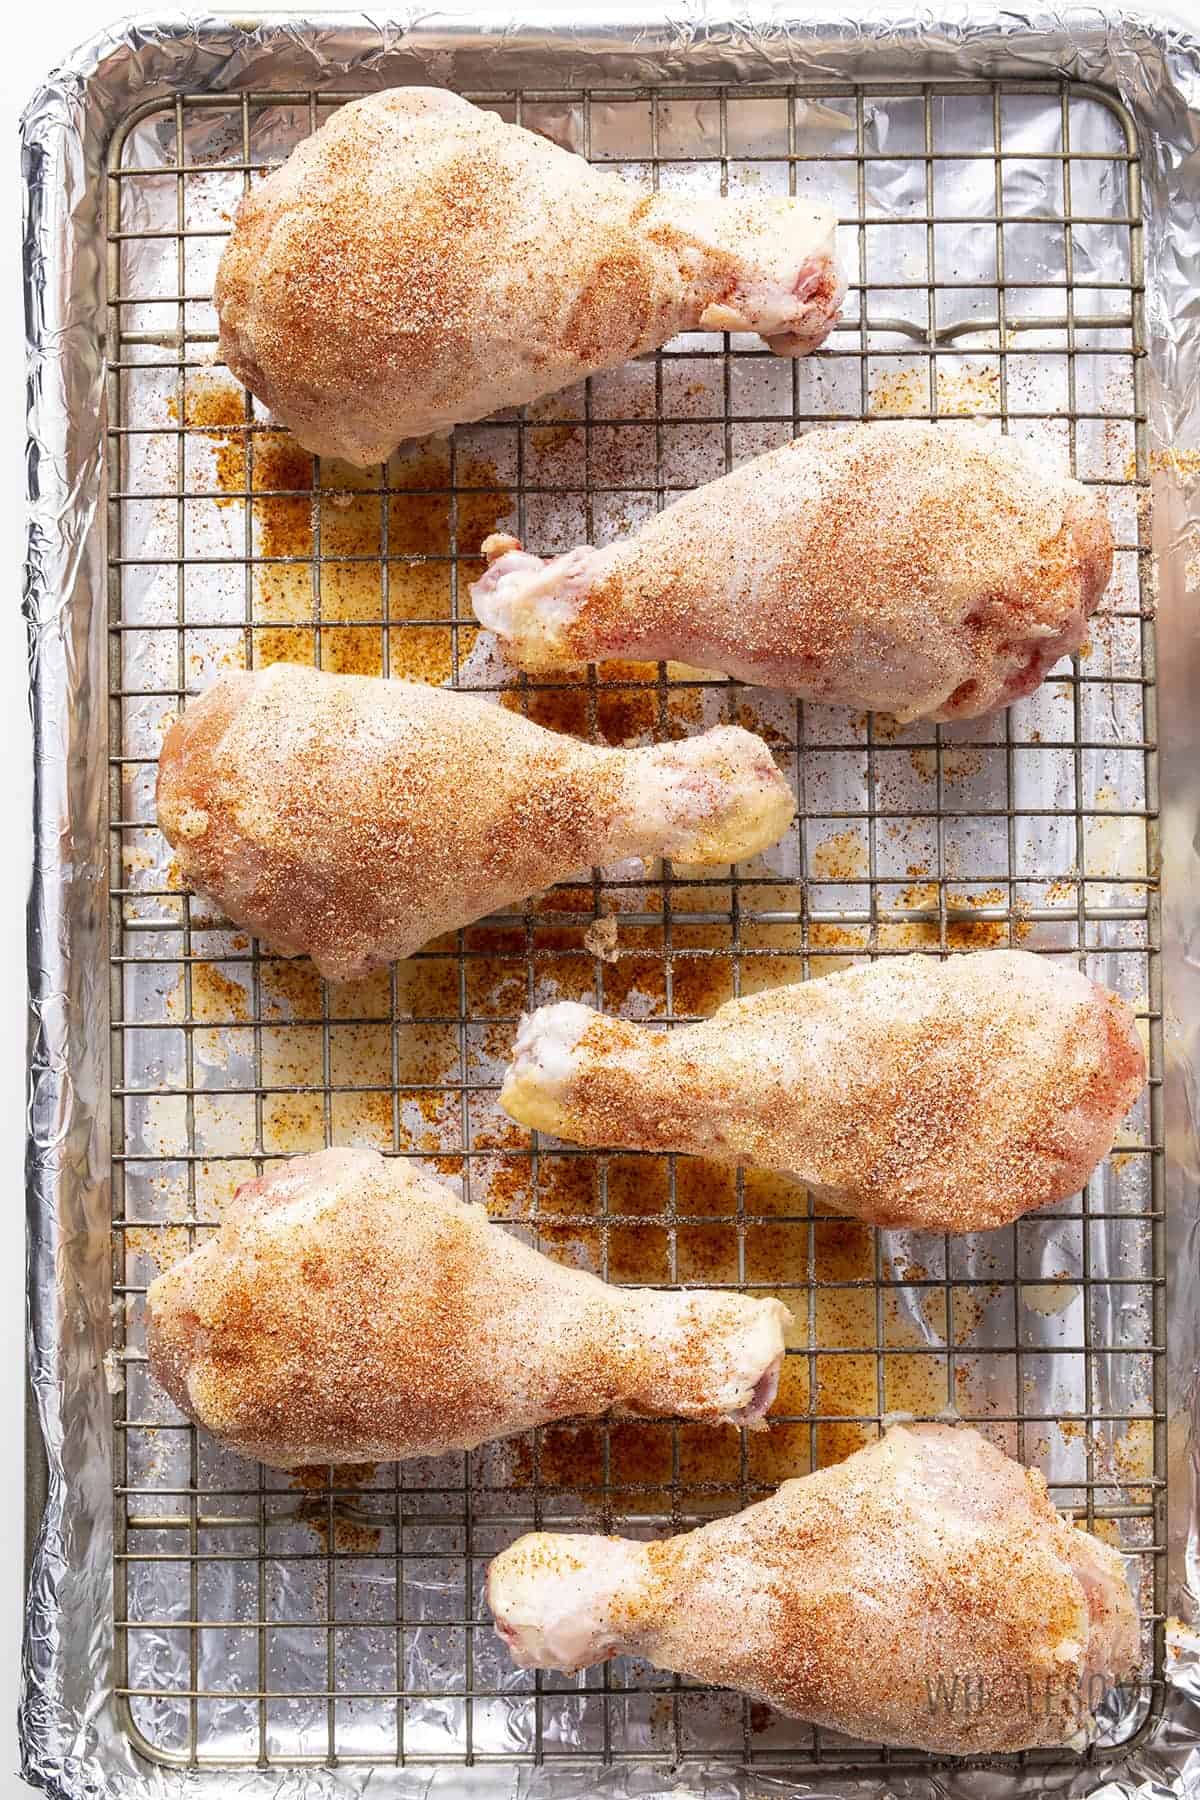
- Prep the oven and pan. Preheat the oven. Line a baking sheet with aluminum foil for easy cleanup, then place an oven-safe rack over the sheet pan. (I like this set — it’s non-stick, so easy to clean.) I prefer foil rather than parchment paper for lining underneath the rack, because it catches the juices more easily.
- Dry, oil, and season. Pat the drumsticks dry with a paper towel to remove excess moisture, then brush with melted butter or oil. (I like this brush that cleans up easily.) Sprinkle spices all over.
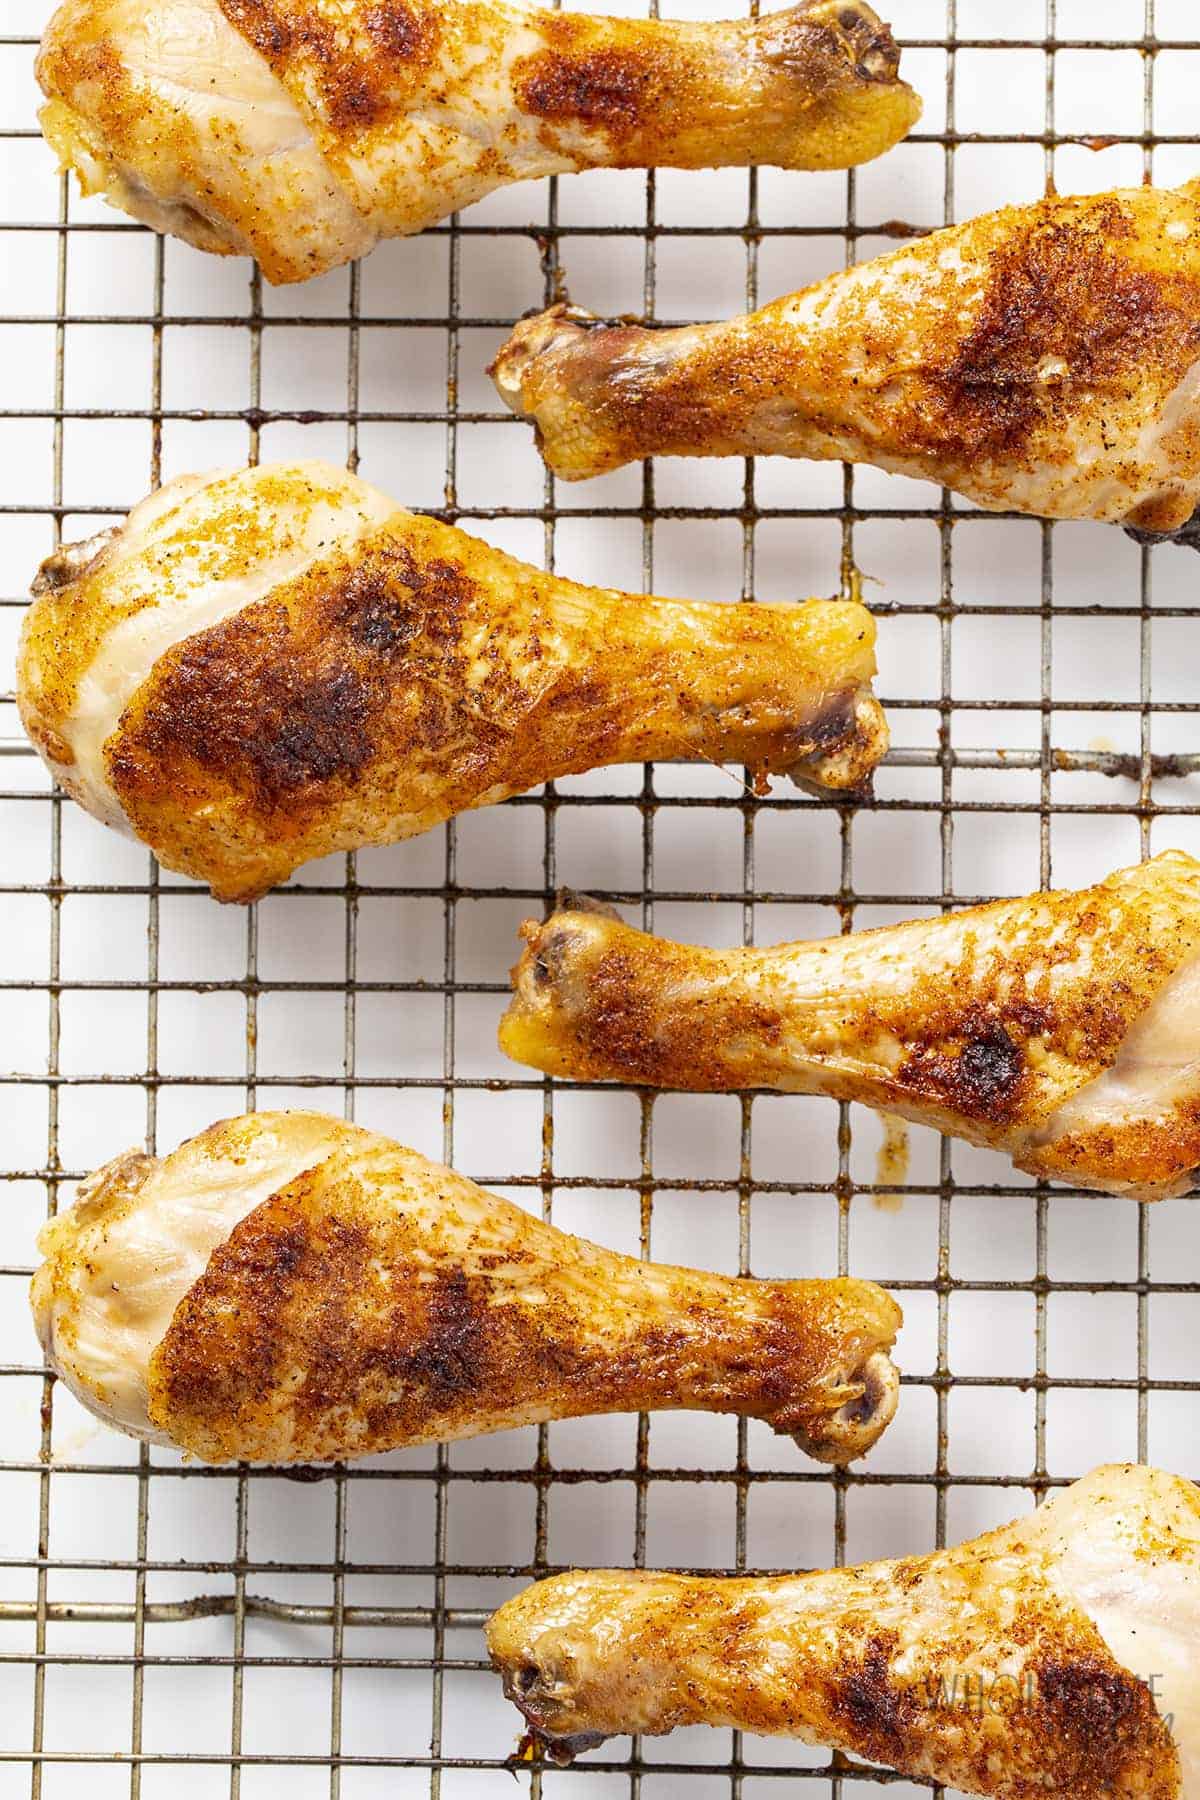
- Bake chicken legs in the oven. Roasting at high heat, flipping halfway through. See my tips below to get them extra crispy!
- Let them rest. Remove from the oven and wait a few minutes before serving — this lets the juices settle, so your baked chicken legs stay juicy inside.

My Recipe Tips
- Why pat dry? I always pat steaks, poultry, and fish dry before cooking, as it helps them all stay more juicy. But for skin-on chicken in particular, this also helps the skin crisp up better.
- Do you have to use a rack? No, and I’ve tried this baked chicken legs recipe on a regular baking sheet, but this baking sheet with rack set makes it so much better. It allos hot air to circulate and extra grease drips down, so it cooks more evenly and crisps up better. And you won’t run out of ways to use it — I also use mine for bacon in the oven, lemon pepper wings, coconut shrimp, and spatchcock chicken!
- Season right on the pan to save on dishes. You can just toss the chicken drumsticks with everything in a bowl or on a cutting board too, but using the baking sheet means less dishes to wash.
- Want to use fresh garlic? I use garlic powder because garlic over the skin will burn. If you want to use fresh garlic, it’s best to put it in a compound butter underneath the skin instead, like I do with my air fryer chicken legs.
- For even crispier skin, sprinkle lightly with baking powder before baking. I do that for this crispy baked chicken and it’s pretty amazing.
- Start baking chicken legs skin side down first. Obviously all sides have skin, but one side has more. The side facing up last ends up a teeny-tiny bit more crispy than the bottom side, so I like to start with the best side down and end with it face up. And flipping is a must, even with the rack.
- Cook to 170 degrees F, not 165. Chicken needs to reach 165 degrees F to be safe (source), but I highly recommend cooking chicken legs in the oven to an internal temperature of 170 degrees F. That’s when the collagen breaks down (in other words, they become juicy and tender). Here’s the instant-read thermometer I use and recommend.
- Broil at the end if needed. If your baked chicken legs are not as crispy as you like, place them under the broiler for a couple minutes to crisp up more. Watch closely so that they don’t burn!
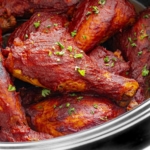
Baked Chicken Legs (Crispy, Easy Recipe)
This baked chicken legs recipe makes them so juicy with perfect crispy skin! You need just a few simple ingredients and easy 10-minute prep.

Instructions
Tap on the times in the instructions to start a kitchen timer.
-
Preheat the oven to 425 degrees F (218 degrees C). Line a rimmed baking sheet with foil and place an oven safe rack on top. (I use this set, which includes the baking sheet and rack that fits perfectly.)
-
Pat the chicken legs dry with paper towels, which will help them get crispy. Arrange the chicken legs on the rack.
-
Brush the chicken drumsticks with melted butter. Season with smoked paprika, garlic powder, salt and pepper.
-
Bake the chicken legs in the oven for 25 minutes. Flip and bake for another 10-20 minutes, until the internal temperature reaches 170 degrees F (77 degrees C).
-
Optional step: If the chicken drumsticks are not as crispy as you like, place under the broiler for a couple of minutes to crisp up the skin more.
-
Let the chicken rest for 5 minutes before serving.
LAST STEP: Leave a rating to help other readers, or tag me @wholesomeyum on Instagram. I’d love to hear from you!
Maya’s Recipe Notes
Serving size: 1 drumstick
- Tips: Check out my recipe tips to help you get the juiciest baked chicken legs with the crispiest skin.
- Store: Keep leftovers in an airtight container in the fridge for up to 3-4 days. The skin does get soft, but you can crisp it up again.
- Reheat: For crispy skin and a juicy inside, I recommend reheating chicken legs in the oven again, this time at 350 degrees F. If the skin is still not crisp, you can place under the broiler for a minute or two. The microwave works in a pinch, but the skin will be soft.
- Freezer meal prep: My favorite meal prep hack with this recipe is to brush with butter and season the chicken, then freeze it raw. That way there is virtually no prep before baking later, and this actually makes them even more juicy!
- More freezing options: You can freeze raw chicken for up to 9-12 months, but already baked chicken legs taste best in the first 3-4 months. I lay them on a parchment lined sheet pan in a single layer and freeze until solid, then transfer to a zip lock bag for compact storage. This method prevents them from sticking together. For best results, thaw before you reheat.
I provide nutrition facts as a courtesy. Have questions about calculations or why you got a different result? Please see my nutrition policy.
Add Your Notes Your Notes
Try More Of My Recipes

© Copyright Maya Krampf for Wholesome Yum. Please DO NOT SCREENSHOT OR COPY/PASTE recipes to social media or websites. We’d LOVE for you to share a link with photo instead.
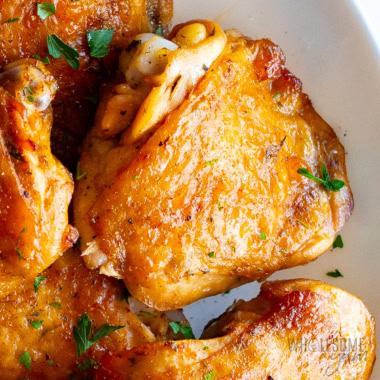
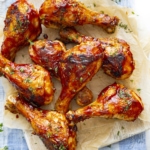
Baked Chicken Legs Recipe
Serving Ideas
There isn’t much that doesn’t go with baked chicken legs. Here are some of my fave side dishes to go with them:
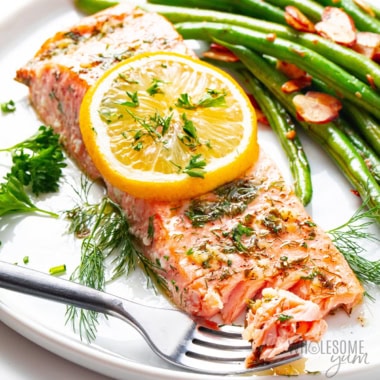
- Vegetables – If you have double ovens like I do, you can make my roasted green beans, loaded cauliflower casserole, or roasted eggplant at the same time as the chicken. Otherwise, I would cook fried cabbage, creamed spinach, sauteed broccoli with garlic, or sauteed zucchini on the stovetop while you bake chicken legs in the oven.
- Starches – Most often, I roasted potatoes, air fry sweet potatoes, or make lighter pasta swaps, like baked spaghetti squash or zucchini noodles.
- Salads – Make it a light meal with my Caprese salad or cucumber tomato avocado salad in the warm months, and my kale salad or winter salad in the cool months.
- Sauces – I think these juicy baked chicken legs are plenty flavorful on their own! If you want a little something extra, serve them with my BBQ sauce, ranch dressing, or sugar-free honey mustard.
More Easy Chicken Leg Recipes
Looking for more chicken leg recipes? Here are some of my other favorite ways to cook them:


385 Comments
Pat Norval
0Absolutely 5* plus. This recipe is so easy . . . and so delicious! After 18 years of not cooking (and now I have to cook again) I’m looking for easy and delicious. I’ve found it in this recipe. Thank you so much! Patty
Ildiko
0Loved it!
Tru
0Excellent recipe! The drumsticks are nice and crispy, which my family loves. I use olive oil instead of butter.
RJ
0Amazingly easy and flavorful. My drumsticks were super crispy and juicy. Yum!! I use ghee or high heat oil since I’m cutting out dairy (boo). Family asks for these all the time now!!
Nora
0Awesome and tasty made the chicken legs and biscuits my family didn’t know that the biscuit recipe was low carb they were surprised and asked that I make them this way from now on I’m knew to keto and it gets overwhelming at times but I’m getting there Thank you for such great information on how to and it’s a bonus with the yummy recipes!
Cindy Cuneio
0I made the Crispy Baked Chicken Legs Drumsticks for dinner and we loved it. This recipe is a keeper.
Pam Moak
0I can’t wait to try this! And, I have a question. Did you season both sides of the drumsticks before cooking?
Wholesome Yum M
0Hi Pam, Yes, season all the way around your drumsticks. Enjoy!
Gin
0Please don’t think I’m trying to be rude or difficult (and any helpful comments would be welcome). I think I am a fairly good cook (hubby says gourmet) and I try many new recipes based on reviews. I followed your recipe to the “T” and the tops of the chicken legs burned (even tho’ I took them out earlier when temp check said they were done) and rack well below middle…but there was little to no flavor in the actual chicken (since the skin has all the seasonings) so we needed Heinz sauce. In the past, when a recipe turns out like this, I try it again and pull back the skin to get some seasoning on the chicken underneath and it turns out better but what could I have done wrong here???
Wholesome Yum M
0Hi Gin, Sorry the drumstick didn’t turn out as expected. I used 6 drumsticks, which weighed 1 1/2 lbs. Is it possible that your drumsticks were smaller? Smaller drumsticks would cook through faster. Feel free to season under the skin if that is your preference, the recipe will still work well if you decide to do that.
Annmarie
0Amazing!
Chantal
0Caused alot of smoke in the house – totally worth it!!! This will forever be my go to drumstick recipe. Was a hit with the whole family. Juicy and delicious. Perfectly seasoned. Thank you a million times for a super easy and tasty chicken recipe. My son who dislikes chicken ate every last bite!
Marysol
0Not enough flavor at all…. the butter made my oven so Smokey since butter burning point is 350 so I suggest using olive oil instead or another high heat oil so your fire alarm doesn’t go off like mine did. Take off skin so the seasoning goes in chicken. It was still eatable but could’ve tasted way better. Would not recommend this recipe.
Val
0Melted butter is bad!! My kitchen if full of smoke. Ugh
Wholesome Yum M
0Hi Val, Sorry this happened to you! Your chicken may have been too close to the heating element which can cause the butter to spit.
Cynthia
0I don’t eat meat, poultry, etc. so didn’t taste these to see if my hubby might like them. But he complimented me on the flavor, gave a thumbs up. They were ready in about 20 minutes in our oven, however. Appreciate the recipe!
Michelle Roberts
0I’m cooking this tonight. It smells heavenly!
Kristine
0Loved this! Perfect seasonings! Will make again!
Sherri M
0Made this tonight and guess what? BEST RECIPE EVER. My chicken was SO flavorful and so crispy, delicious:)
The only thing I changed was I added some of Flavor God’s EVERYTHING seasoning. I have programmed my brain, will make always moving forward.
Lisa
0I’ve had this chicken 4 times now and it is terrific! Cooking it now. Boyfriend is a very picky eater and he loves it. Asked me to cook it tonight. Few tricks I’ve learned with this recipe is to change the foil every 15 minutes or else the smoke alarm goes off, cook it a little longer than recommended, and add a little melted butter before serving. Thank you for the recipe!
Major Pike
0Very great recipe. Very easy with the outcome I was looking for. As far as the site that your recipe is on? It took forever to read your recipe due to the fact that everytime I went to scroll or I read it too long your recipe got covered by ads. Great recipe. Deserves a better site however. Two thumbs up all day.
Wholesome Yum M
0Hi Major Pike, I’m thrilled you enjoyed the recipe. Thank you for your feedback on the site. I understand the ads can be frustrating, but they fund the website and allow me to continue to add content for free. If you are enjoying the recipes, I do have a Wholesome Yum Plus membership that allows you to view the website without ads in addition to several other fun perks!
Claudia
0Hi, I was really looking forward to trying this recipe but was sadly put off by the adverts – not so much the amount but the placement. I completely understand that you choose to make money from your site (who doesn’t?) but the placement of your ads means that practically the whole left 1/4 of your page is covered with an ad pop up, making it almost impossible to read the ingredients and instructions (which is what your site is for). It also covered up a lot of the comments field – and no, I couldn’t press anything to get rid of it as it just kept popping up. There is no malice intended and I sincerely hope that none came across through this comment but it can sometimes be so frustrating navigating through sites.
Maya | Wholesome Yum
0Hi Claudia, I completely understand your frustration and thank you for the kind message. Like you said, the ads do support the free content and all the expenses that come with a website having millions of visitors, and their placement does play a big role in that. However, there should never be any popups that you can’t close. Each page has only one popup, which has an “X” button in the top right corner of it, it usually shows up within a couple seconds.
That being said, I know many people don’t like ads and that’s why I created Wholesome Yum Plus – it’s my ad-free membership for both my website and my mobile app, and also comes with a bunch of other perks included. You can sign up for Wholesome Yum Plus here.
Lisa
0You know – what I love about this recipe is that it suggests sides to go with it. Definitely will be revisiting this site when I meal prep 🙂
Sofiya Peer
0I’ve never made any chicken in the oven that came out as delicious as this. The step to pat the chicken dry was a revelation. The skin was crispy without being too crunchy and the meat was juicy and flavorful. Kids enjoyed it and asked for more, which makes a recipe a winner in my book.
Duffy Pastore
0Smells amazing! Let you know when I eat it!
Jennifer
0Butter burns!!! This recipe is only good for setting off a fire alarm.
Vanessa L Baker
0This looks amazing! Can I do this recipe in the air fryer? I’m worried about the butter burning and smoking on the bottom… But I would LOVE to use the air fryer!
Wholesome Yum M
0Hi Vanessa, Yes an air fryer should work well for this recipe. Be sure to use a thermometer to check your drumsticks about halfway through. They may finish in less time than written for the oven instructions.
Peggy Bly
0Made tonight after seeing it on your site,husband loved it,will do again!!!
Krista
0Smoked up my whole house with this recipe!!
Wholesome Yum M
0Hi Krista, I am sorry this happened to you. It is usually because the chicken wasn’t thoroughly dried before baking. It will sputter a lot less when fully dried before brushing with butter.
Jenn
0This was so easy to make. The butter is key to this. I didn’t butter one side and it showed but still delicious!
Ann B. Richardson
0I just made this! It turned out great! Unfortunately, I only cook for myself and I fixed only 3 drumsticks. They were fat ones! I didn’t really measure anything and I just adjusted the amount for the amount of chicken I had. I added some “soul food” seasoning to the spicemix. It turned out really crispy!! I couldn’t believe it. I think drying off the chicken beforehand is what does the trick. It was very messy, but I loved it. I saved this recipe and will definitely use it again.
Craig Thompson
0From what I saw on your chicken leg video, you only spiced one side. Why not all the wat around? It does look yummy but the flavor flav. Will only be one sided.
Maya | Wholesome Yum
0Hi Craig, Sorry about the confusion, the video only showed one side in the footage but actually both sides should get seasoning.
Scott A Undercofler
0Solid recipe!!! The chicken was crispy and delicious!
Chloe
0This is great. I’ve made it several times in the past few weeks. I don’t have an oven rack but it works fine on the foil. This is definitely in the regular rotation now.
Patti
0Absolutely LOVED this recipe. Great tip on freezing the chicken with the butter and spices already added! So easy to take out of the freezer, thaw and throw in the oven.
I also used this recipe on chicken thighs and it was just as good. My family is already asking me to thaw some out for this weekend.
Beth
0My family and I love this recipe! I can’t wait to make this recipe again! So delicious and tasty!
Genevieve
0This looks like such an easy chicken recipe that can be paired with so many yummy side dishes. Chicken is such a nice go-to when I can’t think of what to make for dinner.
Sara Welch
0Tried this for dinner last night and it didn’t disappoint! Easily, a new family favorite recipe!
Mirlene
0Double the recipe because these will not last long. They are delicious
Bintu
0So crispy and delicious!
Pat
0Where the Blasted is the recipe. Ads. Gabs and EVERYTHING ELSE BUT….
Wholesome Yum M
0Hi Pat, I am sorry you are struggling to find the recipe. It is located in the recipe card, along with the video for the recipe and the nutrition. If you can’t see the card, then please check to make sure you aren’t viewing the website in ‘reader mode.’ This can be verified in your internet browser settings.
Gin
0I followed this recipe to the “T” and hope to provide some constructive feedback. I think I am a fairly good cook (and my husband tells me I am gourmet but I can disagree) So disappointed in this recipe; I wanted to try it based on the good reviews. Here is what I ended up with: chicken was correct temp when I took it out but not even the least bit crispy! (I did pat it completely dry before following the rest of the instructions) The flavor was just ok (and I had to double the amount of seasoning for 6 drumsticks) but since there’s skin on it, that’s where most of the flavor is (and we do not eat the skin). But my biggest headache was the grease that ended up all over my newly cleaned glass oven door – what a mess! Any suggestions to avoid this greasy splatter would have been most appreciated.
Wholesome Yum M
0Hi Gin, You may want to try this recipe on skinless cut of chicken. Removing the skin will cut down on the splattering and the seasoning will be applied directly to the meat. Enjoy!
Gigi
0Found this recipe on Pinterest and was needing to add a new protein to the Keto rotation. Needless to say, we WERE NOT disappointed! Did everything the same as Maya did, EXCEPT, we started the legs (aka “chicken with a handle” as my daughter called it when she was little) with the skin side down. We baked for 20 minutes and then flipped them over to skin side up and baked for another 20 minutes. They didn’t look AS CRISPY as we wanted, so we turned the broiler on Hi and broiled them for 5 more minutes…DELISH! Definitely adding this one to the rotation!
Anita Waugh
0Can you cook these in an air fryer?
Wholesome Yum M
0Hi Anita, Yes and air fryer should work well for this recipe. Be sure to use a thermometer to check your drumsticks about halfway through. They may finish in less time than written for the oven instructions.
Jeff
0Thank you for the quick reply. Once I raise the temperature to 425, how much longer do I bake them? Is it another 20 minutes?
Wholesome Yum M
0Hi Jeff, It shouldn’t need another 20 minutes. The high heat should only be needed to finish off the skin. The easiest way to do this is to use a thermometer and check for doneness before increasing the heat to crisp up the skin.
Editing this to add: If you are making chicken breasts, you may want to just use my juicy baked chicken breast recipe instead. I like that best for those!
Jeff
0I loved this recipe! Can you tell me the time and temperature difference for using this same recipe on chicken breasts?
Wholesome Yum M
0Hi Jeff, Make sure you are getting skin-on chicken breasts, which will give you that terrific crunch to the outer layer. I would bake at 350 for 20 minutes, and then change the heat to 425 or broil to let the skin crisp up.
DD
0I am looking forward to making. Do you butter & season both sides? Thank you for the recipe. Looks so good!
Wholesome Yum M
0Hi DD, Yes. Enjoy!
Line Geerts
0Perfect chicken! Quick and easy and no mess!
Lisa
0I think those would be a big hit at my house!
Earl Sager
0What about baking the chicken the whole leg?
Wholesome Yum M
0Hi Earl, Cooking the whole chicken leg will add quite a bit of cook time, I would estimate around 40 minutes. I suggest doing this with a meat thermometer to make sure the center of your thigh hits the desired temperature of 165 degrees F.
Sr
0My oven started to smoke pretty badly at the 10 min mark. Is there a way to prevent this? The chicken is elevated on a rack with a pan for drippings below
Wholesome Yum M
0Hi Sr, The Chicken may sputter a bit while it cooks. To help cut down on the smoke, remember to thoroughly dry your chicken well before placing it in the oven. It’s the water and fat causes the chicken to spit and smoke. If your chicken was already dried, then you may want to consider using ghee next time in place of the butter. I hope this helps!
Shan
0This smelled so good but then my house started filling up with smoke. How do you cook these at that temperature without smoking?
Wholesome Yum M
0Hi Shan, It sounds like your drumsticks were close to the heating element in your oven. I suggest putting them on the middle rack in your oven to prevent smoke from splattering.
Emily Liao
0This recipe is SO good! I make this often and it’s a family favorite. Also, it makes for great leftovers.
Katie
0Made this for the family and it was a hit!
Jen
0Perfectly crispy and delicious! Thanks for all of your tips to getting this right.
Kacey Perez
0This post seriously answered so many of my questions! Such a good reminder to dry the chicken before anything else! Thanks for sharing all of these tips!
Shannon
0The tips you’ve shared have been super helpful! I always struggled with cooking these. Can’t wait to try them again.