 Shop
Shop My
My Custom


FREE 5-Ingredient Recipe EBook
GET IT NOW- I’m Kind Of Obsessed With This Healthy Baked Chicken Breast Recipe
- Ingredients & Substitutions
- How To Bake Chicken Breast In The Oven
- My Tips For The Juiciest Chicken
- Healthy Baked Chicken Breast (Juicy & Easy) Recipe card
- Seasoning Variations
- Serving Ideas
- More Healthy Chicken Breast Recipes
- Recipe Reviews
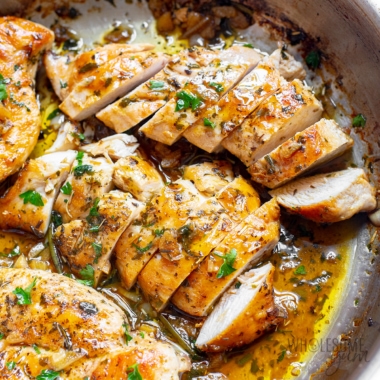
I’m Kind Of Obsessed With This Healthy Baked Chicken Breast Recipe

I said it — I’m kind of obsessed with this healthy baked chicken breast. We eat a lot of chicken in my house, so I get the opportunity to test a lot of oven baked chicken recipes, but I keep coming back to this one. It’s simple, it’s flavorful, it uses ingredients I always have around, and it’s super juicy. Oh, and baking chicken breasts at 450 degrees is super quick, too. Here’s how it checks all the boxes:
- Perfectly cooked, juicy chicken breasts – After hours of research and testing dozens of times, this is the best baked chicken breast recipe I’ve ever made. Even though it’s simple, my method will banish dry chicken from your house forever.
- Just 5 simple ingredients – Plus salt and pepper. That means the prep is super quick, yay!
- Faster bake time – Most healthy chicken breast recipes bake in an oven temperature range from 325 to 400 degrees F, but in my experience the best way to bake chicken breast is very high heat — 450. The shorter cook time gives less time for the moisture to evaporate from the chicken, for a juicier result.
- Healthy protein for anything – I make this often for I-don’t-know-what’s-for-dinner situations, as meal prep for lunch, and even to freeze for later.
The key to juicy baked chicken breasts is all about brining. Don’t worry, it’s super easy to do and takes only 10 minutes.
I use this method on lots of poultry recipes, including my air fryer chicken breast, 6-ingredient spinach stuffed chicken, fancy looking prosciutto wrapped chicken, cheesy asparagus stuffed chicken, and even spatchcock turkey — making them all juicy and extra flavorful.
And yes, it’s my best way to bake chicken breast in the oven, too. Make it with me!


“I made this healthy baked chicken one night this week and we both loved it! The breasts were very tasty and so moist inside. The seasoning was perfect, but next time I think I might try one of the seasoning variations. I served it with a small potato and a Caesar salad. I loved that it was a healthy meal and it didn’t take too long to fix… another hit in our household.”
-Sherry
Ingredients & Substitutions
Here I explain the best ingredients for my healthy baked chicken breasts recipe, what each one does, and substitution options. For measurements, see the recipe card.
- Chicken Breast – I developed this recipe for boneless skinless chicken breasts. Choose ones that are similar in size and thickness, so that they cook at the same rate. (I just pound them with the flat side of a meat mallet if the thickness is not the same.) If your chicken is frozen, you’ll need to thaw it first, but you can do this while brining. To cook other cuts, I’ve got other basic recipes for bone-in chicken breasts, crispy baked chicken thighs, baked chicken legs, and chicken leg quarters.
- Salt Water Brine – This is simply a combination of water and sea salt (or you can use kosher salt). Brining is my secret to juicy baked chicken breast!
TIP: The key to a great chicken brine is the water and salt ratio.
You need 1/4 cup salt per quart (4 cups) of water. Do not skimp on the salt – this is important! Brining is chemistry. The salt solution will travel from the area of high salt concentration (outside the chicken) to low salt concentration (inside the chicken). This means more moisture in the chicken, and the salt also works to break down the chicken proteins, making them more tender.
- Olive Oil – Locks in moisture, adds flavor, and helps the seasonings stick. You can use any heat-safe oil, like avocado oil.
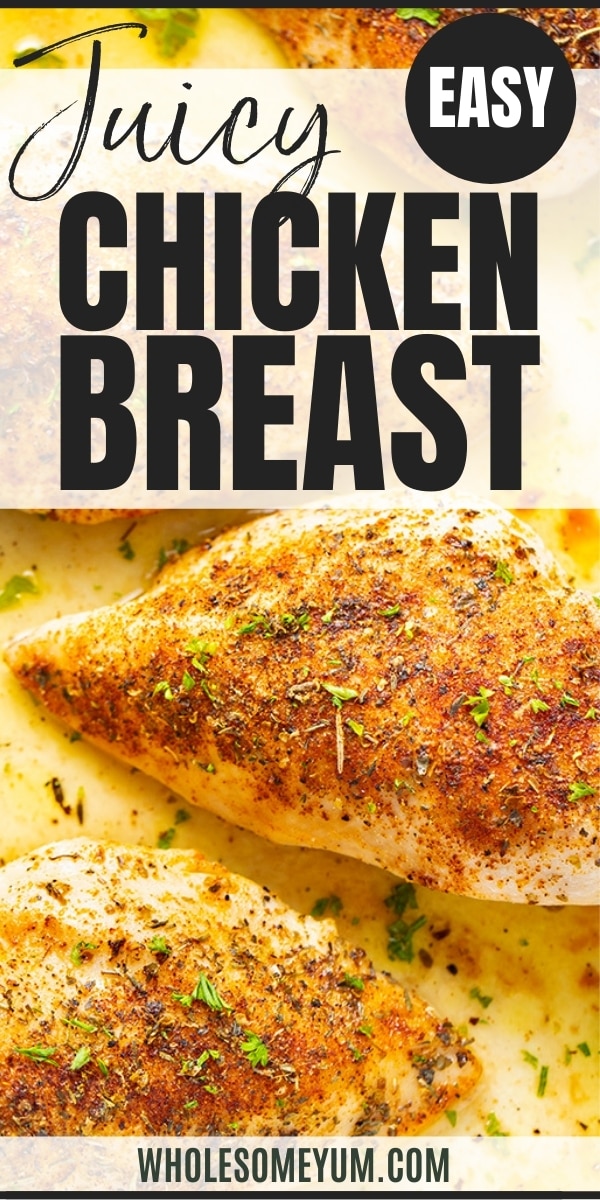
- Spices – My usual combo is Italian seasoning (my go-to dried herb mixture that includes oregano, marjoram, basil, thyme, rosemary, and sage), garlic powder, sea salt, black pepper, and paprika. See my variations below for more seasoning ideas!

How To Bake Chicken Breast In The Oven
I have step-by-step photos here to help you visualize the recipe. For full instructions with amounts and temperatures, see the recipe card.
- Brine. Place chicken breasts in a large bowl with enough water to cover them. Add sea salt and stir to mostly dissolve. Brine at room temperature for 10 minutes, or up to 24 hours in the fridge.
- Brush with oil. While your oven preheats, remove the chicken from brine and pat dry with paper towels. Place it into a baking dish (this is my favorite and I used it here). Brush both sides with olive oil. I used a different brush in the picture below, but now love these silicone brushes because they’re all one piece!
- Season. Sprinkle both sides of chicken with the spices.
- Cook. Bake chicken breasts in the oven until firm and no longer pink, and internal temperature reaches 160-165 degrees F with a meat thermometer. (It needs to reach 165, but see my tips below for why I usually pull it a little earlier.)
- Rest. Cover the cooked chicken with foil and rest for 5 minutes before serving or slicing.


My Tips For The Juiciest Chicken
- Don’t skip the brine. It’s optional for many of my other chicken breast recipes, but for this basic one, I highly recommend it. It’s the absolute best way to guarantee juicy results. Even 10 minutes makes a difference!
- You can brine for up to 24 hours. I often do this the day before, but longer than 24 hours will make the chicken mushy.
- Why pat dry? Even if you don’t brine, drying the chicken helps it stay juicy during baking. In fact, I do this with all my proteins.
- You might need more seasoning than you think, and salt is the most important. My usual rule of thumb for poultry is 1 teaspoon of salt per pound, but with the salt water brine in this chicken breast recipe, I used half of this amount. (For older versions of this recipe, I used the full amount and it was too salty.)
- You can pre-mix the spices if you like. Sometimes I do and sometimes I don’t. The advantage of mixing them in a small bowl first is you don’t have to measure half the amount of each to season each side.
- Don’t crowd the pan. Use a baking dish large enough for pieces to fit without touching, or just barely touching. (This one is my favorite.) If the chicken breasts are too crowded, the cook time will be much longer and the chicken may dry out, plus it’ll cook unevenly. If you don’t have a large enough pan, use multiple pans. You could also use a large baking sheet (line with parchment paper or foil for easier cleanup).
- Use a meat thermometer. I always recommend this, but it’s especially important for baked chicken breast recipes, since this cut is naturally lean and most prone to drying out. I use and love this probe thermometer, which beeps at the right internal temperature and doesn’t require me to keep checking. A regular meat thermometer will work, though. Make sure to insert it into the thickest part of the chicken.
- For the juiciest results, stop baking a few degrees early. The USDA says to cook chicken breast until it reaches 165 degrees F, but the temperature will actually rise a few degrees after you take it out of the oven and let it rest. So, I typically take it out around 162 degrees and let it come to 165 while resting, to ensure an extra juicy chicken breast. Just double check before serving! This is the opposite of what I do for boneless chicken thighs (and other dark meat), which needs to reach at least 170 degrees F to get juicy.
- Resting is important, too. It lets the juices settle into the meat, so that they don’t leak out when you cut into it. If you skip this step, your chicken will taste more dry.
- Slice against the grain. Just like a good sirloin steak or ribeye, I always slice oven baked chicken breast recipes against the grain. This breaks up the muscle fibers, making every bite more tender.
Healthy Baked Chicken Breast (Juicy & Easy)
The BEST way to bake chicken breast, with simple ingredients! My juicy, healthy baked chicken breast recipe is fast, easy, and never dry.
Ingredients
Tap underlined ingredients to see the ones I use.
Brined chicken
Preparation
Instructions
Tap on the times in the instructions to start a kitchen timer.
-
To brine the chicken breasts, place them in a large bowl with enough water to cover them (about 4 cups). Add sea salt and stir to mostly dissolve. Let sit for 10 minutes at room temperature, or for up to 24 hours in the refrigerator.
-
Drain the salt water, rinse the chicken, and pat dry.
-
Preheat the oven to 450 degrees F (232 degrees C).
-
Place the chicken breasts into a baking dish large enough for the pieces to fit without touching, or just barely touching. Brush both sides with olive oil.
-
Sprinkle both sides of the chicken with Italian seasoning, garlic powder, sea salt, paprika, and black pepper.
-
Bake for 18-22 minutes, until firm and no longer pink, and internal temperature reaches 160-165 degrees F (71-74 degrees C). (Internal temperature will rise another 5 degrees when resting.) A probe thermometer like this is the best set-it-and-forget-it method because it will beep when ready, but an instant-read thermometer also works.
-
Cover with foil and rest for 5 minutes before serving or slicing.
LAST STEP: Leave a rating to help other readers, or tag me @wholesomeyum on Instagram. I’d love to hear from you!
Maya’s Recipe Notes
Serving size: 1 chicken breast
- Tips: Check out my recipe tips above to help you get tender, juicy baked chicken breast every time, as well as a couple shortcuts.
- Variations: See my seasoning variations to make other flavors to go with different dishes.
- Store: Cool completely and place into an airtight container in the fridge. Leftovers will last up to 3-4 days.
- Meal prep: I love baked boneless chicken breast is very versatile for meal prep! You can make it ahead as your protein for lunch, or re-purpose it in casseroles (it’s perfect for my chicken bacon ranch casserole!), serve over salads, or add to soups.
- Reheat: To avoid drying out the chicken, I like to reheat it in a baking dish with a little broth at the bottom, covered loosely with foil. I recommend 15-20 minutes at 250 degrees F. The microwave will make it dry, but works in a pinch.
- Freeze: You can freeze baked chicken breast in a zip lock bag for up to 4 months. It’ll be less juicy, so I mainly do this to use in other recipes rather than to eat by itself.
📖 Want more recipes like this? Find this one and many more in my 30 Dinners In 30 Minutes and Healthy Ebook Bundle!
I provide nutrition facts as a courtesy. Have questions about calculations or why you got a different result? Please see my nutrition policy.
Add Your Notes Your Notes
Try More Of My Recipes


© Copyright Maya Krampf for Wholesome Yum. Please DO NOT SCREENSHOT OR COPY/PASTE recipes to social media or websites. We’d LOVE for you to share a link with photo instead.
Baked Chicken Breast
Seasoning Variations
I use this baked chicken breast recipe as my base for all kinds of flavors, depending on what I’m serving it with. The combo above is what I make most often because it goes with everything, but these are great for more punch:
- Add heat – If you want to keep my original spice mixture but like a kick, add 1/4 teaspoon of cayenne pepper or red pepper flakes, or 1 teaspoon of chili powder.
- Mexican – Swap all the spices with 1-2 tablespoons of taco seasoning or fajita seasoning. These are my faves when I’m making this healthy baked chicken breast to go with other Mexican recipes.
- Poultry flavor – For a comfort food vibe, use 2 teaspoons of my poultry seasoning instead of the Italian seasoning.
- Cajun – My husband’s favorite! Use Cajun seasoning in place of the spices (same amount as the Mexican version above).
- BBQ – After brining, brush the chicken with your favorite barbecue sauce (I use this sugar free BBQ sauce). Bake, and baste with more sauce halfway through. If you want it even more caramelized, finish under the broiler for 5 minutes.
- Teriyaki – Use my instructions for BBQ sauce above, with teriyaki sauce instead.
- Lemon pepper – Like my lemon pepper wings, you can simply substitute all the spices in this baked chicken breast recipe with 1 tablespoon of lemon pepper seasoning. Or just make my lemon garlic chicken.
- Ranch – Use ranch seasoning instead of the Italian seasoning, or just follow my ranch chicken recipe.

Serving Ideas
Just about everything goes with my healthy baked chicken breast recipe! You can browse my healthy side dishes and salads, but here are some of my favorites:
- Veggies – Whip up my easy sauteed broccoli, air fryer carrots, or sauteed asparagus while you’re baking chicken breast in the oven. You can also roast zucchini or roast eggplant on the same pan — even though I usually bake those at 400, they do okay at 450 if I cut them a little thicker.
- Salad – Juicy baked chicken breast is my go-to for Cobb salad and chicken Caesar salad, but you can fan it over arugula salad or kale salad, too. I also love loaded cauliflower salad or creamy cucumber salad on the side.
- Starches – When I want something more hearty, I bake potatoes in the Instant Pot, roast potatoes in the air fryer, or make rice for my kids. My husband and I like lighter mashed cauliflower, zucchini noodles, or baked spaghetti squash.
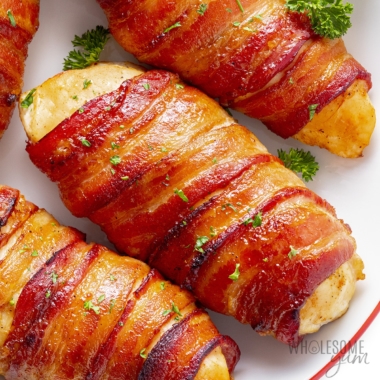
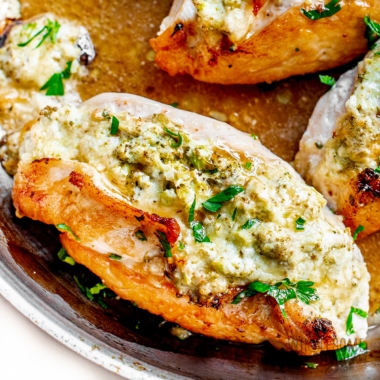
More Healthy Chicken Breast Recipes
Healthy chicken breast doesn’t have to be boring! If you want something a little less basic, try one of my other baked chicken breast recipes that take them up a notch:


179 Comments
monika
0IS THIS FOR RAW OR COOKED CHICKEN?
As an estimate, 4 ounces of boneless skinless chicken breast has:
110 calories
3g fat
24g protein
0g carbohydrates
Wholesome Yum M
0Hi Monika, These nutrition contents are for cooked, unseasoned chicken breast. The nutrition facts for the written recipe are located under the actual recipe in the card.
Carol Thomas
0I admit I was skeptical! 18 minutes at 450? But the chicken was wonderful, just as described! I put the chicken in the brine about midday and I used Greek seasoning when baking. Perfectly cooked, juicy, and my husband loved it! The only problem was getting the rest of the meal done in 18 minutes. Haha!
Eleanor
0Do you advise the same cooking temp for convection?
Wholesome Yum M
0Hi Eleanor, Decrease the temperature to 425 degrees F and start checking for doneness around the 15-minute mark.
Tabbie
0I must admit, I was skeptical.
But now I’m a believer!!!
18 minutes at 450° = moist/ juicy & PERFECT!!!
Thank you!!!
LW
0Please explain how to brine the chicken. How much salt in the water? For how long? Do you leave it in the fridge? Do you dry them or rinse off the brine afterwards? How long after soaking them do they have to be cooked?
Wholesome Yum
0Hi LW, the recipe card above explains the brining process. You’ll want to cook the chicken right away after patting it dry.
Ally
0Should the breasts be boneless? Thanks, Ally in NJ
Maya | Wholesome Yum
0Hi Ally, Yes, they are!
Chantalle
0How much see salt to brine it?
Wholesome Yum L
0Hi Chantalle, 2 tablespoons.
Devon
0Chicken has always been hit or miss for me. I usually overcook it. This recipe has changed all of that. Thank you for the tips and the recipe.
Anjana
0Hi,
Cooked exactly as you said.. 18 mins 230 c.. soft succulent breast I have ever had. I was randomly browsing for some keto chicken breast recipe and stumbled on your website. Totally worth the effort and time.
Anjana
Jaime
0Hi. These definitely take longer to cook. I’m cooking only 3 large chicken breasts spread out on the pan and so far I’m at 22 minutes and they’re not done. Just a head’s up bc I don’t like having to cut them to see if they’re done and then returning them to the oven. (I tend to not trust meat thermometers). I just took them out at 24 and am letting them rest so I hope they’re done! Ty.
Mike
0Do I line the baking sheet with parchment paper and grease the paper or the pan?
Maya | Wholesome Yum
0Hi Mike, Grease the paper on the top where you’ll be placing the chicken. It’s fairly optional though with parchment paper, more important if using foil.
Judy
0Hi –
I bought a package of nice – very large (and thick) chicken breasts and followed your wonderful recipe. I did set my oven on 450 degrees prior to baking. I put them in the oven and timed them for 15 minutes once the oven was at 450 degrees. I checked and they were not done. I put them back in for another 5 min (20 total now) and using a meat thermometer I checked for doneness. They only reached 140 degrees internal temperature.
I ended up baking them (testing along the way) for a total of 35 min at 450 degrees. At that point, the internal temperature was 165 and the chicken was done.
It was moist and so delicious. The seasonings were perfect! I have made it twice now – buying the same size chicken breasts and 35 min is great. Now I can make it by eyeballing the ingredients. Oh – I use Coconut oil (which is soft at room temp) I just brush it on with a silicone brush. That adds a real nice flavor as well!
I have a great gas oven – maybe that makes a difference? I know they go on and off during the baking to keep the temperature stable. I am so happy not to have to bake things for an hour at dinner time here because it gets hot in my Florida kitchen in Sept/Oct when it’s still 85 -95 degrees outside!
Maya | Wholesome Yum
0Hi Judy, I’m glad you liked the chicken! The time can vary based on the size of the chicken breasts, so very large ones can take a little longer. But, most likely the reason it took so much longer could be if the chicken was crowding the pan. The chicken should not be touching, otherwise it takes a lot longer to cook. Either way, I’m glad you found a way that works!
Bethany
0Do you cover the chicken while roasting in the oven?
Maya | Wholesome Yum
0Hi Bethany, No, no need to cover it.
Tammie Kreger
0This had to be the most easiest tastiest chicken I’ve ever made, thank you so much for your wonderful quick recipes for a huge working family of 7, and you can believe it when I say it was good-ood
Maya | Wholesome Yum
0I am so happy you and your family liked it, Tammie! Have a great day!
Judy
0What makes the carb count equal to 2 carbs. Looking at the recipe, I don’t see any carbs.
Would love to know as I really need to stay on top of the carbs to lose the weight I wish to lose. (I don’t want to lose ground on my diet as I’ve already lost 50 lbs.)
I have not tried to recipe yet but will be today.
Judy
Wholesome Yum
0Hi Judy, the carbs here come from the garlic powder and Italian seasoning.
Russ Holstein
0I followed your guidance…using some #lchf brine….and 24 minutes on 450 for some heavy, thick breasts (5) and it’s awesome.
Thanks Maya!
Maya | Wholesome Yum
0I am so happy you liked the chicken recipe, Russ! Please come back again soon!
Gary
0Thank you for this recipe and the brined chicken thighs too! I bought some chicken breasts and thighs (both are bone-in / skin on) so would like to brine both and cook altogether. What cooking temp would you recommend for bone-in thighs and breasts to be cooked together? Love the idea of ghee, smoked paprika, garlic salt and pepper! Thanks so much!!
Gary
Maya | Wholesome Yum
0Hi Gary, You can cook them together and I recommend the process like this. However, the breasts would be cooked before the thighs so you’d need to take them out sooner.
Linda
0After brining the chicken, what’s the sodium content of the cooked chicken?
Wholesome Yum M
0Hi Linda, The chicken will absorb a small amount of salt, but it’s not much. I am not sure how this will affect the overall sodium content. If you are on a low sodium diet, then you may wish to research this technique further before attempting.
Vic
0I’ll start off with I don’t cook. I thought I’d buy some chicken breast, cook them up and freeze for future use – salads. I brined 5 breast overnight, I followed instructions and I’ve been cooking them for 45 minutes at 450 degrees. I must say, this is NOT cooking quickly as described. I keep setting my timer for 15 minutes. I just checked and they are still in a pool of fluid and white. One of them is getting a little brown on an edge. I just put them back in for another 15 minutes. Not complaining -just think you need to modify the time it takes to cook these.
Maya | Wholesome Yum
0Hi Vic, After 45 minutes at 450 degrees, the chicken would be very overcooked. They are supposed to be white when cooked, were you expecting some other color? If they didn’t cook through, the only possible reasons could be if you stacked them (they should be in a single layer) or an issue with your oven. I’ve made these about 100 times by now so am confident about this. 🙂